


Intro
Using the Mixed Reality Toolkit, it's so easy to make an object selectable. You just add a behavior to your object that implements IInputClickHandler, fill in some code in the OnInputClicked method, and you are done. Consider for instance this rather naïve implementation of a behavior that toggles the color from the original to red and back when clicked:
using HoloToolkit.Unity.InputModule;
using UnityEngine;
public class ColorToggler : MonoBehaviour, IInputClickHandler
{
[SerializeField]
private Color _toggleColor = Color.red;
private Color _originalColor;
private Material _material;
void Start ()
{
_material = GetComponent<Renderer>().material;
_originalColor = _material.color;
}
public void OnInputClicked(InputClickedEventData eventData)
{
_material.color = _material.color == _originalColor ? _toggleColor : _originalColor;
}
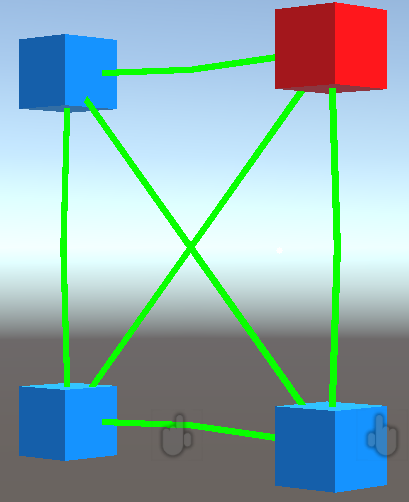
}If you add this behavior on for instance a simple Cube, the color will flick from whatever the original color was (in my case blue) to red and back when you tap it. But add this behavior to a line and and attempt to tap it - and nothing will happen.
So what's a line, then?
In Unity, a Line is basically an empty game object containing a LineRender component. You can access the LineRender using the standard GetComponent, then using it's SetPosition method to actually set the points. You can see how it's done in the demo project, in which I created a class LineController to make drawing the line a bit easier:
public class LineController : MonoBehaviour
{
    public void SetPoints(Vector3[] points)
    {
        var lineRenderer = GetComponent<LineRenderer>();
        lineRenderer.positionCount = points.Length;
        for (var i = 0; i < points.Length; i++)
        {
            lineRenderer.SetPosition(i, points[i]);
        }
        //Stuff omitted
    }
}
This is embedded in a prefab "Line". Here you might see the root cause of the problem. The difference between a line and, for instance a cube is simple: there is no mesh, but more importantly - there is no collider. Compare this with the cube next to it:


So... how do we add a collider, then?
That is not very hard. Find the prefab "Line", and add a "Line Collider Drawer" component. This is sitting in "HoloToolkitExtensions/Utilities/Scripts. 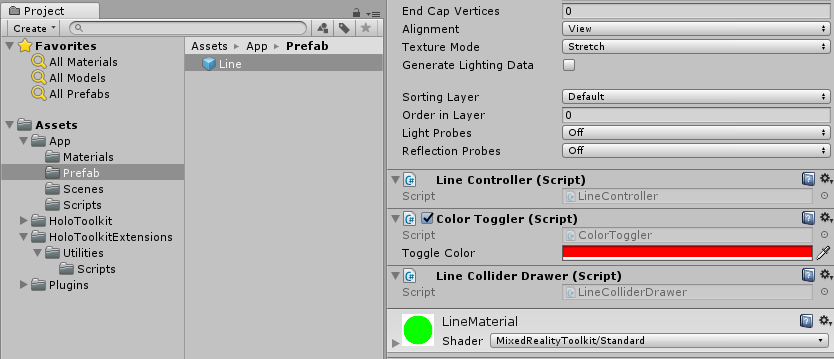
Once you have done that, try to click the line again
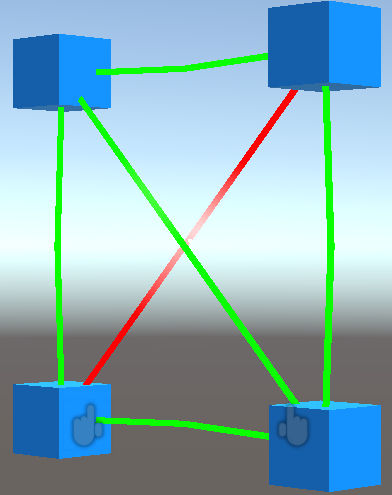
And hey presto - the line is not only selectable, but even the MRKT Standard Shader Hover Light option, that I selected in creating the line material, actually works.
And in code, it works like this
First of all, in the LineController, I wrote "//Stuff omitted". That stuff actually calls the LineColliderDrawer (or at least, it tries to):
public class LineController : MonoBehaviour
{
    public void SetPoints(Vector3[] points)
    {
        var lineRenderer = GetComponent<LineRenderer>();
        lineRenderer.positionCount = points.Length;
        for (var i = 0; i < points.Length; i++)
        {
            lineRenderer.SetPosition(i, points[i]);
        }

        var colliderDrawer = GetComponent<LineColliderDrawer>();
        if (colliderDrawer != null)
        {
            colliderDrawer.AddColliderToLine(lineRenderer);
        }
    }
}
The main part of LineColliderDrawer is this method:
private  void AddColliderToLine( LineRenderer lineRenderer,
    Vector3 startPoint, Vector3 endPoint)
{
    var lineCollider = new GameObject(LineColliderName).AddComponent<CapsuleCollider>();
    lineCollider.transform.parent = lineRenderer.transform;
    lineCollider.radius = lineRenderer.endWidth;
    var midPoint = (startPoint + endPoint) / 2f;
    lineCollider.transform.position = midPoint;

    lineCollider.transform.LookAt(endPoint);
    var rotationEulerAngles = lineCollider.transform.rotation.eulerAngles;
    lineCollider.transform.rotation =
        Quaternion.Euler(rotationEulerAngles.x + 90f,
        rotationEulerAngles.y, rotationEulerAngles.z);

    lineCollider.height = Vector3.Distance(startPoint, endPoint);
}
This is partially inspired by this post in the Unity forums, and partially by this one. Although I think they are both not entirely correct, it certainly put me on the right track.
Basically it creates an empty game object, and add a capsule collider to that. The collider is set to the end with of the line, which is assumed to be of constant width. It's midpoint is set exactly halfway the line (segment) and then rotated to look at the end point. Oddly enough, it's then at 90 degrees with the actual line segment, so the collider is rotated 90 degrees over it's X axis. Finally, it is stretched to cover the whole line segment.
The rest of the class is basically a support act:
public class LineColliderDrawer : MonoBehaviour
{
    private const string LineColliderName = "LineCollider";

    public void AddColliderToLine(LineRenderer lineRenderer)
    {
        RemoveExistingColliders(lineRenderer);

        for (var p = 0; p < lineRenderer.positionCount; p++)
        {
            if (p < lineRenderer.positionCount - 1)
            {
                AddColliderToLine(lineRenderer,
                    lineRenderer.GetPosition(p),
                    lineRenderer.GetPosition(p + 1));
            }
        }
    }

    private void RemoveExistingColliders(LineRenderer lineRenderer)
    {
        for (var i = lineRenderer.gameObject.transform.childCount - 1; i >= 0; i--)
        {
            var child = lineRenderer.gameObject.transform.GetChild(i);
            if (child.name == LineColliderName)
            {
                Destroy(child.gameObject);
            }
        }
    }
  }
This basically first removes any existing colliders, then adds colliders to the line for every segment - basically a line of n points gets n-1 colliders.
Concluding words
And that's basically it. Now lines can be selected as well. Thanks to both Unity forum posters who gave me two half-way parts that allowed me to combine this into one working solution.
No comments:
Post a Comment