This blog attempts to be a collection of how-to examples in the Microsoft software stack - things that may take forever to find out, especially for the beginner. I see it as my way to return something to the Microsoft community in exchange for what I learned from it.
If you are developing an app using the Mixed Reality Toolkit 2 that requires interaction with a Spatial Mesh, the development process can become cumbersome: add code or assets with Unity and Visual Studio, create IL2CPP solution, wait, compile and deploy, wait, check behavior - rinse and repeat. You quickly learn to do as much as possible inside the Unity editor and/or use Holographic Remoting if you want stay productive and make your deadline. But a Spatial Mesh inside the Unity Editor does not exist.
... or does it? ;)
Begun the Clone Wars have again
You guessed it - before we can see anything at all, a lot of cloning and configuring of profiles needs to be happening first.
Clone the Toolkit Configuration Profile itself. I used DefaultHoloLens2CameraProfile this time.
Turn off the diagnostics (as ever).
Enable Spatial Awareness System
Clone the MixedRealityAwareness profile
Clone the MixedRealityAwarenessMeshObserver profile (the names of these things become more tongue-breaking the deeper you go)
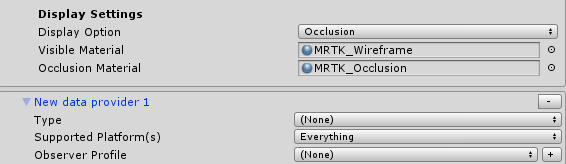
Change the Display option (all the way down) to "Occlusion"
And now the interesting part
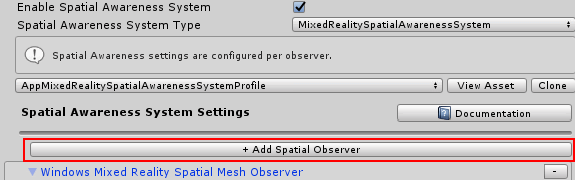
On top of the Spatial Awareness System Settings there's this giant button over the whole length of the UI which is labeled "+ Add Spatial Observer".
If you click that one, it will add a "New data provider 1" at the bottom, below the Display settings we just changed the previous step.
Select "SpatialObjectMeshObserver" for type
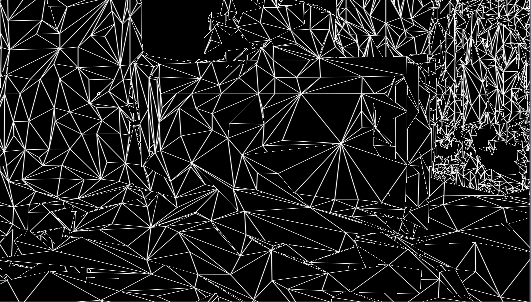
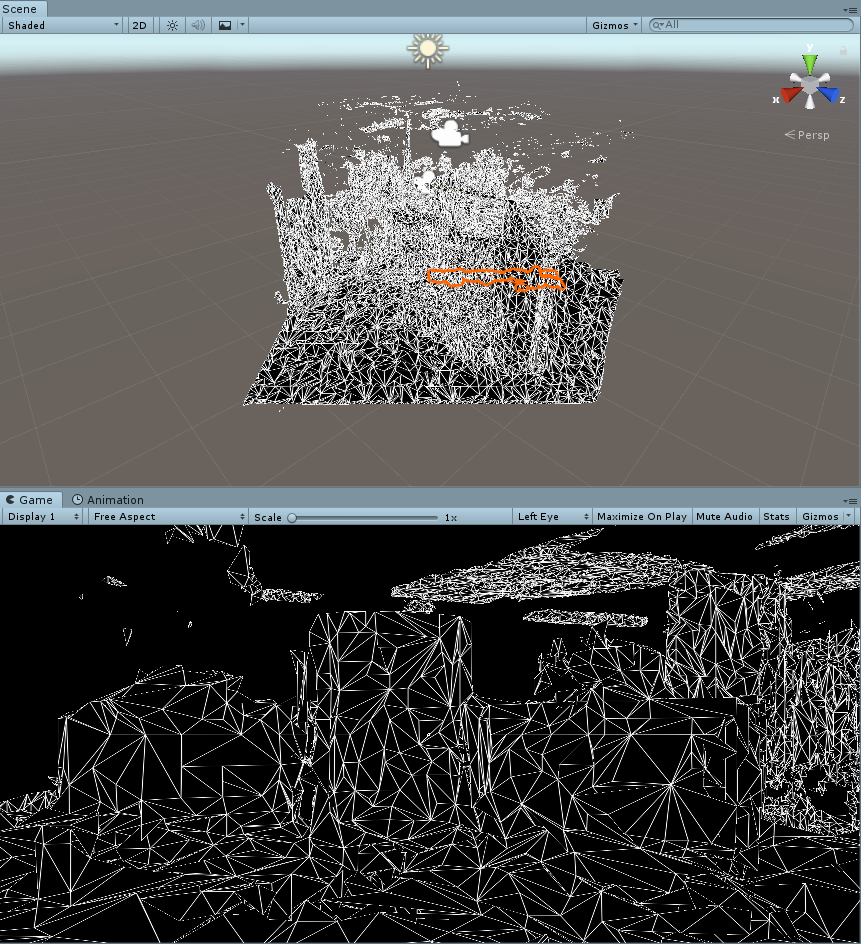
And if you hit the play button, lo and behold:
Basically you are now already where you want to be, but although the wireframe material works very well inside a HoloLens, it does not work very well in an editor. At least, that is my opinion.
Making the mesh more usable inside the editor
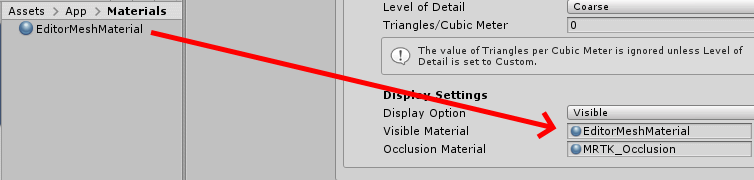
You might have noticed the SpatialObjectMeshObserver comes with a with a profile "DefaultObjectMeshObserverProfile" - I'd almost say of course it does. Anyway, clone that one as well. Then we create a simple material:
Of course using the Mixed Reality Toolkit Standard shader. I only change the color to RGB 115,115,115 which is a kind of battleship grey. You make take any color you fancy, as far as I am concerned. Set that material to the "Visible Material" of the Spatial Mesh Object Observer you just added (not in the material of the "Windows Mixed Reality Spatial Mesh Observer"!)
The result, if you run play mode again, is definitely better IMHO:
Using a mesh of a custom environment
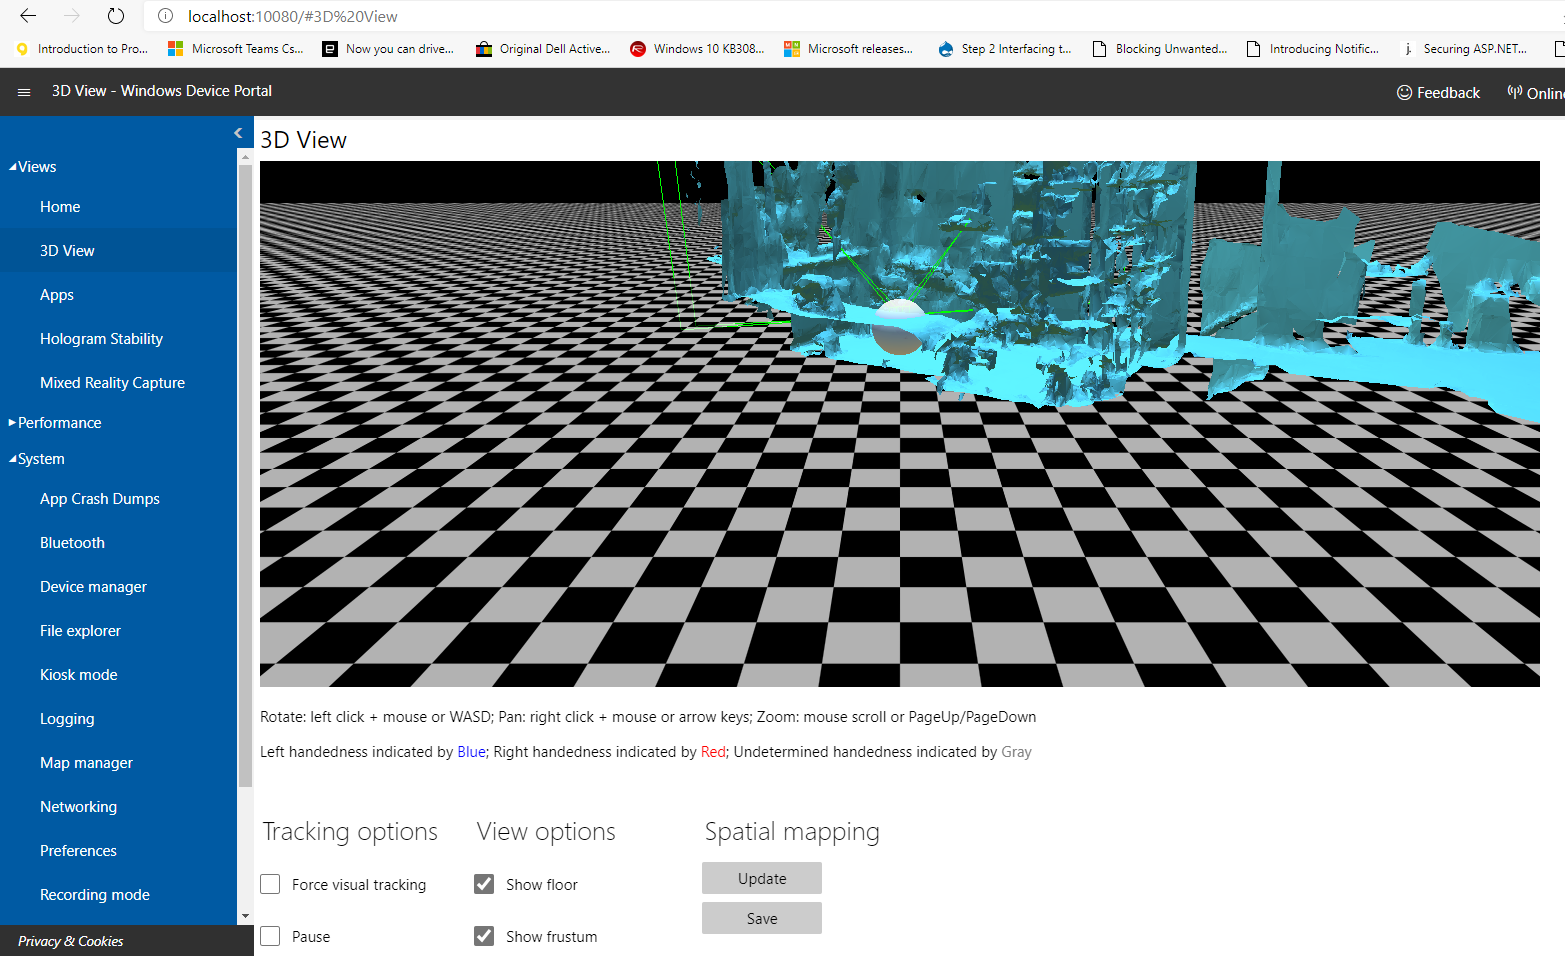
So it's nice to be able to use some sample mesh, but what if you need to the mesh of a real space? No worries, because just like in HoloLens1, the device portal allows you to download a scan of the current (real) space the HoloLens sees:
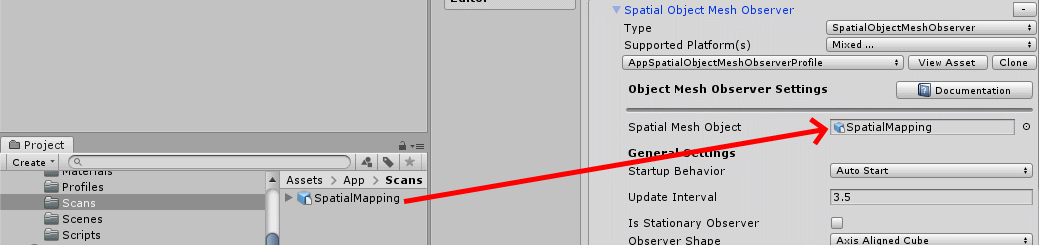
You can download this space by hitting the save button. This will download a SpatialMapping.obj file. Bring this into your Unity project, then drag it on top of the Spatial Mesh Object observer's "Spatial Mesh Object" property:
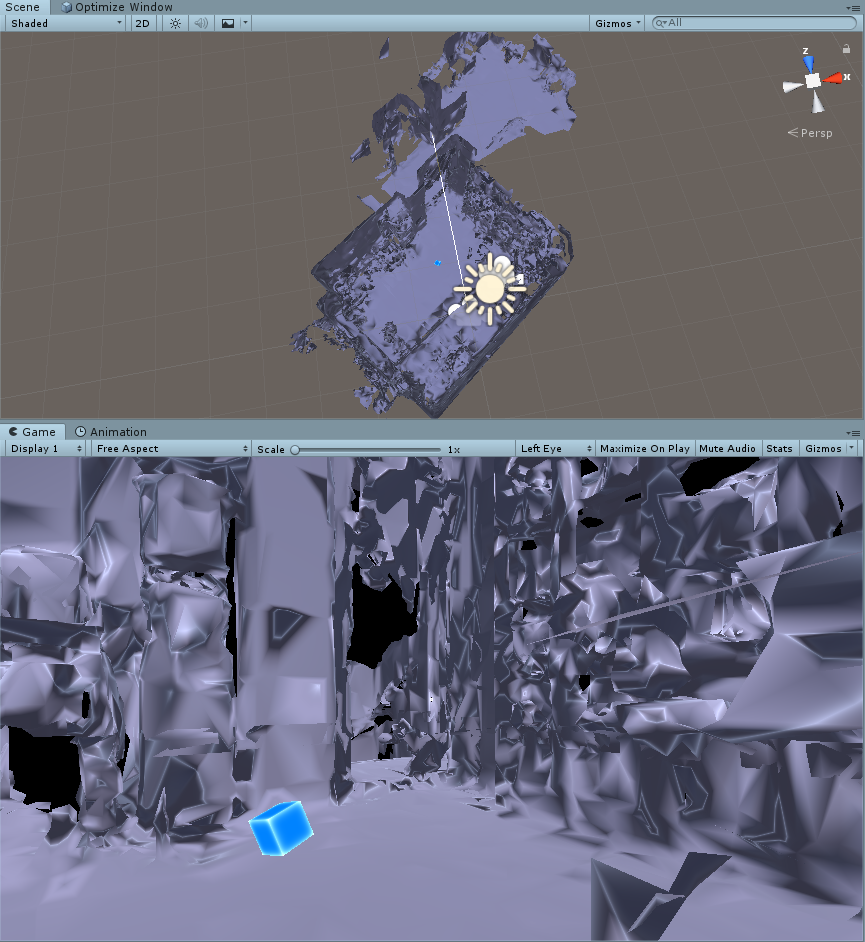
And then, when you hit play mode, you will see the study where I have been hiding in during these worrying times. It has been my domain for working for the past 2.5 months for working and blogging, as well as following BUILD and the Mixed Reality Dev Days. If you download the demo project, it will also include a cube that moves forward, to show objects actually bounce off the fake spatial mesh, just like a real spatial mesh.
Note: if you compile and deploy this project to a HoloLens (either 1 or 2) you won't see this 'fake mesh' at all. It only appears in the editor. Which is exactly what we want. It's for development purposes only.
Conclusion
Using this little technique you can develop for interacting with the Spatial Mesh while staying inside the Unity editor. You will need less access to a physical HoloLens 2 device, but more importantly speed up development this way. The demo project is, al always, on GitHub
As I announced in this tweet that you might remember from February the HoloLens 2 version of my app Walk the World sports two hand palm menus - a primary menu, often used command menu that is attached to your left hand that you operate with your right hand, and a secondary less-used settings menu that is attached to your right hand - and that you operate with your left. Lorenzo Barbieri of Microsoft Italy, a.k.a. 'Evil Scientist' ;) did the brilliant suggestion I should accommodate left-handed usage as well. And so I did - I added a button to the settings menu that actually swaps the 'handedness' of the menus. This means: if you select 'left handed operation' the main menu is operated by your left hand, and the secondary settings menu by your right.
A little video makes this perhaps more clear:
This blog explains how I made this work. I basically extracted the minimal code from my app and made it into a mini app that doesn't do more than make the menu swappable - both by pressing a toggle button and by a speech command. I will discuss the main points, but not everything in detail - but as always you can download a full sample project and see how it's working in the context of a complete running app.
This sample uses a few classes of my MRTKExtensions library of useful scripts.
Configuring the Toolkit
I won't cover this in much detail, but the following items need to be cloned and partially adapted:
The Toolkit Configuration Profile itself (I usually start with DefaultMixedRealityToolkitConfigurationProfile). Turn off the diagnostics (as ever)
The Input System Profile
The SpeechCommandsProfile
The RegisteredServiceProviderProfile
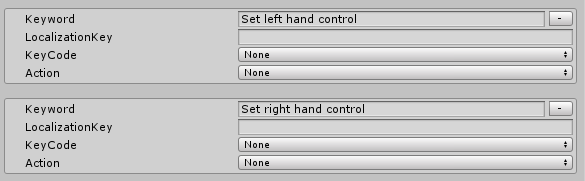
Regarding the SpeechCommandsProfile: add two speech commands:
Set left hand control
Set right hand control
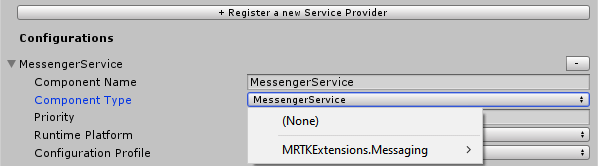
In the RegisteredServiceProviderProfile, register the Messenger Service that is in MRKTExtension.Messaging. If you have been following this blog, you will be familiar with this beast. I introduced this service as a Singleton behavior back in 2017 and converted it to a service when the MRTK2 arrived.
Menu structure
I already explained how to make a hand menu last November, and in my previous blog post I explained how you should arrange objects that should be laid out in a grid (like buttons). The important things to remember are:
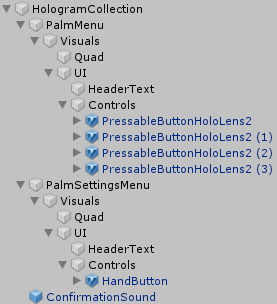
All objects that are part of a hand menu should be in a child object of the main menu object. In the sample project, this child object is called "Visuals" inside each menu.
All objects that should be easily arrangeable in a grid, should be in a separate child object within the UI itself. I always all this child object "UI", and this is where you put a GridObjectCollection behaviour on.
Consistent naming makes a structure all the more recognizable I feel.
Menu configuration
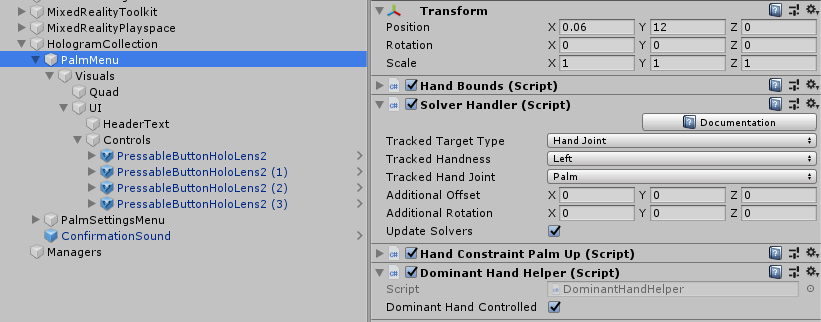
The main palm menu has, of course, a Solver Handler and a Hand Constraint Palm Up behaviour. The tracked hand is set to the left.
The tricky thing is always to remember - the main menu is going to be operated by the dominant hand. For most people the dominant hand is right - so the hand to be tracked for the dominant menu is the left hand, because that leaves the right hand free to actually operate controls on that menu. For left hand control the main menu has to be set to track the right hand. This keeps confusing me every time.
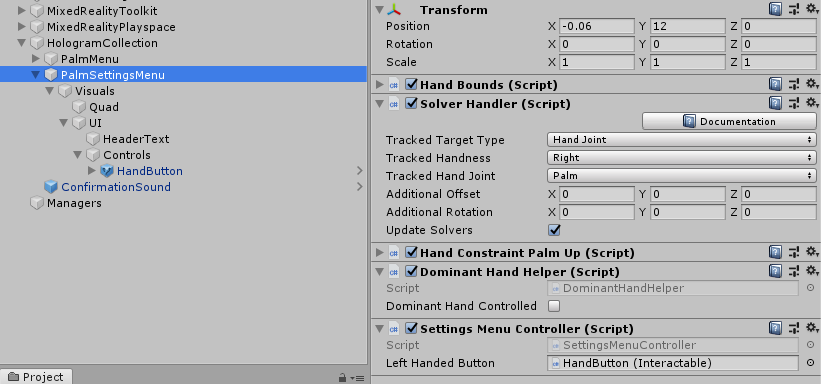
On the palm. It won't surprise you to see the Settings menu look like this:
With the Solver's TrackedHandedness set to Right. But here you also see the star of this little show: the DominantHandController, with the DominantHandController set to off - since I always have the settings menu operated by the non dominant hand, whatever that might be.
DominantHandController
This is actually a very simple script, that responds to messages sent from either a button or from speech commands:
SetSolverHandedness determines what the handedness of the solver should be set to - depending on whether this menu is set to be controlled by the dominant hand or not, and whether or not left handed control is wanted. That's an XOR yes, you don't see that very often. But write out a truth table for those two parameters and that's where you will end up with. This little bit of code is what actually does the swapping of the menus from right to left and vice versa.
It also returns a value to see if the value has actually changed. This is because if the command is started from a speech command we want, like any good Mixed Reality developer, give some kind of audible cue the command has been understood and processed. After all, we can say a speech command any time we want, and if the user does not have a palm up, he or she won't see hand menu flipping from one hand to the other. So only if the command comes from a speech command, and actual change has occurred, we need to give some kind of audible confirmation. I also added this confirmation only to be given by the dominant hand controller - otherwise we get a double confirmation sound. After all, there are two of these behaviours active - one for each menu.
Supporting act: SettingsMenuController
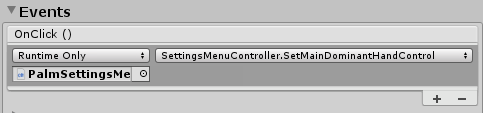
Of course, something still needs to respond to the Toggle Button being pressed. This is done by the this little behaviour:
The SetMainDominantHandControl is called from the OnClick event in the Interactable behaviour on the toggle button:
and then simply fires off the message based upon the toggle status of the button. Note that there's a slight delay, this has two reasons:
Make sure the sound the button plays actually has time to play
Make sure the button's IsToggled is actually set to the right value before we fire off the message.
Yeah, I know, it's dicey but that's how it apparently needs to work. Also note this little script not only fires off HandControlMessage but also listens to it. After all, if someone changes the handedness by speech commands, we want to see the button's toggle status reflect the actual status change.
Some bits and pieces
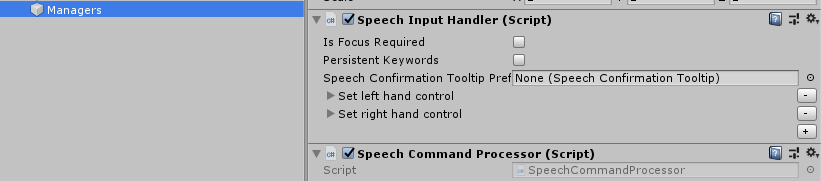
The final piece of code - that I only mention for the sake of completeness - is SpeechCommandProcessor :
It sits together with a SpeechInputHandler in Managers:
Just don't forget to turn off the "Is Focus Required" checkbox as these are global speech commands. Itned to forget this, and that makes for an amusing few minutes of shouting to your HoloLens without it having any effect, before the penny drops.
Conclusion
You might have noticed I don't let the menu's appear on your hand anymore but next to your hand. This comes from the design guidelines on hand menu's on the official MRKT2 documentation, and although I can have a pretty strong opinion about things, I do tend to take some advice occasionally ;) - especially when it's about usability and ergonomics. Which is exactly why I made this left-to-right swappability in the first place. I hope this little blog post will give people some tools to add a little bit to inclusivity for HoloLens 2 applications.
This is simple, short but I have to blog it because I discovered this, forgot about it, then discovered it again. So if anything this blog is for informing you as well al to make sure I keep remembering this myself.
If you have done any UI design for Mixed Reality or HoloLens, you have been in this situation. The initial customer requirement ask for a simple 4 button menu. So you make a neat menu in a 2x2 grid, and are very satisfied with yourself. The next day suddenly you find out you need two more buttons. So - do you make a 2x3 or a 3x2 menu? You decide on the latter, painstakingly arrange them in a nice grid again.
The day after that, there's 2 more buttons. The day after that, 3 more. And the next day... you discover GridObjectCollection. Or in my case, rediscover it.
Simple automatic spacing
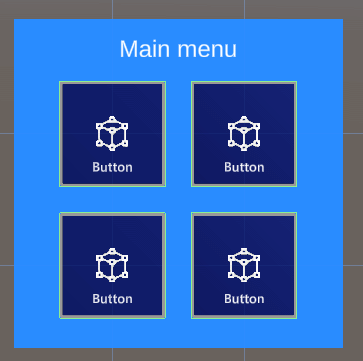
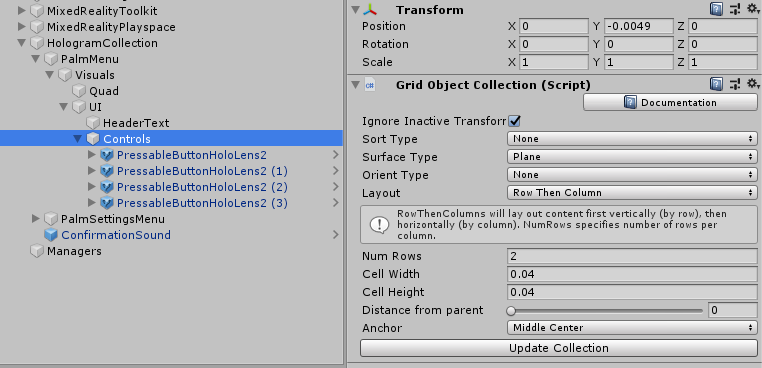
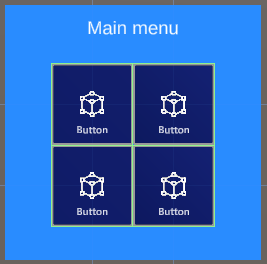
So here is our simple 2x2 menu in the hierarchy. This is a hand menu. It has has a more complex structure than you would imagine, but this is because I am lazy and want an easily adaptable menu that can be organized by GribObjectCollection
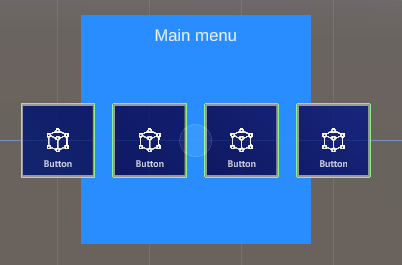
The point is, everything that needs to be easily organizable by GridObjectCollection, needs to be a child of the object that has the actual GridObjectCollection behaviour attached. In my case that's the empty gameobject "Controls". Now Suppose I want this menu not to be 2x2 but 1 x 4. I simply need to change "Num Rows" into 1, press the "Update Collection" button and presto:
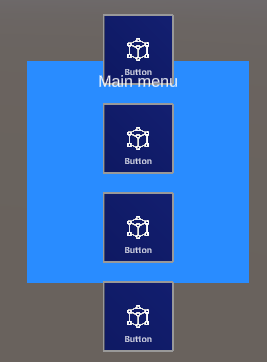
Of course, you will need to update the background plate and move the header text, but that's a lot less work than changing the layout of these buttons. Another example: change the default setting for "Layout" from "Row Then Column" to "Colum then Row", set "Num Rows" to 1 again (for it will flip to 4 when you change the Layout dropdown) and press "Update Collection" again:
You can also change how the button spacing by changing Cell Height and Cell Width. For instance, if I have a 4x4 grid and a cell distance width of 0.032 they are perfectly aligned together without any space in between (not recommended for real live scenario's where you are supposed to press these buttons - a mistake is easily made this way)
You can also do fun things like having then sorted out by name, child order, and both reversed. Or have them spaced out on not only a flat surface, but on a Cylinder, Sphere or a Radial area.
Note: the UpdateCollection can also be accessed by code, so you can actually use this script runtime as well. I mainly use it for static layouts.
Conclusion
Don't waste time in manual spacing, use this very handy tool in the editor to make a nice an evenly spaced button menu - or for whatever you need to have laid out.
Note:
Make it yourself easy by putting any parts of an UI that should be in a grid in a separate empty game object and put the GridObjectCollection control on that, and place the other parts outside that, so they won't interfere with the layout process.
You can use this behaviour with any type of game object, not only buttons of course
More details about GridObjectCollection can be found on the documentation page on GitHub. This also handles related behaviours like ScatterObjectCollection and TileObjectCollection.
No code so no project, although in the next blog post this technique will be applied 'in real life', so to speak.


 If you are developing an app using the Mixed Reality Toolkit 2 that requires interaction with a Spatial Mesh, the development process can become cumbersome: add code or assets with Unity and Visual Studio, create IL2CPP solution, wait, compile and deploy, wait, check behavior - rinse and repeat. You quickly learn to do as much as possible inside the Unity editor and/or use Holographic Remoting if you want stay productive and make your deadline. But a Spatial Mesh inside the Unity Editor does not exist.


 Menu structure