Showing posts with label Bluetooth. Show all posts

04 December 2013

Building for both: a tap+send/Bluetooth connection helper for Windows Phone 8 AND Windows 8.1

On my way to the November 2013 MVP Summit, at Matthijs Hoekstra’s house in Sammamish, and back again in the Netherlands I spent considerable time trying to get my tap+send and Bluetooth connection helper to not only work on Windows 8.1 as well, but also to make it provide cross-platform communication between Windows Phone 8 and Windows 8.1. Unfortunately the MSDN PixPresenter sample suggest you can connect between Windows Phone and Windows 8 by sharing app ids in the PeerFinder.AlternateIdentities property, and so does the MSDN documentation on said property. That way, my friends, lay only mud pies and frustration. I don’t doubt that it will work for tap+send, but as the majority of the current Windows 8.x devices (including Microsoft’s own excellent Surface devices) do not include NFC capabilities, the chances of making a successful connection between a Windows Phone and a random Windows 8 computer using tap+send are very small.

I seem to have a thing with Italians these days – I had a lot of fun with a bunch of them at the Summit, and it was not until this Italian developer called Andrea Boschin pointed me to a recent blog post by him that I found a way out of this. Using this knowledge I adapted DevicePairConnectionHelper once again, so now it’s not only cross platform, but it can also connect between Windows Phone 8 and Windows 8.1. If you are completely new to this subject, I suggest you read the previous two articles about this subject as well.

What it can do

In the demo solution, that sports both a Windows 8.1 Store application and a Windows Phone 8 application, you will find a shared file DevicePairConnectionHelper2.cs containing the updated DevicePairConnectionHelper – now supporting  the following communication paths:

  • Windows Phone 8 to Windows Phone 8 – tap+send
  • Windows Phone 8 to Windows Phone 8 – Bluetooth browsing
  • Windows 8.1 to Windows 8.1 – WifiDirect browsing
  • Windows 8.1 to Windows Phone 8 – Bluetooth.

In theory it should support Windows 8.1 to Windows 8.1 over tap+send as well, but lacking even a single NFC enabled Windows 8.1 device, this is hard to test for me.

How to set it up and use it

A very important precondition– the devices can only find each other when the phone is paired to the Windows 8.1 computer. Now the odd thing is – as you have paired the phone to the computer, you will see that is “connected” on both the computer and the phone, for a very short time. And then it flashes off again, so they are not connected. This is a bit confusing, but it is normal. They now ‘know’ each other, and that is what’s important.

As far as the the updated DevicePairConnectionHelper goes, it works nearly the same as the previous one, but it has two extras, as far as using it is concerned.

  • In the constructor, you can now optionally provide a GUID that describes a Bluetooth Service
  • There is a new boolean property ConnectCrossPlatform that you can set to true – then the Window 8 phone will try to connect to a Windows 8 machine using Bluetooth.

To set it up, you have to take the following things into account:

  • In you Windows Phone 8 app manifest, you have to select the ID_CAP_PROXIMITY capability
  • In you Windows 8 app manifest, you will have to the following capabilities
    • Private Networks (Client & Server)
    • Proximity
  • After you have saved you manifest, you have to open the Package.appmanifest manually (right click, hit View Code) and add a Bluetooth rfcomm service. Andrea explains how this is done, and I repeat it here for completeness:
<Capabilities>
  <Capability Name="internetClient" />
  <Capability Name="privateNetworkClientServer" />
  <DeviceCapability Name="proximity" />
  <m2:DeviceCapability Name="bluetooth.rfcomm">
    <m2:Device Id="any">
      <m2:Function Type="serviceId:A7EA96BB-4F95-4A91-9FDD-3CE3CFF1D8BC" />
    </m2:Device>
  </m2:DeviceCapability>
</Capabilities>

The stuff in Italics is what you add – verbatim. Except for the serviceId. Make and id up yourself, generate a guid, but don’t copy this one. Don’t re-use it over applications. But keep it ready, for you will need it in your code.

So, in your Windows 8 app, you now create a DevicePairConnectionHelper and fire it off like this:

var d = new DevicePairConnectionHelper("A7EA96BB-4F95-4A91-9FDD-3CE3CFF1D8BC");
d.ConnectCrossPlatform = true;
d.Start(ConnectMethod.Browse);

And you do exactly the same on Windows Phone 8. Usually the best way to connect is:

  • Start both the Windows 8.1 and the Windows Phone 8 app.
  • First start connect on the Windows 8.1 computer. That usually pretty quickly returns with zero peers found, but it keeps advertising it’s service. Then hit connect on the Windows Phone 8
  • After some time – sometimes half a minute – the Windows Phone 8 gets the peers

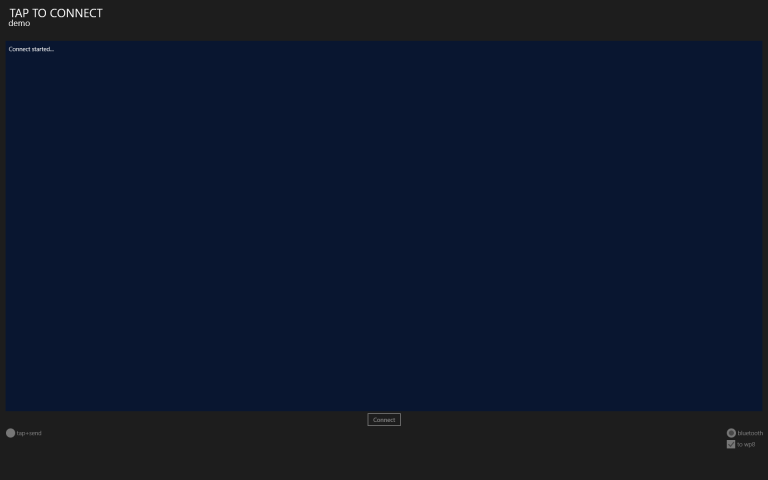
Below is the Windows 8 demo app as it has found my main desktop computer “Karamelk”) (that sports a Bluetooth dongle), and next to it the screen of the Windows 8.1 computer, still searching for contacts
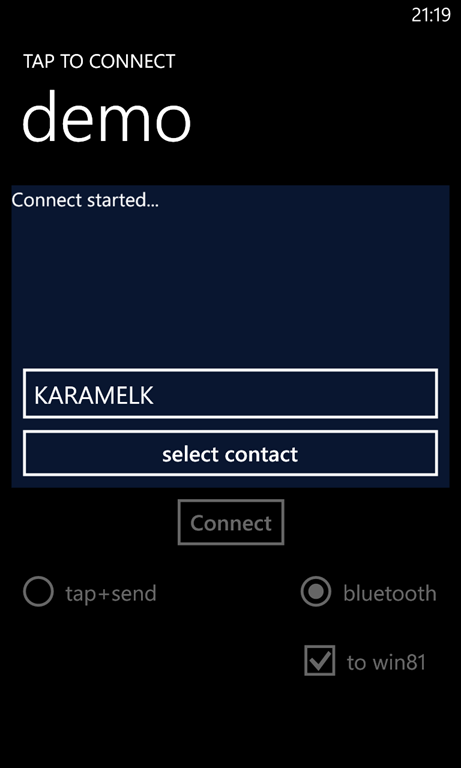
wp_ss_20131204_0001     image

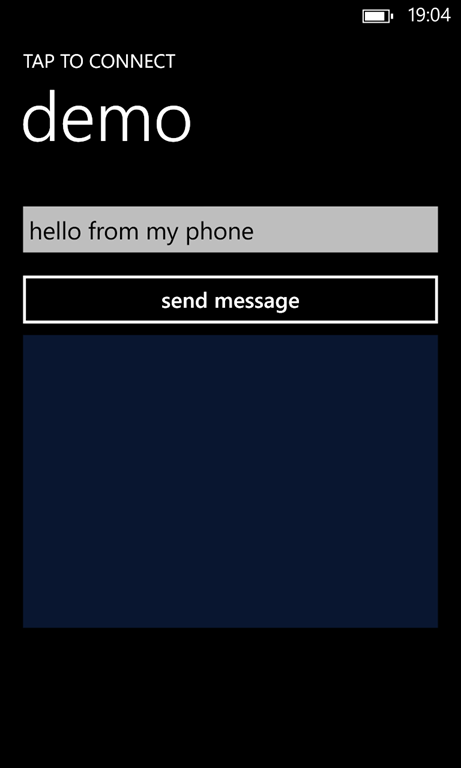
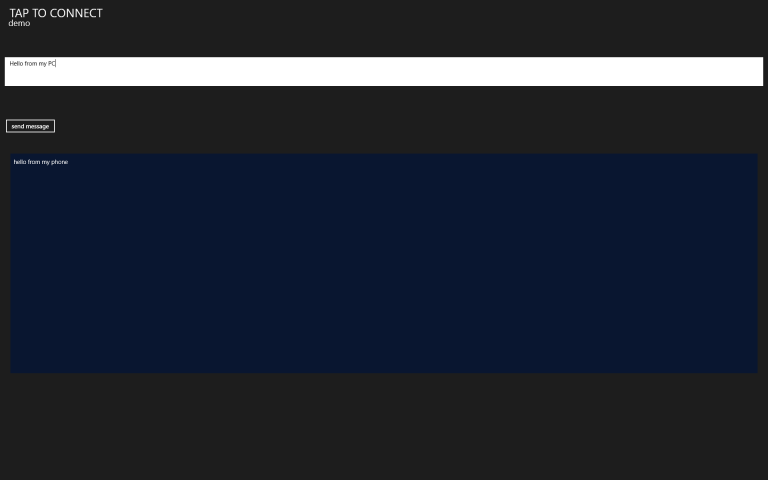
Then I hit “Select contact”. The first time, the Windows 8.1 you get a popup asking if the phone can use the connection. And if you give it permission, the apps connect, and it then it looks like this:
wp_ss_20131205_0001      imagewp_ss_20131205_0003

Now you can send messages back and forth.

You can still use this component to connect two Windows Phones to each other like you used to, and you now can also can connect two computers to each other and exchange messages.

A final piece of warning as far as usage is concerned – if you set ConnectCrossPlatform to true, the Windows Phone 8 will do cross-platform connect – but that’s the only thing it will do. Apparently it can’t find other Windows Phone 8 devices in that mode – just Windows 8.1 computers. For a Windows 8.1 computer, it does not matter – whether ConnectCrossPlatform is on or off, it will find other computers as well as phones. The text “Bluetooth” next to the right radio button is actually wrong on Windows 8.1, since the connection between computer actually uses WiFi Direct.


How it works

Just like last time – when I added Bluetooth – there was surprisingly little to change. The actual difficult stuff was already found out by Andrea ;-). It turns out that on the Windows Phone side you don’t have to do much, but on the Windows 8.1 side you have to resort to some trickery and use the Bluetooth Rfcomm API.

First of all we need a property to instruct the component to connect cross-platform (or not) and some stuff to hold the service GUID that we need:

public bool ConnectCrossPlatform { get; set; }

private Guid rfcommServiceUuid;

public string RfcommServiceUuid
{
  get
  {
    return rfcommServiceUuid == Guid.Empty ? null : rfcommServiceUuid.ToString();
  }
  set
  {
    Guid tmpGuid;
    if (Guid.TryParse(value, out tmpGuid))
    {
      rfcommServiceUuid = tmpGuid;
    }
  }
}

The RfcommServiceUuid property looks a bit complex, but it’s only to ensure there’s an actual GUID in it. Then comes the actual cross-platform connecting stuff. Most is just simply taken from Andrea, and for an explanation of what he is actually doing I kindly refer to his post (because I understand about half of it).

#if WINDOWS_PHONE
    private async Task InitBrowseWpToWin()
    {
      var t = new Task(() =>
      {
        PeerFinder.AlternateIdentities["Bluetooth:SDP"] = 
          rfcommServiceUuid.ToString();
      });
      t.Start();
      await t;
    }

    private void StopInitBrowseWpToWin()
    {
      if (PeerFinder.AlternateIdentities.ContainsKey("Bluetooth:SDP"))
      {
        PeerFinder.AlternateIdentities.Remove("Bluetooth:SDP");
      }
    }
#endif

#if NETFX_CORE
    // Code in this part largely based on 
    // http://www.silverlightshow.net/items/Windows-8.1-Play-with-Bluetooth-Rfcomm.aspx

    private const uint ServiceVersionAttributeId = 0x0300;
    private const byte ServiceVersionAttributeType = 0x0A;
    private const uint ServiceVersion = 200;

    private RfcommServiceProvider provider;

    private async Task InitBrowseWpToWin()
    {
      provider = await RfcommServiceProvider.CreateAsync(
                       RfcommServiceId.FromUuid(rfcommServiceUuid));

      var listener = new StreamSocketListener();
      listener.ConnectionReceived += HandleConnectionReceived;

      await listener.BindServiceNameAsync(
        provider.ServiceId.AsString(),
        SocketProtectionLevel.BluetoothEncryptionAllowNullAuthentication);

      using (var writer = new DataWriter())
      {
        writer.WriteByte(ServiceVersionAttributeType);
        writer.WriteUInt32(ServiceVersion);

        var data = writer.DetachBuffer();
        provider.SdpRawAttributes.Add(ServiceVersionAttributeId, data);
        provider.StartAdvertising(listener);
      }
    }

    private void HandleConnectionReceived(StreamSocketListener listener,
      StreamSocketListenerConnectionReceivedEventArgs args)
    {
      provider.StopAdvertising();
      listener.Dispose();
      DoConnect(args.Socket);
    }
    
    // Borrowed code ends
    
    private void StopInitBrowseWpToWin()
    {
      if (provider != null)
      {
        provider.StopAdvertising();
        provider = null;
      }
    }
#endif

Important to notice is that I use Bluetooth:SDP in stead of Bluetooth:Paired like Andrea does. If I use the paired option, I get a list of all devices paired to my phone, including my Jabra headset, my Surface Pro, a Beewi Mini Cooper Coupé Red I got on the last MVP Summit and the desktop computer that I try to connect to. I use SDP (Service Discovery Protocol) to find the device that actually provides the one service I am looking for – not so much a Bluetooth connection from a device that happens to be in the list of paired devices. Notice the Windows Store portion actually makes a “RfcommServiceProvider” with the Guid as identifier, and the Windows Phone portion sets that same Guid as a string to the AlternateIdentities.

Oh – the Windows Phone version of InitBrowseWpToWin method is a bit convoluted – it’s just a way to make whatever is inside async as well, so it’s compatible with the signature of the Windows 8.1 version.

Another important thing to notice is that the Window 8.1 part needs an extra using:

#if NETFX_CORE
using Windows.Devices.Bluetooth.Rfcomm;
#endif

Anyway, where it all starts is here: at the constructor. Not much has changed – there’s only the extra optional parameter that’s being recorded for future use:

public DevicePairConnectionHelper2(string crossPlatformServiceUid = null)
{
  RfcommServiceUuid = crossPlatformServiceUid;
  Messenger.Default.Register<NavigationMessage>(this, ProcessNavigationMessage);
  PeerFinder.TriggeredConnectionStateChanged += PeerFinderTriggeredConnectionStateChanged;
  PeerFinder.ConnectionRequested += PeerFinderConnectionRequested;
}

The Start method has been slightly adapted- it’s now async, to accommodate the async InitBrowseWpToWin method

public async Task Start(ConnectMethod connectMethod = ConnectMethod.Tap, 
   string displayAdvertiseName = null)
{
  Reset();
  connectMode = connectMethod;
  if (!string.IsNullOrEmpty(displayAdvertiseName))
  {
    PeerFinder.DisplayName = displayAdvertiseName;
  }

  try
  {
    PeerFinder.Start();
  }
  catch (Exception)
  {
    Debug.WriteLine("Peerfinder error");
  }

  // Enable browse
  if (connectMode == ConnectMethod.Browse)
  {
    if (ConnectCrossPlatform)
    {
      await InitBrowseWpToWin();
    }

    await PeerFinder.FindAllPeersAsync().AsTask().ContinueWith(p =>
    {
      if (!p.IsFaulted)
      {
        FirePeersFound(p.Result);
      }
    });
  }
}}

A couple of things have changed here – first of all, the whole component is reset in stead of just the PeerFinder, because there's now potentially much more set up now than just the PeerFinder. The start of the PeerFinder is now in a try-catch because on Windows 8.1 some combinations of parameters cause an exception – while still the connection is set up. This is a typical ‘yeah whatever works’ solution. Then the cross platform stuff is set up – if that is required, and I also check first if the result of the task that returns from the PeerFinder is not faulted, which I did not do in earlier versions either.

The most important piece of refactoring is the DoConnect method. In the old version there was one – now there are three overloads:

private void DoConnect(PeerInformation peerInformation)
{
#if WINDOWS_PHONE
  if (peerInformation.HostName != null)
  {
    DoConnect(peerInformation.HostName, peerInformation.ServiceName);
    return;
  }
#endif

  PeerFinder.ConnectAsync(peerInformation).AsTask().ContinueWith(p =>
  {
    if (!p.IsFaulted)
    {
      DoConnect(p.Result);
    }
    else
    {
      Debug.WriteLine("connection fault");
      FireConnectionStatusChanged(TriggeredConnectState.Failed);
    }
  });
}

private void DoConnect(HostName hostname, string serviceName)
{
  var streamSocket = new StreamSocket();
  streamSocket.ConnectAsync(hostname, serviceName).AsTask().ContinueWith((p) => 
                            DoConnect(streamSocket));
}

private void DoConnect(StreamSocket receivedSocket)
{
  socket = receivedSocket;
  StartListeningForMessages();
  PeerFinder.Stop();
  FireConnectionStatusChanged(TriggeredConnectState.Completed);
}

It is a bit complicated, but these three methods cover all scenario’s

  1. If a Windows Phone connects to a Windows Phone, it calls the first method. Since this is not a cross-platform call, the HostName will be null, so it will do PeerFinder.ConnectAsync, receive a StreamSocket and proceed to call the 3rd DoConnect method.
  2. If a Windows 8.1 computer connects a Windows 8.1 computer – ditto
  3. If a Windows Phone connects a Windows 8.1 computer – the Phone will fine find that the HostName (and ServiceId) will be set, so it calls the 2nd DoConnect method. This will proceed to connect to the service, as pass on the result StreamSocket again to the 3rd method
  4. The Window 8.1 computer, upon being connected by a Windows Phone, will get a callback in HandleConnectionReceived (see above, in Andrea’s code) which will immediately result in a StreamSocket, so it call the 3rd DoConnect immediately.

For good measure – the 2nd DoConnect method is actually never used in a Windows 8.1 application.

And that’s about what I needed to do. The changes to the sample app are very limited – I added a checkbox on both of them, and a wrapping ConnectCrossPlatform property that is set by said checkbox. Also a minor detail – the Reset method in the NfcConnectViewModel no longer stops the PeerFinder first. This is especially important for the Windows 8.1 app – it never finds the phone, but the phone is still trying to make a connection. If the PeerFinder on Windows 8.1 is already stopped, you get all kind of funky errors when you select the computer on the phone.

For those who find the discussion a bit arcane – there is, as always, a working demo solution for this article. It is built on top of my new not-yet-published WpWinNl library – that’s basically a cross-platform (no, not PCL, just a NuGet Package) version of the wp7nl library. Well as cross platform as it can be. Stay tuned, it will be available soon. But tackling this problem took a bit longer than I hoped, so I am a bit behind schedule

27 October 2013

An MVVM friendly tap+send and Bluetooth connection helper for Windows Phone 8

Why?
Early this year I blogged about TtcSocketHelper, an MVVM friendly helper object that allowed you connect two Windows Phone 8 devices to each other using a socket.I made two games with it– Pull the Rope and 2 Phone Pong, head-to-head style games that are played over two phones, exchanging JSON data to keep things in sync. A lot of things happened the last 10 months: super cheap devices entered the market – most notably the Nokia Lumia 520. It is a full fledged Windows Phone 8, but it’s super cheap and as a consequence it does not support NFC (and thus no tap+send). That apparently is of no concern to buyers, as according to AdDuplex stats, it took off like a bat out of hell. In just six months it grabbed what is now almost 33% of the Windows Phone 8 market. In other words, by limiting my app to NFC enabled phones I cut myself off from a significant – and growing – part of the market.

PhonePairConnectionHelper – supporting Bluetooth browsing
So I rewrote TtcSocketHelper into PhonePairConnectionHelper – basically the same class, but it now supports connecting phones using tap+send as well as by using the tried and tested way of Bluetooth pairing. Since October 21st 2 Phone Pong  1.3.0 is in the store, proudly powered by this component, now enabling my game to be played by 50% more people!
In this article I am going to concentrate on connecting via Bluetooth, as connecting via tap+send is already described in my article from January 2013.
The start of the object is simple enough again, and actually looks a lot like the previous incarnation:
using System;
using System.Collections.Generic;
using System.Diagnostics;
using System.Threading.Tasks;
using GalaSoft.MvvmLight.Messaging;
using Windows.Foundation;
using Windows.Networking.Proximity;
using Windows.Networking.Sockets;
using Windows.Storage.Streams;

namespace Wp7nl.Devices
{
  public class PhonePairConnectionHelper
  {
    private ConnectMethod connectMode;

    public PhonePairConnectionHelper()
    {
      Messenger.Default.Register<NavigationMessage>(this, ProcessNavigationMessage);
      PeerFinder.TriggeredConnectionStateChanged +=
        PeerFinderTriggeredConnectionStateChanged;
      PeerFinder.ConnectionRequested += PeerFinderConnectionRequested;
    }
  
    private void ProcessNavigationMessage(NavigationMessage message)
    {
      Debug.WriteLine("PhonePairConnectionHelper.ProcessNavigationMessage " + 
                       message.NavigationEvent.Uri);

      if (message.IsStartedByNfcRequest)
      {
        Start();
      }
    }
  }
}
The most notable is now that the setup is being done in the constructor. The class still listens to the NavigationMessage and if so, it still calls the start method (this is for the tap+send route, that still works). The PeerFinder is set up to listen to TriggeredConnecState events (i.e. events that happen after a tap+send) but also -  and this is important – to plain ole Bluetooth requests (ConnectionRequested event). The start method now, is pretty much changed:
public void Start(ConnectMethod connectMethod = ConnectMethod.Tap, 
  string displayAdvertiseName = null)
{
  PeerFinder.Stop();
  connectMode = connectMethod;
  if (!string.IsNullOrEmpty(displayAdvertiseName))
  {
    PeerFinder.DisplayName = displayAdvertiseName;
  }
  PeerFinder.AllowBluetooth = true;
  PeerFinder.Start();

  // Enable browse
  if (connectMode == ConnectMethod.Browse)
  {
    PeerFinder.FindAllPeersAsync().AsTask().
      ContinueWith(p => FirePeersFound(p.Result));
  }
}
The ConnectMethod enumeration, as you can already see from the code, enables you to indicate which method you want to use:
namespace Wp7nl.Devices
{
  public enum ConnectMethod
  {
    Tap,
    Browse
  }
}
The Start method has an optional parameter that gives you the ability to choose a connection method, and if necessary add a display name. The display name only applicable for the Bluetooth method. The interesting thing is – if you don’t provide a name, like I did in the sample, it will just use the phone’s name as you have provided it (by giving it a name via Explorer if you connect if via a USB cable to your computer)  - abbreviated to 15 characters. Why this is only 15 characters – your guess is as good as mine.
If you call this method without any parameters, it uses default values and will try to connect using tap+send, just like before.
Before selecting a method, you might want to check what connection methods the device support by using the two helper properties in the object:
public bool SupportsTap
{
  get
  {
    return (PeerFinder.SupportedDiscoveryTypes &
       PeerDiscoveryTypes.Triggered) == PeerDiscoveryTypes.Triggered;
  }
}

public bool SupportsBrowse
{
  get
  {
    return (PeerFinder.SupportedDiscoveryTypes &
      PeerDiscoveryTypes.Browse) == PeerDiscoveryTypes.Browse;
  }
}
Mind you – the helper is not so intelligent that it refuses to connect in a non-supported mode. And I don’t check for it in the sample app either. That is up to your app. But anyway – back up a little. If you try to connect via Bluetooth, the component tries to find all peers – that is, other phones running the same app, using FindAllPeersAsync, and fires the PeersFound event when it is done:
private void FirePeersFound(IEnumerable<PeerInformation> args)
{
  if (PeersFound != null)
  {
    PeersFound(this, args);
  }
}

public event TypedEventHandler<object, IEnumerable<PeerInformation>> PeersFound;
Your app has to subscribe to this event, and it then gets a list of “PeerInformation” objects. And PeerEvent has a number of properties, but the only one you will need to concern yourself is the “DisplayName” property. You display that in a list, a dropdown or whatever in your app, and after the user has made a selection, you call the Connect method:
public void Connect(PeerInformation peerInformation)
{
  DoConnect(peerInformation);
}

private void DoConnect(PeerInformation peerInformation)
{
  PeerFinder.ConnectAsync(peerInformation).AsTask().ContinueWith(p =>
  {
    socket = p.Result;
    StartListeningForMessages();
    PeerFinder.Stop();
    FireConnectionStatusChanged(TriggeredConnectState.Completed);
  });
}
And boom. You have a connection to the phone you have selected. The only thing that’s now missing is that the phone you have connected to, does not have a connection to you yet. But as you made the connection, the PeerFinder fired the ConnectionRequested event. Remember we set up a listener “PeerFinderConnectionRequested” to that in the constructor? Well guess what, part of the payload of the arguments of that event method gets is a PeerInformation object as well, containing the information to connect back to the phone that just connected to you :-). Which makes connecting back pretty easy:
private void PeerFinderConnectionRequested(object sender, 
                                           ConnectionRequestedEventArgs args)
{
  if (connectMode == ConnectMethod.Browse)
  {
    DoConnect(args.PeerInformation);
  }
}
And done. We know have a two-way socket connection using Bluetooth and we can call the SendMessage method just like before, and listen to result by subscribing to MessageReceived event. The only thing I did break in this helpers’ interface with regard to it predecessor is the ConnectionStatusChanged event type. This used to be

public event TypedEventHandler<object, 
             TriggeredConnectionStateChangedEventArgs>
             ConnectionStatusChanged; 
and now is
public event TypedEventHandler<object, TriggeredConnectState>
             ConnectionStatusChanged;
So if you subscribe to this event, you don’t have to check for args.State, but just for args itself. This was necessary to be able to fire connect events from DoConnect.
The rest of the class is nearly identical to the old TtcSocketHelper, and I won’t repeat myself here.

To use this class

First, decide if you are going to for for the tap+send route or the Bluetooth route. My apps check the SupportsTap and SupportsBrowse properties. If NFC (thus tap+send) is supported, I offer both options and give the users a choice to select a connect method. If is not supported, I offer only Bluetooth.
For the NFC route, the way to go still is:
  • Make sure you app does fire a NavigationMessage as described here
  • Make a new PhonePairConnectionHelper .
  • Subscribe to its ConnectionStatusChanged event
  • Subscribe to its MessageReceived event
  • Call Start
  • Wait until a TriggeredConnectState.Completed comes by
  • Call SendMessage – and see them appear in the method subscribed to MessageReceived on the other phone.
The way to go for Bluetooth is:
  • Make a new PhonePairConnectionHelper .
  • Subscribe to its ConnectionStatusChanged event
  • Subscribe to its MessageReceived event
  • Subscribe to its PeersFoundevent
  • Call Start with ConnectMethod.Browse and a display name
  • Wait until a PeersFound event comes by
  • Select a peer to connect to in your app
  • Call the Connect method with the selected peer
  • Wait until a TriggeredConnectState.Completed comes by
  • Call SendMessage – and see them appear in the method subscribed to MessageReceived on the other phone.

So basically, there isn’t that much difference ;-)

Changes in original sample
The fun thing is, you don’t even have to change that much to the existing demo solution. I added to the viewmodel the following code:

#region Bluetooth stuff

private bool useBlueTooth;
public bool UseBlueTooth
{
  get { return useBlueTooth; }
  set
  {
    if (useBlueTooth != value)
    {
      useBlueTooth = value;
      RaisePropertyChanged(() => UseBlueTooth);
    }
  }
}

private PeerInformation selectedPeer;

public PeerInformation SelectedPeer
{
  get { return selectedPeer; }
  set
  {
    if (selectedPeer != value)
    {
      selectedPeer = value;
      RaisePropertyChanged(() => SelectedPeer);
    }
  }
}

public ObservableCollection<PeerInformation> Peers { get; private set; }

private void PeersFound(object sender, IEnumerable<PeerInformation> args)
{
  Deployment.Current.Dispatcher.BeginInvoke(() =>
  {
    Peers.Clear();
    args.ForEach(Peers.Add);
    if (Peers.Count > 0)
    {
      SelectedPeer = Peers.First();
    }
    else
    {
      ConnectMessages.Add("No contacts found");
    }
  });
}

public ICommand ConnectBluetoothContactCommand
{
  get
  {
    return new RelayCommand(() =>
    {
      connectHelper.Connect(SelectedPeer);
      Peers.Clear();

    });
  }
}

#endregion
Basically:
  • A property to determine whether you are using Bluetooth or not (not = tap+send)
  • A property holding the selected Peer
  • A list of available peers
  • The callback for the helper’s PeersFound event. Not that everything here happens within a Dispatcher. As the PeersFound event comes back from a background thread, it has no access to the UI – but since it updates several bound properties, it needs that access – hence the Dispatcher.
  • and a command to allow the user to select a certain peer. Notice the Peers.Clear after the Peer is selected. That is because I use my HideWhenCollectionEmptyBehavior to display the UI for showing and selecting peers. This behavior is in the sample solution as code as I kind of forgot to add this to the last edition of my wp7nl library on codeplex.*ahem*
Two minor additions to the rest of the viewmodel: in the Init method, where I set up all the connectHelper, it now says:
connectHelper = new PhonePairConnectionHelper();
connectHelper.ConnectionStatusChanged += ConnectionStatusChanged;
connectHelper.MessageReceived += TtsHelperMessageReceived;
connectHelper.PeersFound += PeersFound;  // Added for Bluetooth support
And there’s also a little change in the StartCommand to accommodate the fact that if the user selects Bluetooth, the connectHelper should be called in a slightly different way.
public ICommand StartCommmand
{
  get
  {
    return new RelayCommand(
        () =>
        {
          ConnectMessages.Add("Connect started...");
          CanSend = false;
          CanInitiateConnect = false;
          // Changed for Bluetooth.
          if(UseBlueTooth)
          {
            connectHelper.Start(ConnectMethod.Browse);
          }
          else
          {
            connectHelper.Start();
          }
        });
  }
}
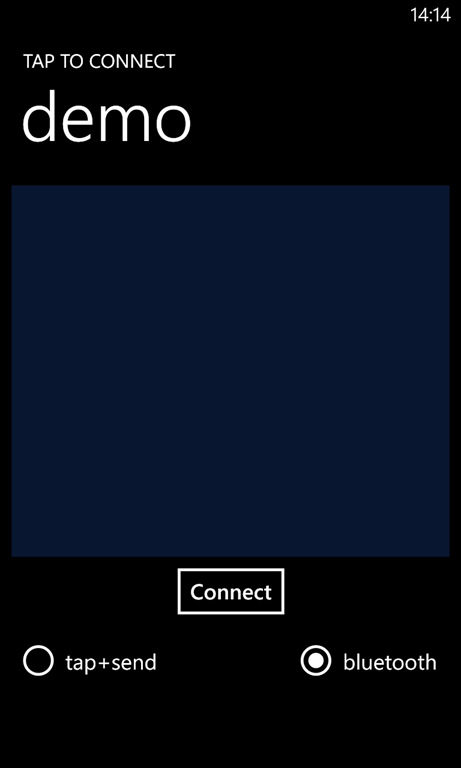
wp_ss_20131027_0001To enable the user to actually select a connection method, the start screen has changed a little and now sports two radio buttons. Bluetooth is selected by default.
<RadioButton Content="tap+send" 
IsChecked="{Binding UseBlueTooth, Converter={StaticResource BooleanInvertConvertor}, Mode=TwoWay}"  
  IsEnabled="{Binding CanInitiateConnect, Mode=OneWay}" />
<RadioButton Content="bluetooth" IsChecked="{Binding UseBlueTooth, Mode=TwoWay}" 
  HorizontalAlignment="Right" Margin="0" 
  IsEnabled="{Binding CanInitiateConnect, Mode=OneWay}" />
which is not quite rocket science, and some more code to give a user a simple UI to view and select found peers:
<Grid x:Name="bluetoothconnectgrid" VerticalAlignment="Bottom">
  <Grid.RowDefinitions>
    <RowDefinition Height="Auto"/>
    <RowDefinition Height="Auto"/>
  </Grid.RowDefinitions>
  <i:Interaction.Behaviors>
    <behaviors:HideWhenCollectionEmptyBehavior Collection="{Binding Peers}"/>
  </i:Interaction.Behaviors>
  <toolkit:ListPicker x:Name="OpponentsListPicker" Margin="12,0" VerticalAlignment="Top" 
      ExpansionMode="FullScreenOnly" 
      ItemsSource="{Binding Peers}" SelectedItem="{Binding SelectedPeer, Mode=TwoWay}" />
  <Button Content="select contact" Height="72" Grid.Row="1" 
      Command="{Binding ConnectBluetoothContactCommand, Mode=OneWay}"/>
</Grid>
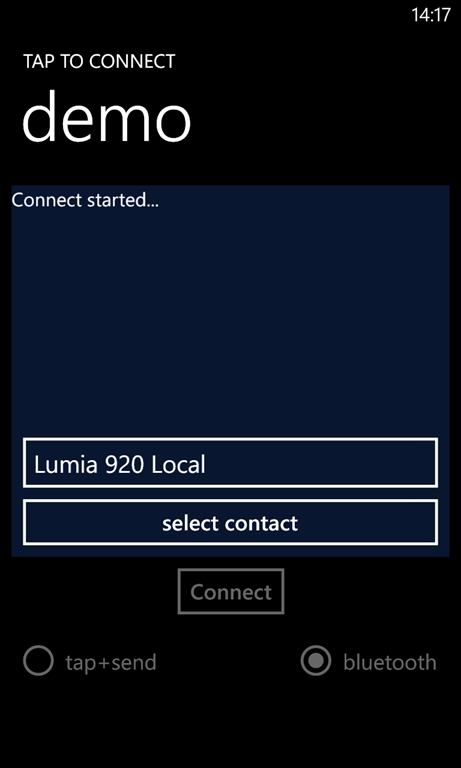
wp_ss_20131027_0002Also not very complicated – a listpicker displays the peers and selects a peer, and the button fires the command to do the actual connecting. I rather like the use of HideWhenCollectionEmptyBehavior here – this automatically shows this piece of UI as there are peers in the list, and hides it when they are not. It’s rather elegant, if I may say so myself. On the picture right you can see it shows the name of my 920 – abbreviated to 15 characters.
After the connection has been made – either by Bluetooth or by tap+send – you can use this app to chat just like the previous version.

Important things to know
  • If you are a developer who wants protect your customers from disappointments, you have checked the “NFC” as requirement in the WMAppManifest.xml when you built an app on top of my previous TtcSocketHelper. Remove that checkmark now. Or else your app still won’t be available for phones like the 520 that don’t have NFC. And that quite defies the point of this whole new class.
  • I have found out Bluetooth browsing on Windows Phone 8 has some peculiar things to take into account
    • You still have to be quite close together – somewhere within the meter range – to find peers. Once the connection is made, you can move further apart
    • The first phone to start searching for a peer, usually finds nothing. The second one finds one opponent, the third one two. The search process usually doesn’t last very long – in most cases just a few seconds – before the PeerFinder either gives up or comes back with a peer. It’s advisable not to call Connect automatically if you find only one peer – that might not be the one the user was looking for. Always keep the user in control.
  • If you connect via tap+send, you will only need to start the app on one of the phones and press the connect button – the other phone will automatically fire up the app (or even download it if it is not there) when the devices are tapped together.
  • For the Bluetooth route, the app needs to be started on both phones and on both phones you will need to press the connect button.

Conclusion

The app market is always in flux, that’s true for all platforms but that sure goes for Windows Phone. It’s important to stay in touch with those developments. There’s a lot of growth in the Windows Phone market – especially on the low end of the phones. Walking the extra mile for those groups is important – cater for as much users as you can. I hope I helped you a little with that, both by general example and actual code. Demo solution, as always, can be downloaded here.

14 January 2013

An MVVM-friendly ‘tap-to-connect’ NFC socket network helper for Windows Phone 8

For my Windows Phone 8 game “Pull the Rope” I wrote a utility class to make pairing phones and obtaining a  two-way communication channel a little bit easier. I already dabbled into this while developing the game, but now I feel it’s time to show a more comprehensive solution.

I re-use the NavigationEventArgsExtensions and the NavigationMessage from my previous article “Handling Windows Phone 8 NFC startup events using the MVVMLight” without describing them further – I suggest you read this article as a preface to this one if you haven’t done so before. The utility class I describe in this article handles the pairing via tap-to-connect and provides – when that’s done – a method for sending a message and an event for receiving a message. I have peppered the code with debug statements, so can you nicely see in your output windows what’s exactly happening inside of the class when you are debugging on the phone.

Messages are sent and received as strings, therefore the message argument class is not very complex either:

using System;

namespace Wp7nl.Devices
{
  public class ReceivedMessageEventArgs : EventArgs
  {
    public string Message { get; set; }
  }
}
The start of the TtcSocketHelper (‘Tap-To-Connect’) class, as I have called it, is as follows:
using System;
using System.Diagnostics;
using System.Threading.Tasks;
using GalaSoft.MvvmLight.Messaging;
using Windows.Foundation;
using Windows.Networking.Proximity;
using Windows.Networking.Sockets;
using Windows.Storage.Streams;

namespace Wp7nl.Devices
{
  public class TtcSocketHelper
  {
    public TtcSocketHelper()
    {
      Messenger.Default.Register<NavigationMessage>(this, 
        ProcessNavigationMessage);
    }

    public virtual void Start()
    {
      PeerFinder.TriggeredConnectionStateChanged += 
         PeerFinderTriggeredConnectionStateChanged;

      PeerFinder.AllowBluetooth = true;
      PeerFinder.Start();
    }

    private void ProcessNavigationMessage(NavigationMessage message)
    {
      Debug.WriteLine("TtsHelper.ProcessNavigationMessage " + 
        message.NavigationEvent.Uri);

      if (message.IsStartedByNfcRequest)
      {
        Start();
      }
    }
  }
}
The constructor subscribes this helper class to a message that will need to be fired when the application navigates to it's main page. If it detects the app is started by an NfcRequest - i.e. a tap-to-connect, the PeerFinder is immediately started to allow for the further build-up of the connection. I already described this technique in the article I already mentioned. The method Start can also be called by an the application, for instance the press of a “connect” button. Note that I only allow Bluetooth connections – this is because this class comes from my game, which does not need the highest possible speed, but the lowest possible latency. Ironically Wi-Fi seems to have a little more latency than Bluetooth.

The next part is the handling of the connection process itself:

private void PeerFinderTriggeredConnectionStateChanged(object sender, 
             TriggeredConnectionStateChangedEventArgs args)
{
  switch (args.State)
  {
    case TriggeredConnectState.Completed:
      FireConnectionStatusChanged(args);
      socket = args.Socket;
      StartListeningForMessages();
      PeerFinder.Stop();
      break;
    default:
      FireConnectionStatusChanged(args);
      break;
  }
}

private void FireConnectionStatusChanged(TriggeredConnectionStateChangedEventArgs args)
{
  Debug.WriteLine("TtsHelper: " + args);
  if (ConnectionStatusChanged != null)
  {
    ConnectionStatusChanged(this, args );
  }
}

public event TypedEventHandler<object, 
             TriggeredConnectionStateChangedEventArgs> ConnectionStatusChanged;

private StreamSocket socket;

This is kind of nicked from the Bluetooth app to app sample at MSDN, although I made it a bit simpler: only on TriggeredConnectState.Completed I need to do something, i.e. obtain a socket. For the rest of the events, I just pass them to the outside world in case it’s interested.

Next is the part that initiates and performs the actual listening for messages, once the socket is obtained:

private async void StartListeningForMessages()
{
  if( socket != null )
  {
    if (!listening)
    {
      listening = true;
      while (listening)
      {
        var message = await GetMessage();
        if (listening)
        {
          if (message != null && MessageReceived != null)
          {
            MessageReceived(this, 
               new ReceivedMessageEventArgs {Message = message});
          }
        }
      }
    }
  }
}

private async Task<string> GetMessage()
{
  try
  {
    if (dataReader == null) dataReader = new DataReader(socket.InputStream);
    await dataReader.LoadAsync(4);
    var messageLen = (uint)dataReader.ReadInt32();

    await dataReader.LoadAsync(messageLen);
    var message = dataReader.ReadString(messageLen);
    Debug.WriteLine("Message received: " + message);

    return message;
  }
  catch (Exception ex)
  {
    Debug.WriteLine("GetMessage: " + ex.Message);
  }
  return null;
}

public event TypedEventHandler<object, ReceivedMessageEventArgs> MessageReceived;

private DataReader dataReader;

private bool listening;

The StartListeningForMessages basically enters an endless loop – endless that is, until the “listening” is set to “false” - waiting for GetMessage to return something. The GetMessage is almost 100% nicked from the Bluetooth app to app sample at MSDN. the first four bytes are supposed to contain the message length, the rest is payload, hence the two read actions.

Then of course we need a method to actually send messages:

private readonly object lockObject = new object();

public async void SendMessage(string message)
{
  Debug.WriteLine("Send message:" + message);
  if (socket != null)
  {
    try
    {
      lock (lockObject)
      {
        {
          if (dataWriter == null)
          {
            dataWriter = new DataWriter(socket.OutputStream);
          }

          dataWriter.WriteInt32(message.Length);
          dataWriter.StoreAsync();

          dataWriter.WriteString(message);
          dataWriter.StoreAsync();
        }
      }
    }
    catch (Exception ex)
    {
      Debug.WriteLine("SendMessage: " + ex.Message);
    }
  }
}
private readonly object lockObject = new object();

private DataWriter dataWriter;

which comes almost directly from my earlier article “Preventing high speed socket communication on Windows Phone 8 going south when using async/await

And finally we have this brilliant method, which basically resets the TtcSocketHelper class back to its initial status.

public void Reset()
{
  PeerFinder.Stop();
  if (dataReader != null)
  {
    try
    {
      listening = false;
      if (dataReader != null)
      {
        dataReader.Dispose();
        dataReader = null;
      }
      if (dataWriter != null)
      {
        dataWriter.Dispose();
        dataWriter = null;
      }
      if (socket != null)
      {
        socket.Dispose();
        socket = null;
      }
    }
    catch (Exception ex)
    {
    }
  }
}

To use this class:

  • Make sure you app does fire a NavigationMessage as described here
  • Make a new TtcSocketHelper.
  • Subscribe to its ConnectionStatusChanged event
  • Subscribe to its MessageReceived event
  • Call Start
  • Wait until a TriggeredConnectState.Completed comes by
  • Call SendMessage – and see them appear in the method subscribed to MessageReceived on the other phone.

Oh, and don’t forget to set ID_CAP_PROXIMITY in your WMAppManifest.Xaml.right?

The source code – and a working demo of this component – can be found in the demo solution right here. It’s a very simple chat-application built upon TtcSocketHelper. Of course this is all MVVMLight based, and I start off with the basic viewmodel and its properties:

using System.Collections.ObjectModel;
using System.Windows;
using System.Windows.Input;
using GalaSoft.MvvmLight;
using GalaSoft.MvvmLight.Command;
using GalaSoft.MvvmLight.Messaging;
using Windows.Networking.Proximity;
using Wp7nl.Devices;

namespace TtcDemo.Viewmodels
{
  public class NfcConnectViewModel : ViewModelBase
  {
    private TtcSocketHelper ttcSocketHelper;

    public ObservableCollection<string> ConnectMessages { get; private set; }
    public ObservableCollection<string> ReceivedMessages { get; private set; }

    private bool canInitiateConnect;
    public bool CanInitiateConnect
    {
      get { return canInitiateConnect; }
      set
      {
        if (canInitiateConnect != value)
        {
          canInitiateConnect = value;
          RaisePropertyChanged(() => CanInitiateConnect);
        }
      }
    }

    private bool isConnecting;
    public bool IsConnecting
    {
      get { return isConnecting; }
      set
      {
        if (isConnecting != value)
        {
          isConnecting = value;
          RaisePropertyChanged(() => IsConnecting);
        }
      }
    }

    private bool canSend;
    public bool CanSend
    {
      get { return canSend; }
      set
      {
        if (canSend != value)
        {
          canSend = value;
          RaisePropertyChanged(() => CanSend);
        }
      }
    }
    
    private string message;
    public string Message
    {
      get { return message; }
      set
      {
        if (message != value)
        {
          message = value;
          RaisePropertyChanged(() => Message);
        }
      }
    }
  }
}

We have a TtcSocketHelper itself, and two ObservableCollections of strings. ConnectMessages serves is to report the connection progress, and ReceivedMessages hold the messages received by your ‘opponent’ once the connection is established. Then we have three booleans, that basically turn on or off certain parts of the user interface depending on the state:

  • Initially, IsConnecting is true and CanSend is false. That should show a part of the user interface to show ConnectMessages.
  • If the app is started by the user, CanInitiateConnect is true as well, so the user can click on some “connect” button as well. If the apps is started by an NFC request, the process of creating a connection is initiated by someone else and the user should not be able to press a “connect” button to prevent the whole process from being south. I my mind I call the instance of the app that has been started by the user “master”, the instance started by the NFC request “slave”.
  • If the connection has been successfully established, IsConnecting should become false and CanSend true, disabling the controls handling the connection setup, and enabling the controls doing the actual chatting stuff.

And yeah, I know, usually CanSend != IsConnecting so I could replace this with one boolean. But that makes the designer’s job harder, as I will show further on.

Finally we have the Message property, which is where the message the user wants to send. We’ll come to that later. The viewmodel is initialized via a method “Init”, now called in the constructor:

public NfcConnectViewModel()
{
  Init();
}

private void Init()
{
  Messenger.Default.Register<NavigationMessage>(this, ProcessNavigationMessage);

  if (ConnectMessages == null)
  {
    ConnectMessages = new ObservableCollection<string>();
  }

  if (ReceivedMessages == null)
  {
    ReceivedMessages = new ObservableCollection<string>();
  }

  if (!IsInDesignMode)
  {
    if (ttcSocketHelper == null)
    {
      ttcSocketHelper = new TtcSocketHelper();
      ttcSocketHelper.ConnectionStatusChanged += ConnectionStatusChanged;
      ttcSocketHelper.MessageReceived += TtsHelperMessageReceived;
    }
    else
    {
      CanSend = true;          
    }
  }
  IsConnecting = true;
}

It doesn’t really do that much – apart from initializing the ObservableCollections, creating an instance of TtcSocketHelper and subscribing to its events, and setting the initial status. There are two things to note here – one, in design mode both CanSend and IsConnecting are true so all the parts of the GUI are enabled. This is to remain friends with the designer, who can now shut on or off both the connection part of the GUI and the messaging part when he/she chooses using Blend, making the design process a lot easier - in stead of having to muck around in your code – or worse, by coming to complain to you.

The second thing to note is that this viewmodel also subscribes to NavigationMessage (just as TtcSocketHelper itself) . This is because the viewmodel likes to know as well if it’s in a master or slave app:

private void ProcessNavigationMessage(NavigationMessage message)
{
  CanInitiateConnect = !message.IsStartedByNfcRequest;
}

so it can enable or disable the connect button. The handling of the connection messages is done by ConnectionStatusChanged:

private void ConnectionStatusChanged(object sender,
  TriggeredConnectionStateChangedEventArgs e)
{
  Deployment.Current.Dispatcher.BeginInvoke(() =>
    ConnectMessages.Add(GetMessageForStatus(e.State)));
    
  if (e.State == TriggeredConnectState.Completed)
  {
    Deployment.Current.Dispatcher.BeginInvoke(() =>
    {
      IsConnecting = false;
      CanSend = true;
    });
  }
}

private static string GetMessageForStatus(TriggeredConnectState state)
{
  switch (state)
  {
    case TriggeredConnectState.Listening:
      return "Listening....";

    case TriggeredConnectState.PeerFound:
      return "Opponent found";

    case TriggeredConnectState.Connecting:
      return "Opponent found";

    case TriggeredConnectState.Completed:
      return "Connection succesfull!";

    case TriggeredConnectState.Canceled:
      return "Connection canceled";

    default: //TriggeredConnectState.Failed:    
      return "Connection failed";
  }
}

That first adds a message to ConnectMessages using a little helper method GetMessageForStatus (I’d suggest loading this from a resource if you do this in a real app) . After that, if it detects a TriggeredConnectState.Completed message coming by, switches from connect mode to chat mode, so to speak. Since all these events are raised outside of the UI thread, say hello to your old friend Dispatcher to prevent cross-thread access exceptions. Oh, and then of course there’s the little matter of enabling the user actually starting the whole connection process:

public ICommand StartCommmand
{
  get
  {
    return new RelayCommand(
        () =>
        {
          ConnectMessages.Add("Connect started...");
          CanSend = false;
          CanInitiateConnect = false;
          ttcSocketHelper.Start();
        });
  }
}

It adds a message to ConnectMessage (to show “see, I am really doing something!”), disables the connect button (as to prevent an annoying Windows Phone certification tester crashing your program) and then it starts the helper. All this is only needed to handle the build-up of the connection. All that actually handles the chatting is merely this:

public ICommand SendComand
{
  get
  {
    return new RelayCommand(
      () =>
      {
        ttcSocketHelper.SendMessage(Message);
        Message = string.Empty;
      }
   );
  }
}

private void TtsHelperMessageReceived(object sender,
                                      ReceivedMessageEventArgs e)
{
  Deployment.Current.Dispatcher.BeginInvoke(() =>
    ReceivedMessages.Add(e.Message));
}

As you can see it’s only a command that relays the message to the TtcSocketHelper and then clears the field, and a simple method listening for messages and adding received message contents to ReceivedMessages, once again with the aid of the Dispatcher.

Since this article is already way longer than I planned, I limit myself to the part of the XAML that is actually interesting:

<!-- Connect panel-->
<Grid x:Name="ConnectGrid" Margin="0,0,0,76" Grid.RowSpan="2" 
   Visibility="{Binding IsConnecting, Converter={StaticResource VisibilityConverter}}">
  <Grid.RowDefinitions>
    <RowDefinition Height="425*"/>
    <RowDefinition Height="106*"/>
  </Grid.RowDefinitions>
  <Button Content="Connect" HorizontalAlignment="Center" VerticalAlignment="Top"
     IsEnabled="{Binding CanInitiateConnect}" Command="{Binding StartCommmand}" 
     Grid.Row="1"/>
  <ListBox ItemsSource="{Binding ConnectMessages}" Background="#FF091630"/>
</Grid>

<!-- Message panel-->
<Grid x:Name="MessageGrid" 
      Visibility="{Binding CanSend, Converter={StaticResource VisibilityConverter}}" >
  <Grid.RowDefinitions>
    <RowDefinition Height="110*"/>
    <RowDefinition Height="100*"/>
    <RowDefinition Height="412*"/>
  </Grid.RowDefinitions>
  <TextBox Height="72" Margin="0,10,0,0" TextWrapping="Wrap" VerticalAlignment="Center" 
    Text="{Binding Message, Mode=TwoWay}"/>
  <Button Content="send message" Grid.Row="1" Command="{Binding SendComand, Mode=OneWay}"/>
  <ListBox Grid.Row="2" ItemsSource="{Binding ReceivedMessages}" 
           Background="#FF091630" Margin="12,0"/>
</Grid

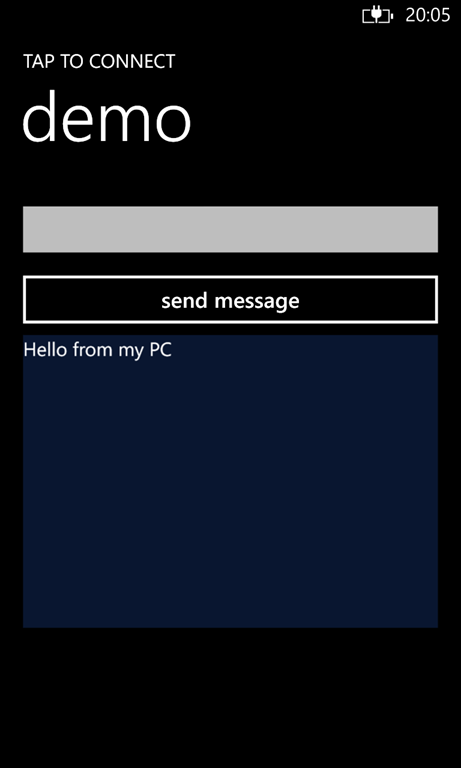
wp_ss_20130116_0002[1]wp_ss_20130116_0001[1]You can see ConnectGrid whose visibility is controlled by IsConnecting, and a MessageGrid whose visibility is controlled by CanSend. Then there is the Connect button that is enabled or disabled by CanInitiateConnect. The two faces of the application look like as showed on the right. On the left image you see the app just after connect has been initiated by the ‘master’ the right shows the app after having received a message from the first phone and the user of the second phone responding.

I will add the classes described in this article to the wp8-specific version of  my wp7nl CodePlex library soon. In the mean time, you can find them in the Wp7nl.Contrib project of the demo solution.

For the record, there’s also a ResetCommand in the viewmodel that makes it possible to reset the whole connection process, but that’s currently not bound to a button of sorts. I leave that as exercise for the reader ;-)

A final word: I am aware of the fact that I could also have used the Visual State Manager to turn pieces of the GUI on and off (and animate that, too) but I did not want to add even more complexity to this article.

16 December 2012

Preventing high speed socket communication on Windows Phone 8 going south when using async/await

Currently I am working on a Windows Phone 8 action game in which you can fight a kind of duel. This involves pairing the phones via NFC and then obtaining a socket trough which the phones can exchange game information. Liking to steal from examples myself (why do you think I name my blog this way, eh?) I stole code from the Bluetooth app to app sample at MSDN. Now this is a great sample but it has one kind of problem for me.

I’ll skip the pairing, the obtaining of the socket and the definition of the data reader – that’s all documented in the MSDN sample. The method to send a message to the opponent was, in condensed form:

public async void SendMessage(string message)
{
  if (dataWriter == null)
  {
    dataWriter = new DataWriter(socket.OutputStream);
  }

  dataWriter.WriteInt32(message.Length);
  await dataWriter.StoreAsync();

  dataWriter.WriteString(message);
  await dataWriter.StoreAsync();
}

while at the same time both opponenents where listening using a simple method like

public async Task GetMessage()
{
  if (dataReader == null) dataReader = new DataReader(socket.InputStream);
  await dataReader.LoadAsync(4);
  var messageLen = (uint)dataReader.ReadInt32();
  Debug.WriteLine(messageLen);

  await dataReader.LoadAsync(messageLen);
  var message = dataReader.ReadString(messageLen);
  Debug.WriteLine(message);
  return message;
}

From the debug statements in this code you can see things weren’t exactly working as planned. Now the way this is supposed to work is as follows: as the opponent sends a message using SendMessage, the other phone is receiving a message via the socket in GetMessage. The first four bytes contain an unsigned integer containing the length of the rest of the message – which is supposed to be a string.

I noticed that while things went off to a good start, sooner or later one of the two phones would stop receiving messages or both games crashed simultaneously. I got all kind of null value errors, index out of range and whatnot. When I started debugging, I found out that while the app on phone 1 said it sent a 3-character string, the receiving app on phone 2 sometimes got a huge number for the message length, that obviously wasn’t sent, it read past the end of the stream – crash.

The MSDN sample works fine, as long as it is used for the purpose it was written, i.e. sending out (chat) messages at a kind of sedate pace – not for sending a lot of events per second to keep a game in sync. The essence of a stream is that it’s a stream indeed – things have to be written and read in the right order. For what happened of course was a race condition between two or more events in a short timeframe. The first event wrote the message length, the second event as well, then possibly a third, before the first one came to writing the actual message, and whatever arrived on the other phone was a garbled jumble of bytes that did exactly reflect what happened on the sending phone, but wasn’t the orderly message length – message payload stream the other phone expected.

The way I solved it – in a ‘there-I-fixed-it’ kind of way – was to use a lock on the write code so at least stuff went in the stream in the order the other phone was expecting it:

public async void SendMessage(string message)
{
  lock (this)
  {
    if (dataWriter == null)
    {
      dataWriter = new DataWriter(socket.OutputStream);
    }

    dataWriter.WriteInt32(message.Length);
    dataWriter.StoreAsync();

    dataWriter.WriteString(message);
    dataWriter.StoreAsync();
  }
}

Note you have to remove the “await” before the StoreAsync methods as those are not allowed within a lock. This method makes sure one message – and the whole message – is written on the stream and nothing comes in between.

Update – the first version of this posting contained a small error – which has been graciously pointed out to me by a few readers (see comments section). Also, I’ve been pointed to an article by Scott Hanselman about a similar subject. I’ve tried using the AsyncLock by Stephen Toub he describes but found out that although it works very good and my game does become a bit more fluid, the lag in getting messages across is a lot higher. Net effect: while the game runs more smoothly on both phones, the game state actually gets out of sync very fast, making the game unplayable. Apparently the AsyncLock approach doesn’t work for high speed continuous message exchange, so for now I’ll stick to the approach I described above.