Intro
Coming from business development, you might get a little shock coming into Unity - traditionally, game developers are much more focused on making the outside pretty than the inside. Things like dependency injection are kind of unheard of or considered 'too heavy' for game development. But if you are still in the process of development, actually being able to access a consistent (mock) data service in stead of the real live data service might be a big advantage, especially when that data service is rate limited or expensive.
The Mixed Reality Toolkit 2 offers a great feature for that: extension services. And it's actually pretty easy to use, and I am going to show a simple sample. I have written about this in very early alpha stage almost a year ago, but it's now to a point that it's actually usable.
Setting the stage
Using Unity 2018.4.6f1, I created a simple project MKRT2DepInject using the 3D template, imported the MRKT2 and TextMeshPro. For the latter I usually take essential resources only.Then I and added the MRKT2 to the SampleScene in the project. For the default profile, I usually take the DefaultHololens2Profile. Also, don't forget to set the platform to UWP (File/Build settings)
Also - and this is important - import JSON.net from the Unity store.
Extension services
A service requires an interface, an implementing class, optionally an inspector, a profile, and a default profile asset. Now the latter three may sounds maybe a bit abstract but it actually boils down to this:
- An inspector is something that can be used to show the runtime status of a service in the editor. It's basically a debugging tool. It's entirely optional and in most cases it's not necessary.
- A profile is a class holding configuration info for a class. If you have been using the MRKT2 for a while, you have been using them all along - cloning profiles and changing settings.
- a default service profile asset is basically a serialized version of a profile class.
This may seem like a lot of work, but there's actually a nice tool for generating the boiler plate for all that - although had to get in a few pull request myself to getting it to work as I assume was intended ;)
Creating an extension service
Select Mixed Reality Toolkit/Utilities/Create Extension Service. This will bring up this UI:
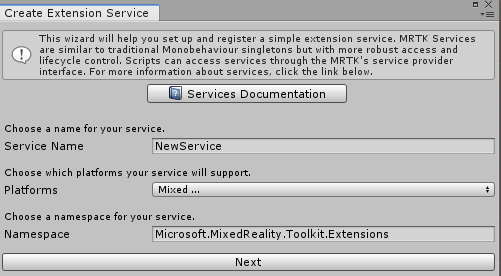
Name the service "DataService". You will notice the "Service" suffix is mandatory. Choose "Services" for namespace. Then click the "Next" button. This will show you the next stage.
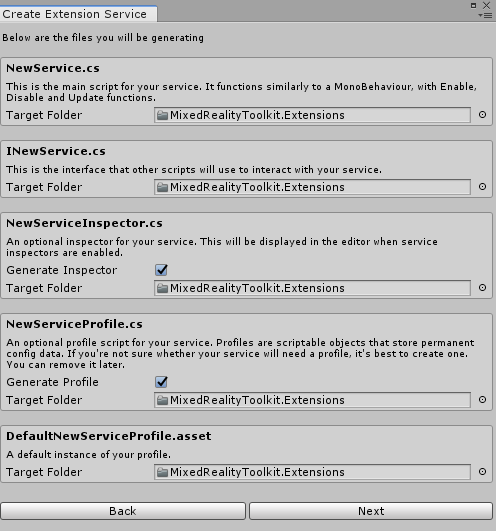
Now I like to organize my stuff a little, so I tend to put things in folders. The scripts go in a scripts/services folder, the profile in profile. You can set this by dragging the folder from the assets. Notice also I have disabled the inspector:

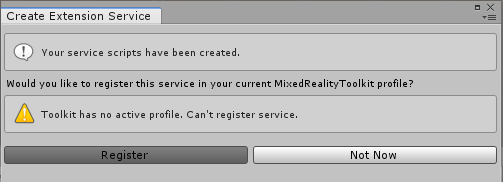
Hit next, and on the next screen click not now because otherwise you will be editing the default profiles - effectively, you are modifying the default settings of the MRKT2. You can do this only after you have cloned the proper profiles.
You will also notice that although you specified the default asset should have been created in the Profiles folder, it is in fact created in the Services folder. Look I am going to need to make another pull request. Anyway. I moved the DefaultDataServiceProfile to profiles, and let it sit there
Registering the service
First, we clone the top profile.

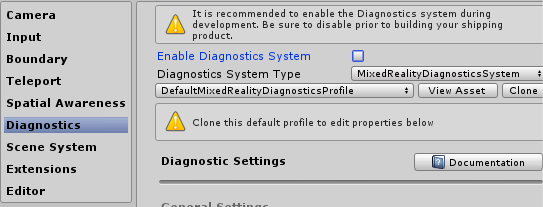
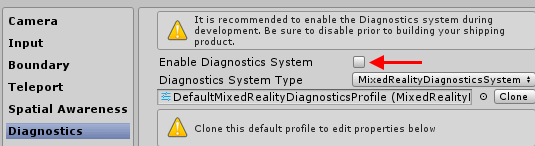
Then we disable the profiler, because that's annoyingly in the way when you want to demo something
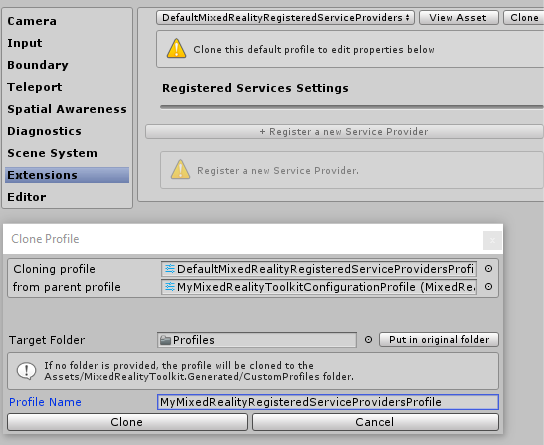
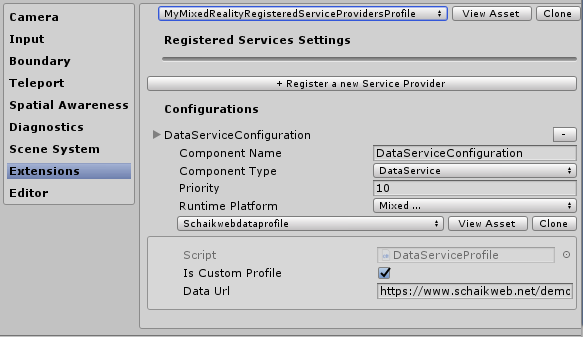
Then we select the Extensions tab, and clone the "DefaultMixedRealityRegisteredServiceProvidersProfile" (the creators of the MRTK2 seem to have taken a liking to rather verbose names, as you might have noticed) to MyMixedRealityRegisteredServiceProvidersProfile
Now you can actually click the "+ Register a new Service Provider" button and register the service
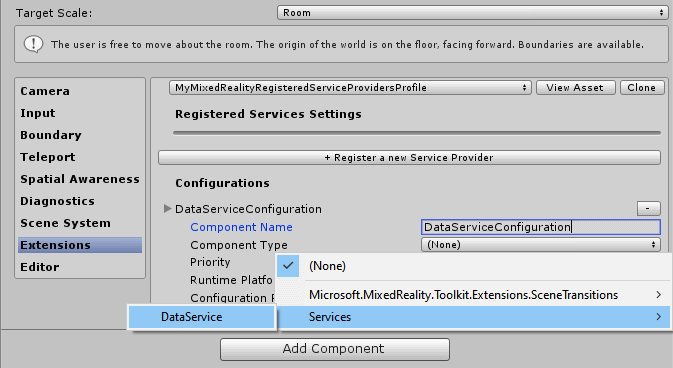
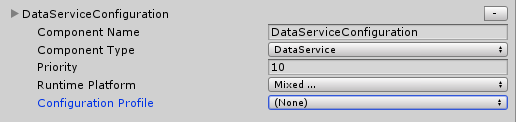
Then you have to click the Configuration Profile drop down, which unfortunately shows you all possible profiles, and you have to pick the one you need, which is DefaultDataServiceProfile, which is fortunately at the top of the list
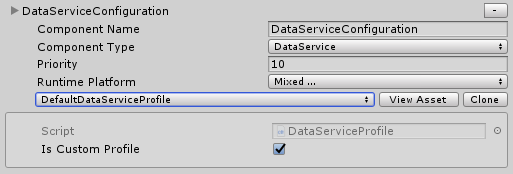
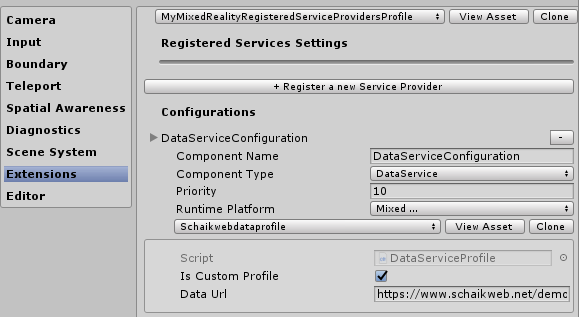
The end result should look like this:
Now the configuration stuff is finally done, and we are going to add some code.
The data and the data set
My simple sample is going to read a json file from the web and show the contents in the text. Therefore we need a data file, and a class to deserialize it in.
The data file sits here, and the class in which in can be deserialized looks like this
using Newtonsoft.Json;

namespace Json
{
    public class DemoData
    {
        [JsonProperty("firstName")]
        public string FirstName { get; set; }

        [JsonProperty("lastName")]
        public string LastName { get; set; }
    }
}
Configuration profile
So to make the configuration profile actually configurable, the DataServiceProfile class needs to be changed. We actually need to make a property to store an URL in. So, we add a serializable field and a read only property. Like this:
using System;
using UnityEngine;
using Microsoft.MixedReality.Toolkit;

namespace Services
{
    [MixedRealityServiceProfile(typeof(IDataService))]
    [CreateAssetMenu(fileName = "DataServiceProfile",
        menuName = "MixedRealityToolkit/DataService Configuration Profile")]
    public class DataServiceProfile : BaseMixedRealityProfile
    {
        [SerializeField]
        private string _dataUrl;

        public string DataUrl => _dataUrl;
    }
}
Added code in red/bold. If you go back to the inspector, you will see there is a Data Url field now added to the DataService profile.

So let's clone that default profile to SchaikwebProfile:
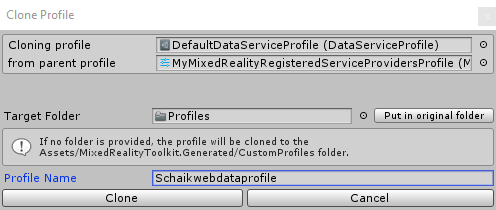
And enter for Data Url: https://www.schaikweb.net/demo/DemoData.json. Result:
You can now already see how you can quickly change from one configuration profile to another. You could actually clone the schaikwebprofile to another profile with different settings. Now it has only one property, but it can have a lot - and you can change from one setting to another just by selecting a new profile.
Implementing the actual service
The generated code for the service - a bit abbreviated - looks like this:
namespace Services
{
    [MixedRealityExtensionService(....
    public class DataService : BaseExtensionService, IDataService,
      IMixedRealityExtensionService
    {
        private DataServiceProfile dataServiceProfile;

        public DataService(IMixedRealityServiceRegistrar registrar, ....)
        {
            dataServiceProfile = (DataServiceProfile)profile;
        }

        public override void Initialize()
        {
            // Do service initialization here.
        }

        public override void Update()
        {
            // Do service updates here.
        }
    }
}
You can see the profile - the class holding the settings - is being fed into the constructor. Now we don't need Initialize and Update in this simple service, so we delete that and add this:
public async Task<IList<DemoData>> GetNames()
{
    using (var request = new HttpRequestMessage(HttpMethod.Post,
                                                dataServiceProfile.DataUrl))
    {
        using (var client = new HttpClient())
        {
            var response = await client.SendAsync(request);
            response.EnsureSuccessStatusCode();
            var result = await response.Content.ReadAsStringAsync();
            return JsonConvert.DeserializeObject<IList<DemoData>>(result);
        }
    }
}
Notice feeding in the URL from the dataserviceProfile!
Of course, we need to add this method to the IDataService interface as well:
public interface IDataService : IMixedRealityExtensionService
{
    Task<IList<DemoData>> GetNames();
}
And now some action...
So I created this little MonoBehaviour that actually accesses and uses the service.
public class NamesReader : MonoBehaviour
{
    [SerializeField]
    private TextMeshPro _text;

    private IDataService _dataService;
    void Start()
    {
        _dataService = MixedRealityToolkit.Instance.GetService<IDataService>();
    }

    void Update()
    {
        if (Input.GetKeyDown(KeyCode.Alpha3))
        {
            LoadNames();

        }
        if (Input.GetKeyDown(KeyCode.Alpha4))
        {
            _text.text = "";
        }
    }

    private async Task LoadNames()
    {
        var names = await _dataService.GetNames();
        _text.text = string.Join(Environment.NewLine,
            names.Select(p => $"{p.FirstName} {p.LastName}"));
    }
}
You can see how it simply gets a reference to the service in the start method. If you run this in the editor and you press "3" it will try to load the values from the service, and show them in as TextMeshPro _text (pressing "4" clears it again). The extremely spectacular result looks like this:

Basically a direct dump from the data file on my website:
[
    {
        "firstName": "Scott",
        "lastName": "Guthrie"
    },
    {
        "firstName": "Alex",
        "lastName": "Kipman"
    },
    {
        "firstName": "Scott",
        "lastName": "Hanselman"
    }
]
Mocking service access
Now let's assume, for the moment, this data service is extremely expensive, slow or otherwise limited in access. Or you need to test certain edge cases but the data service does not always give them when you need them. In other words, you want to make a fake service - a mock service. This, now, is very simple.
So let's build a mocking service:
[MixedRealityExtensionService(....
public class MockDataService : BaseExtensionService,
                               IDataService
{
    public MockDataService(IMixedRealityServiceRegistrar registrar, ....
    {
    }

    public async Task<IList<DemoData>> GetNames()
    {
        var data = new List<DemoData>
        {
            new DemoData {FirstName = "Joost", LastName = "van Schaik"},
            new DemoData {FirstName = "John", LastName = "Doe"},
            new DemoData {FirstName = "Kermit", LastName = "the Frog"},
        };
        await Task.Yield();
        return data;
    }
}
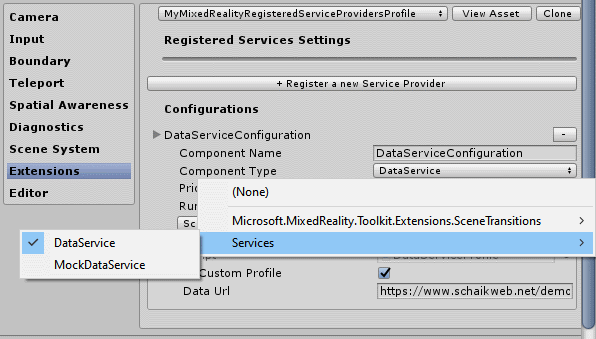
So we implement the same interface, but it does not take a DataServiceProfile configuration (although it perfectly could if I implemented the constructor). And now a second implementation version of the service appears in the drop down:
Sow you can quickly now change a single service from a production implementation to test implementation. The mock service will show this:

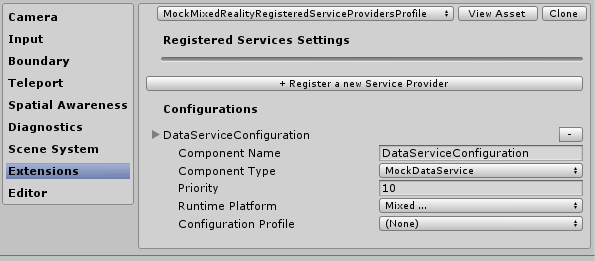
But what is even more cool is when you make a 'mock profile' from the RegisteredServiceProfile profile. For if you have like 20 services (and believe me, the number of services goes up pretty quickly) you can change from test to production by simply switching the profile. So I cloned the MyMixedRealityRegisteredServiceProvidersProfile itself to MockMixedRealityRegisteredServiceProvidersProfile and now, by simply switching profiles - you can change the whole extension service definition with one simple dropdown.
Conclusion
Extension services are a really powerful feature of the MRTK2, that can be used for central access of data services - typically stuff you would use Singletons for in ye olde HoloToolkit. But using service profiles also offers a quick and easy way to switch between real and mock implementations, brings an important part of enterprise level development into the traditional - ahem - more chaotic Unity development environment.
Demo project can be found here.


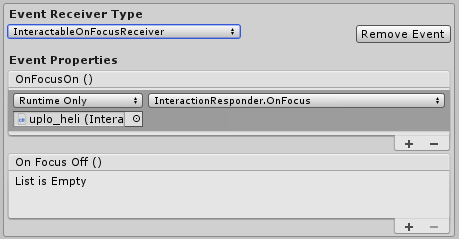
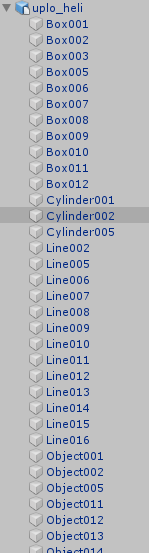 It consists of a lot of small objects. Default it does not even have a collider. You cannot add a Near Interaction Touchable on top of the object because it simply cannot find a collider. Now you can generate those on import, but that makes the object kind of heavy with regards to required processing power, and hooking all those colliders up up to their own Interaction Touchable is a lot of work.


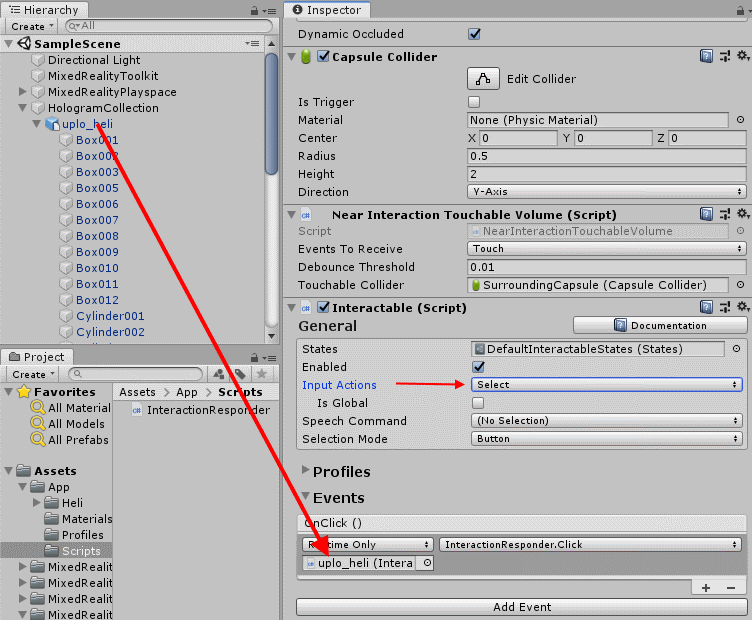


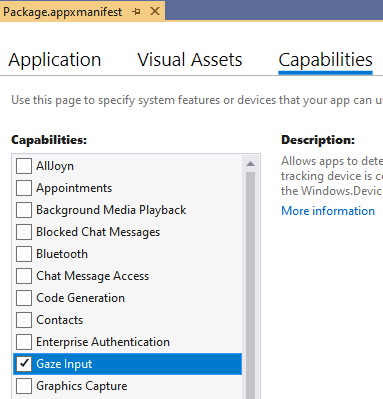 You will notice now the Gaze cursor turning up in the editor so you might thing you are done. Well, almost. There's the small matter of capabilities. C++ or not, the result is still a UWP app, and Gaze Input is a capability that you need to ask consent for. This, unfortunately, is not yet implemented in Unity. So after you generated the C++ app, you will need to open it in Visual Studio, select the Package.appmanifest file, and select there the Gaze Input capability.
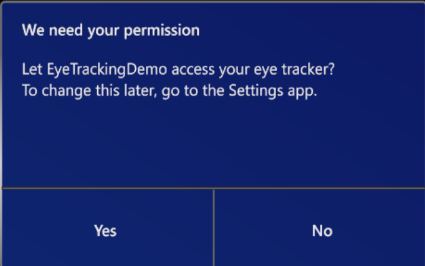 If you deploy the resulting solution to an emulator (or, if you are one of the lucky ones out there, an actual HoloLens 2) and it asks for your consent, you did it right.