Showing posts with label WinRt. Show all posts

26 February 2014

Drawing circles on Windows Phone Here Maps and Windows Store Bing Maps

One of the areas where the mapping systems for Windows Phone and Windows 8 are lacking, is the ability to draw circles. In particular in Windows Store apps, where you have the ability to use geofences, it would come in pretty handy to be able to draw the outline of a geofence (typically a circle, as this is the only supported type right now) on the map – if only for testing purposes.

To this end I have created a set of extension methods, both for Windows Phone 8 and for Windows Store apps. In the first case, they cannot be used to display the location of a geofence as there are no geofences in Windows Phone 8, but well – drawing circles may come in handy anyway.

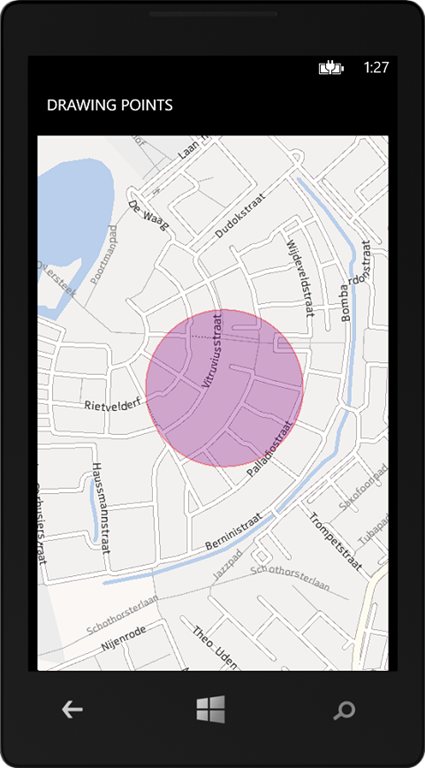
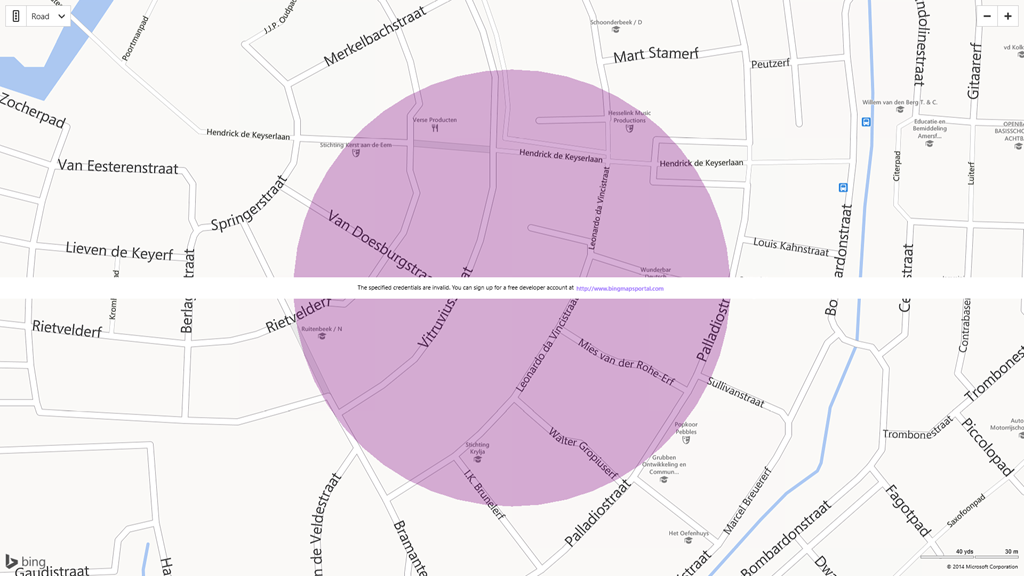
The results look something like this

imageScreenshot (16)

These are not circles – they look like circles. Basically they are just normal polygons, but their points are drawn in a form to resemble a circle. Would you zoom in very far, you would actually be able to see this. Would you calculate it’s surface area, you would actually find it  fraction smaller than a real circle area. But what the heck – it serves the purpose.

I have created a few extension methods to get this done. I will start with Windows Phone code - hey, I am not a Windows Phone MVP for nothing, right? ;-) -which starts off with this piece of math:

using System;
using System.Collections.Generic;
using System.Device.Location;

namespace WpWinNl.Utilities
{
  public static class GeoCoordinateExtensions
  {
    public static GeoCoordinate GetAtDistanceBearing(this GeoCoordinate point, 
                                                     double distance, double bearing)
    {
      const double degreesToRadian = Math.PI / 180.0;
      const double radianToDegrees = 180.0 / Math.PI;
      const double earthRadius = 6378137.0;

      var latA = point.Latitude * degreesToRadian;
      var lonA = point.Longitude * degreesToRadian;
      var angularDistance = distance / earthRadius;
      var trueCourse = bearing * degreesToRadian;

      var lat = Math.Asin(
          Math.Sin(latA) * Math.Cos(angularDistance) +
          Math.Cos(latA) * Math.Sin(angularDistance) * Math.Cos(trueCourse));

      var dlon = Math.Atan2(
          Math.Sin(trueCourse) * Math.Sin(angularDistance) * Math.Cos(latA),
          Math.Cos(angularDistance) - Math.Sin(latA) * Math.Sin(lat));

      var lon = ((lonA + dlon + Math.PI) % (Math.PI * 2)) - Math.PI;

      var result = new GeoCoordinate(lat * radianToDegrees, lon * radianToDegrees);

      return result;
    }
  }
}

This is a method that, given a coordinate, a distance in meters, and a bearing (in degrees) gives you another point. So a entering 50 for distance and 180 for bearing would give you a point 50 meters south of your original point. An impressive piece of math, if I may say so. Which I totally stole from here - as I am into maps, not so much into math. Having this, it’s pretty easy to add a second extension method:

public static IList<GeoCoordinate> GetCirclePoints(this GeoCoordinate center, 
                                   double radius, int nrOfPoints = 50)
{
  var angle = 360.0 / nrOfPoints;
  var locations = new List<GeoCoordinate>();
  for (var i = 0; i <= nrOfPoints; i++)
  {
    locations.Add(center.GetAtDistanceBearing(radius, angle * i));
  }
  return locations;
}

It divides the circle of 360 degrees in the number of points you want, and then simply adds points to the shape at the same distance but at every 360/points degrees. The higher the number of points, the more the shape will look like a real circle. Drawing the circle on a Windows Phone map is child’s play now:

void MainPageLoaded(object sender, RoutedEventArgs e)
{
  var location = new GeoCoordinate(52.181427, 5.399780);
  MyMap.Center = location;
  MyMap.ZoomLevel = 16;

  var fill = Colors.Purple;
  var stroke = Colors.Red;
  fill.A = 80;
  stroke.A = 80;
  var circle = new MapPolygon
  {
    StrokeThickness = 2,
    FillColor = fill,
    StrokeColor = stroke,
    StrokeDashed = false,
  };

  foreach( var p in location.GetCirclePoints(150))
  {
    circle.Path.Add(p);
  }

  MyMap.MapElements.Add(circle);
}

This draws a circle of 150 meters around my house. 

For Windows Store, the story is nearly the same. The differences are:

  1. You will need to install the Bing Maps SDK for Windows 8.1 Store apps
  2. The Bing Maps SDK does not understand System.Device.Location.GeoCoordinate you will need to make the extension method on Bing.Maps.Location

It’s very unfortunate that the mapping APIs for Windows Phone and Windows Store lack convergence even at the point of something as basic the naming of location types. I hope this will get more attention in the future, as mapping is something that I really care about - in case you had not noticed that from this blog ;-).

However, clever use of C# aliasing brings this convergence a bit closer. I changed the top of this file to

using System;
using System.Collections.Generic;
#if WINDOWS_PHONE
using GeoCoordinate = System.Device.Location.GeoCoordinate;
#else
using GeoCoordinate=Bing.Maps.Location;
#endif

et voilá, this file compiles under both Windows Phone and Windows Store (provided you have the Map SDK installed). You can forget about PCLs, but sharing code is definitely a possibility now as far as this little method goes.

Drawing a shape in the Windows Store app is now nearly the same:

void MainPageLoaded(object sender, RoutedEventArgs e)
{
  var location = new Location(52.181427, 5.399780);
  MyMap.Center = location;
  MyMap.ZoomLevel = 18;
  var fill = Colors.Purple;
  fill.A = 80;
  var circle = new MapPolygon
  {
   FillColor = fill,
  };

  foreach (var p in location.GetCirclePoints(150))
  {
    circle.Locations.Add(p);
  }

  var layer = new MapShapeLayer();
  layer.Shapes.Add(circle);

  MyMap.ShapeLayers.Add(layer);
}

Although attentive readers might notice there is no stroke color defined (as MapPolygon in Windows Store does not feature a separate outer shape border) and adding shapes to a map regrettably also works a bit differently. The API of both mapping systems definitely could benefit from some attention here. But anyway – it get’s the job done now at this point.

Full demo solution is downloadable here. One more time – to be able to compile this you will need to install the Bing Maps SDK for Windows 8.1 Store apps first!

04 December 2013

Building for both: a tap+send/Bluetooth connection helper for Windows Phone 8 AND Windows 8.1

On my way to the November 2013 MVP Summit, at Matthijs Hoekstra’s house in Sammamish, and back again in the Netherlands I spent considerable time trying to get my tap+send and Bluetooth connection helper to not only work on Windows 8.1 as well, but also to make it provide cross-platform communication between Windows Phone 8 and Windows 8.1. Unfortunately the MSDN PixPresenter sample suggest you can connect between Windows Phone and Windows 8 by sharing app ids in the PeerFinder.AlternateIdentities property, and so does the MSDN documentation on said property. That way, my friends, lay only mud pies and frustration. I don’t doubt that it will work for tap+send, but as the majority of the current Windows 8.x devices (including Microsoft’s own excellent Surface devices) do not include NFC capabilities, the chances of making a successful connection between a Windows Phone and a random Windows 8 computer using tap+send are very small.

I seem to have a thing with Italians these days – I had a lot of fun with a bunch of them at the Summit, and it was not until this Italian developer called Andrea Boschin pointed me to a recent blog post by him that I found a way out of this. Using this knowledge I adapted DevicePairConnectionHelper once again, so now it’s not only cross platform, but it can also connect between Windows Phone 8 and Windows 8.1. If you are completely new to this subject, I suggest you read the previous two articles about this subject as well.

What it can do

In the demo solution, that sports both a Windows 8.1 Store application and a Windows Phone 8 application, you will find a shared file DevicePairConnectionHelper2.cs containing the updated DevicePairConnectionHelper – now supporting  the following communication paths:

  • Windows Phone 8 to Windows Phone 8 – tap+send
  • Windows Phone 8 to Windows Phone 8 – Bluetooth browsing
  • Windows 8.1 to Windows 8.1 – WifiDirect browsing
  • Windows 8.1 to Windows Phone 8 – Bluetooth.

In theory it should support Windows 8.1 to Windows 8.1 over tap+send as well, but lacking even a single NFC enabled Windows 8.1 device, this is hard to test for me.

How to set it up and use it

A very important precondition– the devices can only find each other when the phone is paired to the Windows 8.1 computer. Now the odd thing is – as you have paired the phone to the computer, you will see that is “connected” on both the computer and the phone, for a very short time. And then it flashes off again, so they are not connected. This is a bit confusing, but it is normal. They now ‘know’ each other, and that is what’s important.

As far as the the updated DevicePairConnectionHelper goes, it works nearly the same as the previous one, but it has two extras, as far as using it is concerned.

  • In the constructor, you can now optionally provide a GUID that describes a Bluetooth Service
  • There is a new boolean property ConnectCrossPlatform that you can set to true – then the Window 8 phone will try to connect to a Windows 8 machine using Bluetooth.

To set it up, you have to take the following things into account:

  • In you Windows Phone 8 app manifest, you have to select the ID_CAP_PROXIMITY capability
  • In you Windows 8 app manifest, you will have to the following capabilities
    • Private Networks (Client & Server)
    • Proximity
  • After you have saved you manifest, you have to open the Package.appmanifest manually (right click, hit View Code) and add a Bluetooth rfcomm service. Andrea explains how this is done, and I repeat it here for completeness:
<Capabilities>
  <Capability Name="internetClient" />
  <Capability Name="privateNetworkClientServer" />
  <DeviceCapability Name="proximity" />
  <m2:DeviceCapability Name="bluetooth.rfcomm">
    <m2:Device Id="any">
      <m2:Function Type="serviceId:A7EA96BB-4F95-4A91-9FDD-3CE3CFF1D8BC" />
    </m2:Device>
  </m2:DeviceCapability>
</Capabilities>

The stuff in Italics is what you add – verbatim. Except for the serviceId. Make and id up yourself, generate a guid, but don’t copy this one. Don’t re-use it over applications. But keep it ready, for you will need it in your code.

So, in your Windows 8 app, you now create a DevicePairConnectionHelper and fire it off like this:

var d = new DevicePairConnectionHelper("A7EA96BB-4F95-4A91-9FDD-3CE3CFF1D8BC");
d.ConnectCrossPlatform = true;
d.Start(ConnectMethod.Browse);

And you do exactly the same on Windows Phone 8. Usually the best way to connect is:

  • Start both the Windows 8.1 and the Windows Phone 8 app.
  • First start connect on the Windows 8.1 computer. That usually pretty quickly returns with zero peers found, but it keeps advertising it’s service. Then hit connect on the Windows Phone 8
  • After some time – sometimes half a minute – the Windows Phone 8 gets the peers

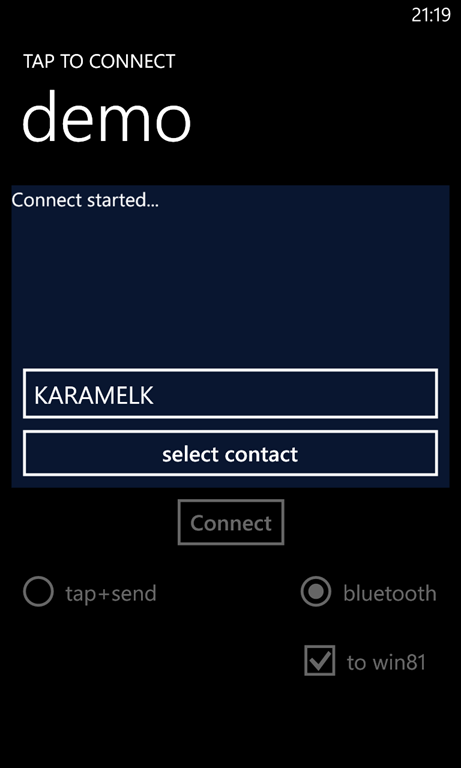
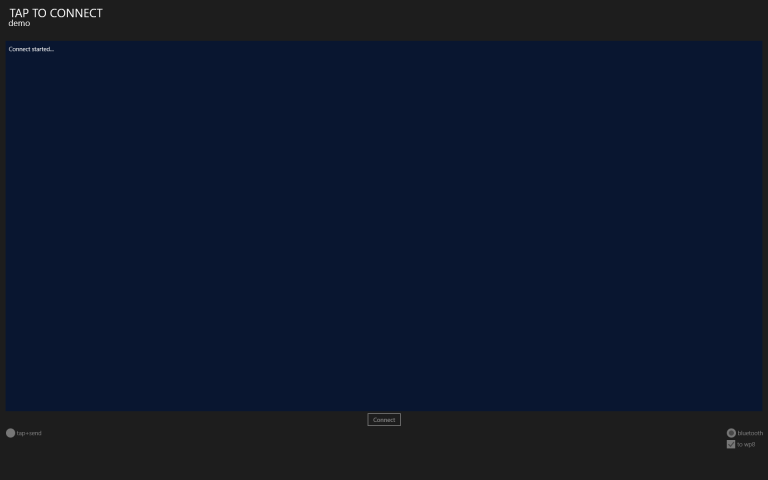
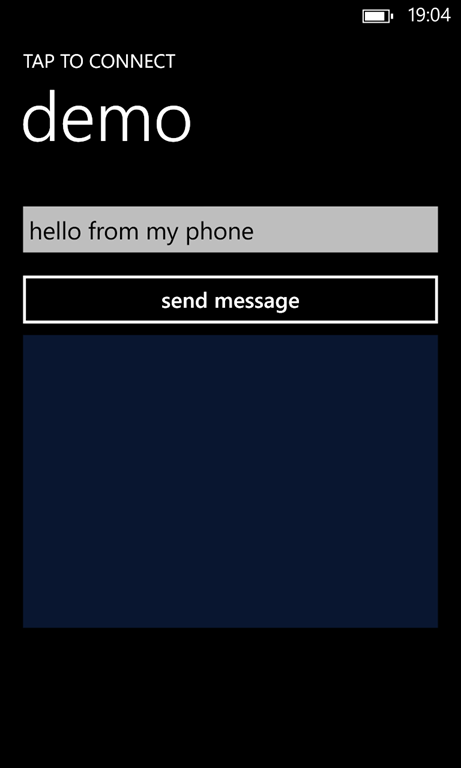
Below is the Windows 8 demo app as it has found my main desktop computer “Karamelk”) (that sports a Bluetooth dongle), and next to it the screen of the Windows 8.1 computer, still searching for contacts

wp_ss_20131204_0001     image

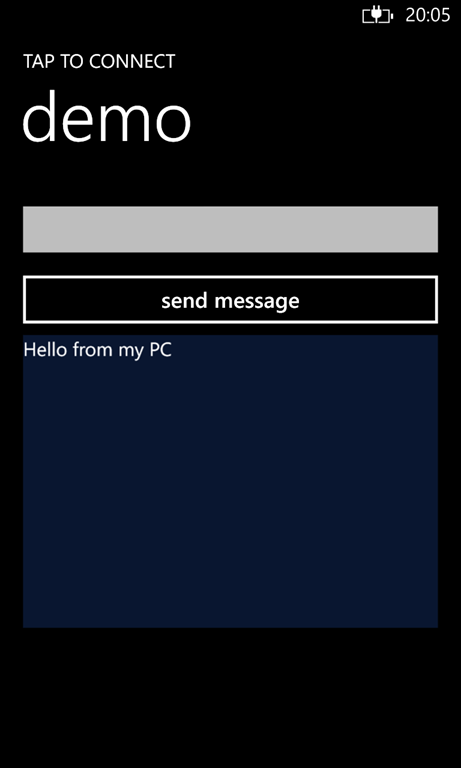
Then I hit “Select contact”. The first time, the Windows 8.1 you get a popup asking if the phone can use the connection. And if you give it permission, the apps connect, and it then it looks like this:

wp_ss_20131205_0001      imagewp_ss_20131205_0003

Now you can send messages back and forth.

You can still use this component to connect two Windows Phones to each other like you used to, and you now can also can connect two computers to each other and exchange messages.

A final piece of warning as far as usage is concerned – if you set ConnectCrossPlatform to true, the Windows Phone 8 will do cross-platform connect – but that’s the only thing it will do. Apparently it can’t find other Windows Phone 8 devices in that mode – just Windows 8.1 computers. For a Windows 8.1 computer, it does not matter – whether ConnectCrossPlatform is on or off, it will find other computers as well as phones. The text “Bluetooth” next to the right radio button is actually wrong on Windows 8.1, since the connection between computer actually uses WiFi Direct.


How it works

Just like last time – when I added Bluetooth – there was surprisingly little to change. The actual difficult stuff was already found out by Andrea ;-). It turns out that on the Windows Phone side you don’t have to do much, but on the Windows 8.1 side you have to resort to some trickery and use the Bluetooth Rfcomm API.

First of all we need a property to instruct the component to connect cross-platform (or not) and some stuff to hold the service GUID that we need:

public bool ConnectCrossPlatform { get; set; }

private Guid rfcommServiceUuid;

public string RfcommServiceUuid
{
  get
  {
    return rfcommServiceUuid == Guid.Empty ? null : rfcommServiceUuid.ToString();
  }
  set
  {
    Guid tmpGuid;
    if (Guid.TryParse(value, out tmpGuid))
    {
      rfcommServiceUuid = tmpGuid;
    }
  }
}

The RfcommServiceUuid property looks a bit complex, but it’s only to ensure there’s an actual GUID in it. Then comes the actual cross-platform connecting stuff. Most is just simply taken from Andrea, and for an explanation of what he is actually doing I kindly refer to his post (because I understand about half of it).

#if WINDOWS_PHONE
    private async Task InitBrowseWpToWin()
    {
      var t = new Task(() =>
      {
        PeerFinder.AlternateIdentities["Bluetooth:SDP"] = 
          rfcommServiceUuid.ToString();
      });
      t.Start();
      await t;
    }

    private void StopInitBrowseWpToWin()
    {
      if (PeerFinder.AlternateIdentities.ContainsKey("Bluetooth:SDP"))
      {
        PeerFinder.AlternateIdentities.Remove("Bluetooth:SDP");
      }
    }
#endif

#if NETFX_CORE
    // Code in this part largely based on 
    // http://www.silverlightshow.net/items/Windows-8.1-Play-with-Bluetooth-Rfcomm.aspx

    private const uint ServiceVersionAttributeId = 0x0300;
    private const byte ServiceVersionAttributeType = 0x0A;
    private const uint ServiceVersion = 200;

    private RfcommServiceProvider provider;

    private async Task InitBrowseWpToWin()
    {
      provider = await RfcommServiceProvider.CreateAsync(
                       RfcommServiceId.FromUuid(rfcommServiceUuid));

      var listener = new StreamSocketListener();
      listener.ConnectionReceived += HandleConnectionReceived;

      await listener.BindServiceNameAsync(
        provider.ServiceId.AsString(),
        SocketProtectionLevel.BluetoothEncryptionAllowNullAuthentication);

      using (var writer = new DataWriter())
      {
        writer.WriteByte(ServiceVersionAttributeType);
        writer.WriteUInt32(ServiceVersion);

        var data = writer.DetachBuffer();
        provider.SdpRawAttributes.Add(ServiceVersionAttributeId, data);
        provider.StartAdvertising(listener);
      }
    }

    private void HandleConnectionReceived(StreamSocketListener listener,
      StreamSocketListenerConnectionReceivedEventArgs args)
    {
      provider.StopAdvertising();
      listener.Dispose();
      DoConnect(args.Socket);
    }
    
    // Borrowed code ends
    
    private void StopInitBrowseWpToWin()
    {
      if (provider != null)
      {
        provider.StopAdvertising();
        provider = null;
      }
    }
#endif

Important to notice is that I use Bluetooth:SDP in stead of Bluetooth:Paired like Andrea does. If I use the paired option, I get a list of all devices paired to my phone, including my Jabra headset, my Surface Pro, a Beewi Mini Cooper Coupé Red I got on the last MVP Summit and the desktop computer that I try to connect to. I use SDP (Service Discovery Protocol) to find the device that actually provides the one service I am looking for – not so much a Bluetooth connection from a device that happens to be in the list of paired devices. Notice the Windows Store portion actually makes a “RfcommServiceProvider” with the Guid as identifier, and the Windows Phone portion sets that same Guid as a string to the AlternateIdentities.

Oh – the Windows Phone version of InitBrowseWpToWin method is a bit convoluted – it’s just a way to make whatever is inside async as well, so it’s compatible with the signature of the Windows 8.1 version.

Another important thing to notice is that the Window 8.1 part needs an extra using:

#if NETFX_CORE
using Windows.Devices.Bluetooth.Rfcomm;
#endif

Anyway, where it all starts is here: at the constructor. Not much has changed – there’s only the extra optional parameter that’s being recorded for future use:

public DevicePairConnectionHelper2(string crossPlatformServiceUid = null)
{
  RfcommServiceUuid = crossPlatformServiceUid;
  Messenger.Default.Register<NavigationMessage>(this, ProcessNavigationMessage);
  PeerFinder.TriggeredConnectionStateChanged += PeerFinderTriggeredConnectionStateChanged;
  PeerFinder.ConnectionRequested += PeerFinderConnectionRequested;
}

The Start method has been slightly adapted- it’s now async, to accommodate the async InitBrowseWpToWin method

public async Task Start(ConnectMethod connectMethod = ConnectMethod.Tap, 
   string displayAdvertiseName = null)
{
  Reset();
  connectMode = connectMethod;
  if (!string.IsNullOrEmpty(displayAdvertiseName))
  {
    PeerFinder.DisplayName = displayAdvertiseName;
  }

  try
  {
    PeerFinder.Start();
  }
  catch (Exception)
  {
    Debug.WriteLine("Peerfinder error");
  }

  // Enable browse
  if (connectMode == ConnectMethod.Browse)
  {
    if (ConnectCrossPlatform)
    {
      await InitBrowseWpToWin();
    }

    await PeerFinder.FindAllPeersAsync().AsTask().ContinueWith(p =>
    {
      if (!p.IsFaulted)
      {
        FirePeersFound(p.Result);
      }
    });
  }
}}

A couple of things have changed here – first of all, the whole component is reset in stead of just the PeerFinder, because there's now potentially much more set up now than just the PeerFinder. The start of the PeerFinder is now in a try-catch because on Windows 8.1 some combinations of parameters cause an exception – while still the connection is set up. This is a typical ‘yeah whatever works’ solution. Then the cross platform stuff is set up – if that is required, and I also check first if the result of the task that returns from the PeerFinder is not faulted, which I did not do in earlier versions either.

The most important piece of refactoring is the DoConnect method. In the old version there was one – now there are three overloads:

private void DoConnect(PeerInformation peerInformation)
{
#if WINDOWS_PHONE
  if (peerInformation.HostName != null)
  {
    DoConnect(peerInformation.HostName, peerInformation.ServiceName);
    return;
  }
#endif

  PeerFinder.ConnectAsync(peerInformation).AsTask().ContinueWith(p =>
  {
    if (!p.IsFaulted)
    {
      DoConnect(p.Result);
    }
    else
    {
      Debug.WriteLine("connection fault");
      FireConnectionStatusChanged(TriggeredConnectState.Failed);
    }
  });
}

private void DoConnect(HostName hostname, string serviceName)
{
  var streamSocket = new StreamSocket();
  streamSocket.ConnectAsync(hostname, serviceName).AsTask().ContinueWith((p) => 
                            DoConnect(streamSocket));
}

private void DoConnect(StreamSocket receivedSocket)
{
  socket = receivedSocket;
  StartListeningForMessages();
  PeerFinder.Stop();
  FireConnectionStatusChanged(TriggeredConnectState.Completed);
}

It is a bit complicated, but these three methods cover all scenario’s

  1. If a Windows Phone connects to a Windows Phone, it calls the first method. Since this is not a cross-platform call, the HostName will be null, so it will do PeerFinder.ConnectAsync, receive a StreamSocket and proceed to call the 3rd DoConnect method.
  2. If a Windows 8.1 computer connects a Windows 8.1 computer – ditto
  3. If a Windows Phone connects a Windows 8.1 computer – the Phone will fine find that the HostName (and ServiceId) will be set, so it calls the 2nd DoConnect method. This will proceed to connect to the service, as pass on the result StreamSocket again to the 3rd method
  4. The Window 8.1 computer, upon being connected by a Windows Phone, will get a callback in HandleConnectionReceived (see above, in Andrea’s code) which will immediately result in a StreamSocket, so it call the 3rd DoConnect immediately.

For good measure – the 2nd DoConnect method is actually never used in a Windows 8.1 application.

And that’s about what I needed to do. The changes to the sample app are very limited – I added a checkbox on both of them, and a wrapping ConnectCrossPlatform property that is set by said checkbox. Also a minor detail – the Reset method in the NfcConnectViewModel no longer stops the PeerFinder first. This is especially important for the Windows 8.1 app – it never finds the phone, but the phone is still trying to make a connection. If the PeerFinder on Windows 8.1 is already stopped, you get all kind of funky errors when you select the computer on the phone.

For those who find the discussion a bit arcane – there is, as always, a working demo solution for this article. It is built on top of my new not-yet-published WpWinNl library – that’s basically a cross-platform (no, not PCL, just a NuGet Package) version of the wp7nl library. Well as cross platform as it can be. Stay tuned, it will be available soon. But tackling this problem took a bit longer than I hoped, so I am a bit behind schedule

09 November 2013

Build for both-Reflection bits & pieces for Windows Phone 8 and Windows 8

This is a bit of an odd post – it’s the things I learned while porting SilverlightSerializer 2 from Windows Phone to Windows 8 Store apps code. For those who don’t know what that is – it’s a very fast serializer, created by the brilliant Mike Talbot that’s able to store complex objects graphs in a very compact binary format. I use it to store an app’s state by simply serializing the view model graph to storage. For my (now) only Windows Store app I made a half-*ssed attempt to convert the much simpler SilverlightSerializer  v1 last year – but that’s slower and much less capable – especially my port. I was very much in a hurry then, so I cut out everything I did not need.

Anyway – SilverlightSerializer is a big chunk of reflection code. To get it to work in Windows Store apps, I had to change quite a lot of things – but then again a lot less than I thought. Even more shocking was the fact it worked without any problems when I linked the adapted code back to my Windows Phone project. That’s the power of the common Windows Runtime – no #if WINDOWS_PHONE preprocessor statements here!

So anyway, here’s what I learned. I wrote it in a kind of boring old-new style, but I found very little on this subject on the web, so I hope this is useful for people digging into reflection on Windows Store apps and hitting the wall when trying to do it ‘the new way’.

Properties and Fields

Get an object’s properties:

  • Old code: Type.GetProperties()
  • New code: Type.GetRuntimeProperties()

Get a single property:

  • Old code: Type.GetProperty("MyProperty")
  • New code: Type.GetRuntimeProperty("MyProperty")

Get a property’s get method

  • Old code: PropertyInfo.GetGetMethod();
  • New code: PropertyInfo.GetMethod;

Get a property’s set method

  • Old code: PropertyInfo.GetSetMethod();
  • New code: PropertyInfo.SetMethod;

Get public non-static properties that can be get and set

  • Old code:Type.GetProperties(BindingFlags.Instance | BindingFlags.Public).
                          Where(p => p.GetSetMethod() != null));
  • New code:Type.GetRuntimeProperties().
                             Where(p=> p.GetMethod != null && p.SetMethod != null &&
                                         !p.SetMethod.IsStatic && !p.GetMethod.IsStatic &&
                                         p.GetMethod.IsPublic && p.SetMethod.IsPublic);

Get an object’s Fields:

  • Old code: Type.GetFields()
  • New code: Type.GetRuntimeFields()

Get a single Field:

  • Old code: Type.GetField("MyProperty")
  • New code: Type.GetRuntimeField("MyProperty")

You can already see two patterns here – in stead of GetXYZ you do GetRuntimeXYZ. This “Runtime” indicates all an objects has available on runtime – that is, both it’s own properties, methods etc. and those of it’s parents. The other pattern is that in the Windows Runtime there is a tendency to use properties in stead of zero-parameter get methods.

Attributes

Determine whether a property has a custom attribute or not

  • Old code: PropertyInfo.GetCustomAttributes(typeof(DoNotSerialize), true).Any()
  • New code: PropertyInfo.GetCustomAttribute<DoNotSerialize>(true) != null

Type info

Determine if a type is an enum

  • Old code: Type.IsEnum
  • New code: Type.GetTypeInfo().IsEnum

Determine if a type is a generic type

  • Old code: Type.IsGenericType
  • New code: Type.GetTypeInfo().IsGenericType

Determine a type’s generic arguments

  • Old code: Type.GetGenericArguments()
  • New code: Type.GetTypeInfo().GenericTypeArguments

Find a type’s default constructor

  • Old code:Type.GetConstructor(new Type[] { });
  • New code: Type.GetTypeInfo().DeclaredConstructors.
                            FirstOrDefault(p => !p.GetParameters().Any());

Determine if a type implements an interface

  • Old code: Type.GetInterface("IEnumerable", true) != null;
  • New code: GetTypeInfo().ImplementedInterfaces.FirstOrDefault(
                         p => string.Compare(p.Name, name, ignoreCase?
                         StringComparison.OrdinalIgnoreCase : StringComparison.Ordinal)==0);

I must admit being a bit lazy on this one – this was used quite a number of times in SilverlightSerializer, so I made the following extension method

using System;
using System.Linq;
using System.Reflection;

namespace WpWinNl.Utilities
{
  public static class TypeExtensions
  {
    public static Type GetInterface(this Type type, string name, bool ignoreCase)
    {
      return type.GetTypeInfo().ImplementedInterfaces.FirstOrDefault(
        p => string.Compare(p.Name, name, ignoreCase? 
            StringComparison.OrdinalIgnoreCase : StringComparison.Ordinal)==0) ;
    }
  }
}

and was done with it ;-). Beware – this is not something I recommend – making the new API compatible with the old. Rather, make it the other way around. But for porting existing code – especially code you did not write yourself – this can be a helpful way to save time.

Miscellaneous

Creating delegates

  • Old code: Delegate.CreateDelegate(typeof(DelegateType), MethodInfo);
  • New code: MethodInfo.CreateDelegate(typeof(DelegateType));

A MethodInfo is something you would get out of for instance PropertyInfo.GetMethod. I must admit to code in SilverlightSerializer is quite complex at this point, and I don’t understand the whole detail. But this seems to work, and I suggest people more interested in the details to have a look at the code. I will post the whole shebang soon.

Sorry, no sample this time ;-)

17 October 2013

Introducing Win8nl for Windows 8.1–kissing WinRtBehaviors goodbye

Updated November 11, 2013
It was at my very first MVP Summit in February 2012 that I learned that Windows 8 XAML was not to have any behaviors. I remember distinctly being very angry first, telling the presenter I would be “dead in the water”, then upon reflection, calming down, and deciding to find out if I could plug the hole myself. And so I did, with the help of (in order of appearance) Geert van Horrik, Filip Skakun, and András Velvárt.

WinRtBehaviors saw the light in Spring 2012, shortly after said Summit. With 4,634 downloads, it being used in well-known top apps like Shazam, and being specifically mentioned at the 2013 edition of TechDays in both Belgium and The Netherlands (much to the surprise of colleagues and friends visiting there, not to mention myself) – I think I quite made my mark in the Windows XAML stack.

I also learned the downsides of having such a successful library, i.e. a lot of support requests. But today Visual Studio 2013 was released, and along with it the final version of the Behaviors SDK, so I released a version of Win8nl – the library with ported Windows Phone code that I built on top of WinRtBehaviors – and I made a yet-to-release version of Catch’em Birds for Windows on it, that totally works (since very recently) on that new version of Win8nl. So the days of the old WinRtBehaviors warhorse are over.

Win8nl 1.0.9 still supports Windows 8.0 and still downloads WinRtBehaviors, but if you target your app for Windows 8.1 you will see that there’s not longer a reference made to it when you download the Nuget Package.

Part of the library are the classes Behavior and Behavior<T>. These have the following implementations:
using Windows.UI.Xaml;
using Microsoft.Xaml.Interactivity;

namespace Win8nl.Behaviors
{
  /// <summary>
  /// A base class for behaviors, can be used in native environments too
  /// </summary>
  /// <typeparam name="T"></typeparam>
  public abstract class Behavior : DependencyObject, IBehavior
  {
    public DependencyObject AssociatedObject { get; set; }

    public virtual void Attach(DependencyObject associatedObject)
    {
      AssociatedObject = associatedObject;
    }

    public virtual void Detach()
    {
    }
  }
}
This is a base class for environments where generics cannot be used - and the implementation for C# behaviors is then simple:
using Windows.UI.Xaml;

namespace Win8nl.Behaviors
{
  /// <summary>
  /// A base class for behaviors, to appear them to be identical to older frameworks
  /// </summary>
  /// <typeparam name="T"></typeparam>
  public abstract class Behavior<T> : Behavior where T: DependencyObject
  {
    [System.ComponentModel.EditorBrowsable(System.ComponentModel.EditorBrowsableState.Never)]
    public new T AssociatedObject { get; set; }

    public override void Attach(DependencyObject associatedObject)
    {
      base.Attach(associatedObject);
      this.AssociatedObject = (T)associatedObject;
      OnAttached();
    }

    public override  void Detach()
    {
      base.Detach();
      OnDetaching();
    }


    protected virtual void OnAttached()
    {
    }

    protected virtual void OnDetaching()
    {
    }

  }
}
Based upon this class, you can port your existing behaviors from WinRtBehaviors (or from any other XAML framework, for what matters, virtually without any code change. I wrote this code in the early days of August 2013, but kind of sat on it as I wanted it to be part of the new Win8nl library. I sat a bit on it too long, as Fons Sonnemans published a very similar solution in September, so I can’t really claim prior art, but let just say it’s a logical thing to do and great minds apparently think alike. I took the EditorBrowsable thing from him, never thought of that.

What you will also notice is that the ‘hero’ behaviors EventToCommandBehavior and EventToBoundCommandBehavior, although still present, are now marked as Obsolete.This is for a very simple reason: the framework now has a standard way of doing such things. Would you use something like this in Windows 8.0 XAML:
<WinRtBehaviors:Interaction.Behaviors>
  <Win8nl_Behavior:EventToBoundCommandBehavior Event="Loaded" 
    Command="{Binding StartGame}"/>
  <Win8nl_Behavior:EventToBoundCommandBehavior Event="Unloaded" 
    Command="{Binding SuspendGame}"/>
</WinRtBehaviors:Interaction.Behaviors>
Now you can achieve the same thing an EventTriggerBehavior combined with an InvokeCommandAction.
<interactivity:Interaction.Behaviors>
  <Core:EventTriggerBehavior EventName="Loaded">
    <Core:InvokeCommandAction Command="{Binding StartGame}"/>
</Core:EventTriggerBehavior>

<Core:EventTriggerBehavior EventName="Unloaded"> <Core:InvokeCommandAction Command="{Binding SuspendGame}"/> </Core:EventTriggerBehavior> </interactivity:Interaction.Behaviors>

Update November 11, 2013
InvokeCommandAction has a CommandParameter too that you can bind to and refer to in the usual way. An interesting and useful feature of InvokeCommandAction was pointed out to me by fellow MVP Morten Nielsen – if don’t specify a CommandParameter, it defaults to passing the event arguments of the trapped event to the command. So if you have for instance this

<interactivity:Interaction.Behaviors>
  <core:EventTriggerBehavior EventName="Tapped">
    <core:InvokeCommandAction Command="{Binding TappedCommand}"/>
  </core:EventTriggerBehavior>
</interactivity:Interaction.Behaviors>

Then this is still a valid command to intercept it – you just ignore the arguments

public ICommand TappedCommand
{
  get
  {
    return new RelayCommand(
        () =>
        {
          Debug.WriteLine ("Command tapped");
        });
  }
}

But this as well!

public ICommand TappedCommand
{
  get
  {
    return new RelayCommand<TappedRoutedEventArgs>(
        (p) =>
        {
          Debug.WriteLine ("Command tapped:" + p!=null);
        });
  }
}

And thus you can do something with the event arguments. So with InvokeCommandAction you can do everything you wanted to do with EventToBoundCommandBehavior.
(Update ends)
I would urge you to the utmost to no longer using EventToCommandBehavior and/or EventToBoundCommandBehavior from this day forward. Any support requests will simply be directed to this blog post ;).

Something I have been sitting on for very long – part of Catch’em Birds for Windows was a DataStateBehavior, which I basically cobbled together by reflecting into a Windows Phone 7 assembly, butchering stuff I didn’t need, understand or that did not compile, and finally arriving at something that kind of worked. For my goals. For obvious reasons I could not publish what was basically stolen and butchered Microsoft code and I am therefore very happy the Behavior SDK now has something to do the trick. If you now use DataStateBehavior in for instance a Windows Phone project like this:

<behaviors:Interaction.Behaviors>
  <behaviors_ic:DataStateBehavior Binding="{Binding IsGameOver}" 
     FalseState="GameNotOver" TrueState="GameOver" Value="true"/>
</behaviors:Interaction.Behaviors>
You can achieve the same effect by using this code:
<interactivity:Interaction.Behaviors>
  <Core:DataTriggerBehavior Binding="{Binding IsGameOver}" Value="True">
    <Core:GoToStateAction StateName="GameOver"/>
  </Core:DataTriggerBehavior>
  <Core:DataTriggerBehavior Binding="{Binding IsGameOver}" Value="False">
    <Core:GoToStateAction StateName="GameNotOver"/>
  </Core:DataTriggerBehavior>
</interactivity:Interaction.Behaviors>
Thus ends the story of WinRtBehaviors on October 17, 2013. I hope you have enjoyed it, and I also hope to have given you a clear migration path.

I wish the development team lots of luck with the support requests from especially my Belgian friends, who were quite ingenious in finding scenarios in which the EventToCommand behaviors did not work properly. The best one was something like “the behavior does not work if it’s in a data template from a resource file located in another assembly”. ;)

20 November 2012

Passing event arguments to the WinRT EventToCommandBehavior

This week my fellow MVP Scott Lovegrove contacted me and asked if and how he could pass the result of an event to my WinRT EventToCommandBehavior and/or EventToBoundCommandBehavior. I replied this was currently not supported, but that would not be hard to make. He acknowledged that, and asked if he could mail some code. Since I am not very possessive of ‘my’ libraries, and am a lazy as any programmer should be, I responded with giving him developer access to Win8nl. He actually took up the challenge, and submitted the code.

Both EventToCommandBehavior and EventToBoundCommandBehavior now sport an extra property:

public bool PassEventArgsToCommand { get; set; }

If you set this property to true and don’t use the CommandParameter property, the method firing the command will actually pass the captured event to the model. How this works, is pretty simple to see in EventToBoundCommandBehavior:

private void FireCommand(RoutedEventArgs routedEventArgs)
{
  if (Command != null && Command.CanExecute(CommandParameter))
  {
    if (PassEventArgsToCommand && CommandParameter == null)
    {
      Command.Execute(routedEventArgs);
    }
    else
    {
      Command.Execute(CommandParameter);
    }
  }
}

Red shows the additions. Usage of course is pretty simple:

<TextBlock Text="TextBlock" FontSize="48">
  <WinRtBehaviors:Interaction.Behaviors>
    <Behaviors:EventToBoundCommandBehavior Event="Tapped" 
      Command="{Binding TestCommand}" 
      PassEventArgsToCommand="true"/>
  </WinRtBehaviors:Interaction.Behaviors>
</TextBlock>

And then you have to define a command TestCommand like this in your model:

public ICommand TestCommand
{
  get
  {
    return new RelayCommand<TappedRoutedEventArgs>(
      (p) =>
        {
           Debug.WriteLine(p.PointerDeviceType);
        });
  }
}

This will write '”Mouse”, “Touch” or “Pen” in your output window, depending on what you use to tap. Of course this is not a very useful application of this technique, but it proves the point. If you don’t use PassEventArgsToCommand both behaviors will work as before.

Now as an architect I am not too fond of this technique, because it introduces user-interface related objects into the view model – I get a bit restless when I see something like “using Windows.UI.Xaml.Input” on top of a view model class. Be careful when you use this. On the other hand, a holier-than-thou attitude ain’t gonna help getting Window 8 apps shipped and so if this will help people, I am more than fine with that.;-)

Scott tells me this code is derived from Laurent Bugnion’s original code – I did not check, but I am going to take his word for it. At the time of this writing it’s part of Win8nl 1.0.6 and already available as Nuget package. Now I only have the problem that not every line of code comes from the Netherlands, so maybe I should indeed rename this package to Win8eu ;-)

As (almost) always, a demo solution can be found here

14 November 2012

A WinRT behavior to mimic EventToCommand (take 2)

(Updated with sample code January 19 2013)

Some time ago I posted a WinRT behavior to mimic EventToCommand. This behavior cunningly looked for the command name in the DataContext, but it occurred to me (and some blog post commenters as well) that it actually might be more logical skip all that skullduggery and let the developer bind to a command in stead of letting her/him provide its name as string and then go look for it.

Anyway, not wanting to break compatibility I added a new behavior to my win8nl library on CodePlex, very originally called EventToBoundCommandBehavior.

It’s working is very similar to the original EventToCommandBehavior. There are two notable differences:

  • The Command property is now no longer of type string but ICommand
  • The FireCommand method is now very simple:
private void FireCommand()
{
  if (Command != null && Command.CanExecute(CommandParameter))
  {
    Command.Execute(CommandParameter);
  }
}

Which goes to show that you can be too clever.

If you want to replace the original behavior for the new one – say, you used it like this

<TextBlock Text="TextBlock" FontSize="48">
  <WinRtBehaviors:Interaction.Behaviors>
    <Behaviors:EventToCommandBehavior Event="Tapped" 
      Command="TestCommand" 
      CommandParameter="{Binding TestProperty, Mode=TwoWay}"/>
  </WinRtBehaviors:Interaction.Behaviors>
</TextBlock>

Just go to the places marked red/underlined:

<TextBlock Text="TextBlock" FontSize="48">
  <WinRtBehaviors:Interaction.Behaviors>
    <Behaviors:EventToBoundCommandBehavior Event="Tapped" 
      Command="{Binding TestCommand}" 
      CommandParameter="{Binding TestProperty, Mode=TwoWay}"/>
  </WinRtBehaviors:Interaction.Behaviors>
</TextBlock>

Those who want to see the full source code of the new (and largely simplified) behavior can do so at http://win8nl.codeplex.com/SourceControl/changeset/view/20896#395786

Update: I’ve added some more sample code as a lot of people seem to struggle with the correct use of this behavior. Lots of time I get program problems like this: “I have a list in my view model and a command yet my command is not fired when then I tap the item”. The view model usually contains these properties:

public ObservableCollection Phones { get; set; }

public ICommand TappedCommand
{
  // code omitted
}

and the XAML is like this:

<Grid Background="{StaticResource ApplicationPageBackgroundThemeBrush}" 
  DataContext="{StaticResource DemoViewModel}">

  <GridView ItemsSource="{Binding Phones}" SelectionMode="None" 
     IsTapEnabled="True">
    <GridView.ItemTemplate>
      <DataTemplate>
        <Grid Width="350">
          <Grid.ColumnDefinitions>
            <ColumnDefinition/>
            <ColumnDefinition/>
          </Grid.ColumnDefinitions>
          <WinRtBehaviors:Interaction.Behaviors>
            <Behaviors:EventToBoundCommandBehavior 
              Command="{Binding TappedCommand}" 
              CommandParameter="{Binding}" Event="Tapped" />
          </WinRtBehaviors:Interaction.Behaviors>

          <TextBlock Text="{Binding Brand}"/>
          <TextBlock Text="{Binding Type}" Grid.Column="1"/>
        </Grid>
      </DataTemplate>
    </GridView.ItemTemplate>
  </GridView>
</Grid>

I this case, the programmer has lost track of what’s the exact data context. Happens all the time, even to me. I’ve used colors to depict the data context changes.

  • In the black code, DemoViewModel is the data context
  • In the red code, the ObserservableCollection Phones is the data context
  • In the blue code, a single Phone is the context.

So what this code tries to do is to call a command TappedCommand on class Phone in stead of DemoViewModel.So either the command needs to be in “Phone”, or the behavior’s binding must be updated like this:

<WinRtBehaviors:Interaction.Behaviors>
  <Behaviors:EventToBoundCommandBehavior 
    Command="{Binding TappedCommand, Source={StaticResource DemoViewModel}}" 
    CommandParameter="{Binding}" Event="Tapped" />
</WinRtBehaviors:Interaction.Behaviors>

Full working example can be found here.

03 October 2012

A WinRT behavior to start a storyboard on an event

Sometimes I get a bit distracted. In this article I mention a behavior that I wrote which starts a storyboard on an event, I even put in in the win8nl library – and then totally forget to blog about it, or even to announce it. So anyway, when Danny van Neyghem asked me about a problem that was almost solved by my behavior, I kinda remembered it, and that I totally forgot about it - and decided a) to improve it and b) to talk about it (well, write).

World, meet StartStoryboardBehavior. It’s a very simple behavior that has the following properties:

Storyboard The name of the Storyboard to start. Mandatory.
StartImmediately true = don’t wait for an event to start, just start the storyboard when the behavior is loaded. Optional; default is false
EventName The event of the AttachedObject that will initiate the start of the storyboard (e.g. ‘Click’ on a button). Ignored when StartImmediately  == true, mandatory otherwise
SearchTopDown Optional, default is true. If true, the behavior will start to search for your storyboard from the top of the visual tree. This is the scenario in which for instance clicking a button will initiate a storyboard that sits somewhere in the top of the page. If this value is set to false, the behavior will search from the attached object up. Choose this setting when you use the behavior to start a storyboard that’s sitting inside a template.

“SearchTopDown” was added just yet, and I hope it solves Danny’s problem. For those who just want to use the behavior: Nuget Win8nl and you have the behavior armed and ready. I’ve updated the package with the improved behavior already. For those who want to learn – well, it’s not rocket science but read on.

The first part is not so very interesting – just your basic setting up of the behavior, the wiring up and a wiring down of the events. The only interesting things happen in AssociatedObjectLoaded:

using System;
using System.Linq;
using Windows.UI.Xaml;
using WinRtBehaviors;
using System.Reflection;
using Win8nl.External;
using Windows.UI.Xaml.Media.Animation;
using System.Reactive.Linq;

namespace Win8nl.Behaviors
{
  public class StartStoryboardBehavior : Behavior<FrameworkElement>
  {
    protected override void OnAttached()
    {
      base.OnAttached();
      AssociatedObject.Loaded += AssociatedObjectLoaded;
    }
    
    protected override void OnDetaching()
    {
      AssociatedObject.Loaded -= AssociatedObjectLoaded;
      base.OnDetaching();
    }

    private void AssociatedObjectLoaded(object sender, RoutedEventArgs e)
    {
      if (StartImmediately)
      {
        StartStoryboard();
      }

      if (!string.IsNullOrWhiteSpace(EventName))
      {
        var evt = AssociatedObject.GetType().GetRuntimeEvent(EventName);
        if (evt != null)
        {
          Observable.FromEventPattern<RoutedEventArgs>(AssociatedObject, EventName)
            .Subscribe(se => StartStoryboard());
        }
      }
    }
  }
}

If StartImmediately is true, the storyboard is fired immediately. If not, the behavior tries to find an event with the name supplied in the EventName property and tries to attach a dynamic handler to it using Rx. Nothing new here, I already described this technique earlier - in the article where I announced this forgotten behavior :-)

More interesting is this funny little method, that’s basically one big Linq statement:

private Storyboard GetStoryBoardInVisualDescendents(FrameworkElement f)
{
  return f.GetVisualDescendents()
    .Where(p => p.Resources.ContainsKey(Storyboard) && p.Resources[Storyboard] is Storyboard)
    .Select(p => p.Resources[Storyboard] as Storyboard).FirstOrDefault();
}

It checks in all visual children’s resources for a storyboard with the name supplied in “Storyboard”, and if so, it selects it. It uses the extension method GetVisualDescendents to generate a list of all the children – all the way to the bottom of the visual tree from the element in “f”.

As for the behavior’s default behavior (meh), it searches top-down for the storyboard, using this method:

private void StartStoryboardTopDown()
{
  var root = AssociatedObject.GetVisualAncestors().Last() ?? AssociatedObject;

  var storyboard = GetStoryBoardInVisualDescendents(root);
  if (storyboard != null)
  {
    storyboard.Begin();
  }
}

In a nutshell: find the very last top object in the visual tree – that is the root. If that’s null, apparently the current associated object already is the root. Then it starts to search downward for the storyboard and if it finds it, it will fire it.

For the bottom-up strategy, another method is employed, with a very original name:

private void StartStoryboardBottomUp()
{
  var root = AssociatedObject;
  Storyboard storyboard;
  do
  {
    storyboard = GetStoryBoardInVisualDescendents(root);
    if (storyboard == null)
    {
      root = root.GetVisualParent();
    }
  } while (root != null && storyboard == null);

  if (storyboard != null)
  {
    storyboard.Begin();
  }
}

This method starts by trying to find the storyboard in the visual tree below the current associated object. If it doesn’t find it, in moves one level up and tries again. And another one. Till it a) finds the storyboard or b) runs out of levels. If a storyboard is found, then it fires it. Okay, so that’s a little inefficient, but it only happens upon firing the event.

The final pieces of the puzzle is StartStoryboard, which simply selects the method based upon the SearchTopDown value.

private void StartStoryboard()
{
  if( SearchTopDown)
  {
    StartStoryboardTopDown();
  }
  else
  {
    StartStoryboardBottomUp();
  }
}

And that’s all there is to it. I’ve omitted the declaration of the four (attached dependency) properties as that only bulks up this post with no actual value, and the complete listing can be found here on CodePlex if that helps you to get overview.

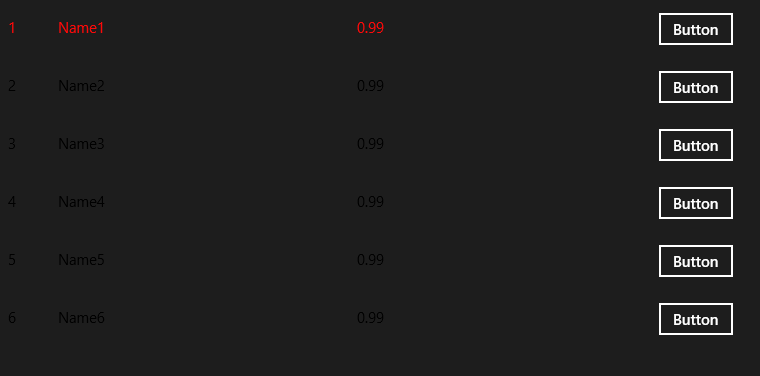
Screenshot8For those who love to see the behavior in action I created a little sample app, which shows a few items in a ListBox. At the end of each row there’s a button, and if you click that the color of three texts to the left is animated from black to red in about a second. That’s a storyboard being fired by the behavior. Very exiting ;-) - but it proves the point.

Enjoy! I hope this helps you with your Windows 8 development! Global Availability is coming, get cracking to get your stuff in the store!

26 September 2012

Data binding shapes to the WinRT Bing Maps control – coming from Windows Phone

Disclaimer: this is not a 101 article. It requires understanding of the basic idea about MVVM, data binding, the MVVMLight messenger, and the use of behavior in Windows 8 XAML.

Updated for RTM Bing Maps Control October 3 2012

MVVMLightwp7

Introduction
Let me get this straight: I don’t want you to wean off Windows Phone development – far from it. It’s value proposition is great, and it will become much greater still. This article is yet another way to show you how to carry over code and architecture principles between Microsoft’s great tile based operating systems. It’s all about re-using skills and code. C# and XAML code that is.

Those who have attended my talks about this subject during this year, have seen the application to the right popping up. Basically it generates shapes (be it points, lines or polygons) by data binding from ‘business objects’ - using MVVMLight view models. If you tap any of those shapes, a “SelectCommand” on the bound view model will be fired, and the view model will put itself on the MVVMLight Messenger. Some other view model will listen for those messages, and pop up the info window. The app shows gas stations (points), roadblocks (lines) and buildings (shapes). Don’t go look for the gas stations, they are not there and the fuel prices a way bit behind the (expensive) times, the roadblock are all but one fictional as well. Only the buildings are real – location wise that is. Sources of the original Windows Phone (7) application can be found here:

Windows Phone map binding recap
A quick recap: if you want to data bind to a Bing Maps control in Windows Phone, you will go about like this – first, you would define a data template for a layer:

<DataTemplate x:Key="RoadBlockViewModelTemplate">
  <Microsoft_Phone_Controls_Maps:MapPolyline Locations="{Binding Geometry}"
                         Stroke="#FF71FF00"
                         StrokeThickness="5">
    <i:Interaction.Triggers>
      <i:EventTrigger EventName="Tap">
        <GalaSoft_MvvmLight_Command:EventToCommand 
             Command="{Binding SelectCommand}" />
      </i:EventTrigger>
    </i:Interaction.Triggers>
  </Microsoft_Phone_Controls_Maps:MapPolyline>
</DataTemplate>
This would be able to make a line geometry from a viewmodel containing a “Geometry” attribute containing a LocationCollection object, and an ICommand “SelectCommand” that is executed when the user taps the line. Second, you would make a Bing Maps control, and define a layer like this.
<Microsoft_Phone_Controls_Maps:Map x:Name="map"
    CredentialsProvider="Your-credentials-here">
  <Microsoft_Phone_Controls_Maps:MapLayer 
     x:Name="MapLayer_RoadBlocks">
    <Microsoft_Phone_Controls_Maps:MapItemsControl 
      ItemsSource="{Binding RoadBlocks}" 
      ItemTemplate="{StaticResource RoadBlockViewModelTemplate}"/>
  </Microsoft_Phone_Controls_Maps:MapLayer>
</Microsoft_Phone_Controls_Maps:Map>;

The roadblock view model would look like this:

using System.Windows.Input;
using GalaSoft.MvvmLight;
using GalaSoft.MvvmLight.Command;
using GalaSoft.MvvmLight.Messaging;
using Microsoft.Phone.Controls.Maps;
using MvvmMaps.Logic.Models.GeoObjects;
using MvvmMaps.Logic.Models.Geometries;
using Wp7nl.Utilities;

namespace MvvmMaps.Logic.ViewModels
{
  public class RoadBlockViewModel : ViewModelBase
  {
    public RoadBlock Model { get; set; }

    // Some code omitted
[DoNotSerialize] public LocationCollection Geometry { get { var modelGeom = Model.Location as LineGeometry; return modelGeom.GetLocationCollection(); } set { var modelGeom = Model.Location as LineGeometry; modelGeom.SetLocationCollection(value); } } [DoNotSerialize] public ICommand SelectCommand { get { return new RelayCommand( () => Messenger.Default.Send(this), () => true); } } } }

Basically it comes down to a Geometry view model property that converts a business object geometry to and from something the Bing Maps control understands – a LocationCollection. This is a named collection that contains objects of type GeoCoordinate – your basic Lat/Lon container. As said above, when you tap select the MVVMLight Messenger just sets off the selected viewmodel, and ‘something’  should capture that message and handle it.

Going to Windows 8 – challenges
Now let’s re-use our skills on Windows 8. Simply put – in its current state, the data binding support for the Bing Maps SDK for Windows Store apps is pretty easy to describe with one word – non-existent. Some developers immediately go into the ‘blame-and-flame-the-Microsoft-dev-team’ mode when they encounter things like this. I think ‘CodePlex library’. I always see things like this as an intellectual challenge, a chance to contribute to the community, and fortunately there are more people thinking that way. My very smart fellow Dutch developer community member Dave Smits has created BindableRTMaps, which is very useful for binding point objects – but its shape support is a bit limited. Being a GIS professional and an MVVMLight junkie, I want the control to be able to generate geographical elements directly from view models, just like I was able to do in Windows Phone. I solved the data binding issue for shapes using a Behavior based upon my WinRtBehaviors library. Not quite surprising for those who know me.

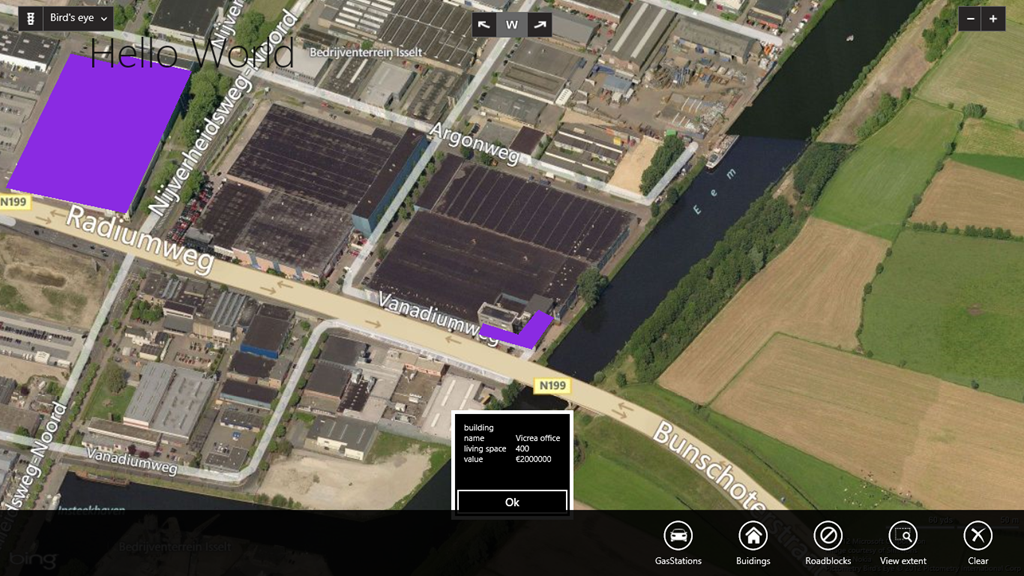
The result can be seen below:

Screenshot (9)

In the center, next to the river, the Vicrea offices, where I work. Say cheese fellows! ;-) As you can see, the shapes are beautifully re-projected when Birds’ Eye View is selected. This is the stuff that makes a GIS buff tick.

Researching the control I quickly found the following:

  • There’s no data binding support at all (as stated)
  • The shapes the control draws cannot be templated. They are apparently just projections of something native (as is the map itself).
  • There are only two kinds of shapes: MapPolygon and MapPolyline, both descending from MapShape, which in turn descends from DependencyObject – which is very fortunate, as I hope will become clear over the course of this article.

So I had the challenge to create something that can be put into XAML to still give the designer an amount of control how things appear, without having to resort to code.

Introducing MapShapeDrawBehavior 
The behavior I created is called MapShapeDrawBehavior  (I’ve never been one for original catchy names) and can be used like this:

<Maps:Map Credentials="Your-credentials-here">
  <WinRtBehaviors:Interaction.Behaviors>
  
    <MapBinding:MapShapeDrawBehavior 
       LayerName="Roadblocks" 
       ItemsSource="{Binding RoadBlocks, Mode=TwoWay}" 
       TapCommand="SelectCommand" PathPropertyName="Geometry" >
         <MapBinding:MapShapeDrawBehavior.ShapeDrawer>
           <MapBinding:MapPolylineDrawer Color="Green" Width="10"/>
         </MapBinding:MapShapeDrawBehavior.ShapeDrawer>
    </MapBinding:MapShapeDrawBehavior>
  
  </WinRtBehaviors:Interaction.Behaviors>
</Maps:Map>

For every category of objects there’s a layer – which translates to one behavior per list of objects, in this case the road blocks (the green line on the app sceenshot above). Then you need to define three things per layer:

  • What command in the item view model (in this case, a RoadBlockViewModel) must be fired when a MapShape’s only event – Tap – is called.
  • Which property in the item view model contains the Path – this is the terminology for a MapShape’s collection of points. This is, once again, of type LocationCollection. Only that’s no longer a collection of GeoCoordinate but of Location.
  • Finally, you need to define a drawer. A drawer is a concept I sucked from my own thumb – it determines how a collection of points is supposed to be transformed to something on the map. It’s my way to make something that’s not templatable more or less configurable.

I created three drawers out of the box: MapPolylineDrawer, MapPolygonDrawer, and MapStarDrawer. The last one draws a configurable star shaped polygon around a point – since map shapes cannot be points by themselves. A drawer needs only to implement one method:

public override MapShape CreateShape(object viewModel, LocationCollection path)

The basic drawers don’t do anything with the view model: they just take the settings from XAML. But if you want for instance your shapes having different colors based upon some view model property – say you want to color urban areas based upon their crime rate (what we GIS buffs call a thematic map) – you can write a little custom drawer.

If you just want to use the behavior you are done with reading. You can download the demo solution with code (which, incidentally, shows off a lot of more things than just binding to a map) and start playing around with it. Be aware of the following issues/caveats:

  • You will need to install the Bing Maps SDK for Windows Store apps first
  • When I moved the solution from my Big Black Box to my slate I had to delete and redo all references to Bing.Maps and “Bing Maps for C#, C++, or Visual Basic” (this was using the Beta, I don’t know if that still applies to the RTM version)
  • The control apparently contains native code, so you cannot build it for Any CPU.
  • The designer only works when you build for x86 (this still the case in RTM)

For the technically interested I will continue with some gory details.

The inner guts
The behavior itself is actually pretty big, so I won’t repeat all code verbatim; I will concentrate on the interesting parts.

First of all, I already mentioned the fact MapShape descends from DependencyObject. That spells ‘Ahoy, Attached Dependency Property ahead!’  to me. So I created two of those, one holding the name of the layer (I use those to find out which shapes belong to a single layer) and one in which I store the view model from which the shape was created:

using Windows.UI.Xaml;

namespace Win8nl.MapBinding
{
  public static class MapElementProperties
  {
    public static readonly DependencyProperty ViewModelProperty =
         DependencyProperty.RegisterAttached("ViewModel",
         typeof(object),
         typeof(MapElementProperties),
         new PropertyMetadata(default(object)));

    // Called when Property is retrieved
    public static object GetViewModel(DependencyObject obj)
    {
      return obj.GetValue(ViewModelProperty) as object;
    }

    // Called when Property is set
    public static void SetViewModel(
       DependencyObject obj,
       object value)
    {
      obj.SetValue(ViewModelProperty, value);
    }

    public static readonly DependencyProperty LayerNameProperty =
         DependencyProperty.RegisterAttached("LayerName",
         typeof(string),
         typeof(MapElementProperties),
         new PropertyMetadata(default(string)));

    // Called when Property is retrieved
    public static string GetLayerName(DependencyObject obj)
    {
      return obj.GetValue(LayerNameProperty) as string;
    }

    // Called when Property is set
    public static void SetLayerName(
       DependencyObject obj,
       string value)
    {
      obj.SetValue(LayerNameProperty, value);
    }
  }
}

The core of the MapShapeDrawBehavior self consists out of just five little methods, and the VERY core method is CreateShape. The behavior iterates over the object list databound to ItemsSource, and calls CreateShape for every view model:

/// <summary>
/// Creates a new shape
/// </summary>
/// <param name="viewModel"></param>
/// <returns></returns>
private MapShape CreateShape(object viewModel)
{
  var path = GetPathValue(viewModel);
  if (path != null && path.Any())
  {
    var newShape = CreateDrawable(viewModel, path);
    newShape.Tapped += ShapeTapped;

    MapElementProperties.SetViewModel(newShape, viewModel);
    MapElementProperties.SetLayerName(newShape, LayerName);

    // Listen to property changed event of geometry property to check 
    // if the shape needs tobe redrawed
    var evt = viewModel.GetType().GetRuntimeEvent("PropertyChanged");
    if (evt != null)
    {
      Observable
        .FromEventPattern<PropertyChangedEventArgs>(viewModel, "PropertyChanged")
        .Subscribe(se =>
                     {
                       if (se.EventArgs.PropertyName == PathPropertyName)
                       {
                         ReplaceShape(se.Sender);
                       }
                     });
    }
    return newShape;
  }
  return null;
}
  • First, it reads the view model property that holds the geometry (or at least, it tries that)
  • It creates the actual shape
  • It attaches an event listener to the “Tapped” event
  • It puts the view model and the layer name in attached dependency properties for said shape
  • Finally it attaches a property changed listener so that when the property that’s holding the view model’s geometry changes, the ReplaceShape method is called (which replaces the shape on the map – duh)

GetPathValue is a simple method that retrieves the view model’s geometry using reflection. Nothing special there:

private LocationCollection GetPathValue(object viewModel)
{
  if (viewModel != null)
  {
    var dcType = viewModel.GetType();

    var methodInfo = dcType.GetRuntimeMethod("get_" + PathPropertyName, 
                     new Type[0]);
    if (methodInfo != null)
    {
      return methodInfo.Invoke(viewModel, null) as LocationCollection;
    }
  }
  return null;
}

CreateDrawable – well that’s VERY simple. Get the drawer and let it decide how the shape will look

protected virtual MapShape CreateDrawable(object viewModel, LocationCollection path )
{
  var newShape = ShapeDrawer.CreateShape(viewModel, path);
  return newShape;
}

And finally ShapeTapped and FireViewModelCommand:

private void ShapeTapped(object sender, TappedRoutedEventArgs e)
{
  var shape = sender as MapShape;
  if( shape != null )
  {
    var viewModel = MapElementProperties.GetViewModel(shape);
    if( viewModel != null )
    {
      FireViewmodelCommand(viewModel, TapCommand);
    }
  }
}

private void FireViewmodelCommand(object viewModel, string commandName)
{
  if (viewModel != null && !string.IsNullOrWhiteSpace(commandName))
  {
    var dcType = viewModel.GetType();
    var commandGetter = dcType.GetRuntimeMethod("get_" + commandName, new Type[0]);
    if (commandGetter != null)
    {
      var command = commandGetter.Invoke(viewModel, null) as ICommand;
      if (command != null)
      {
        command.Execute(viewModel);
      }
    }
  }
}

ShapeTapped checks if it the object sending the event is actually a shape, then tries to retrieve a view model from the attached dependency property, and calls FireViewModelCommand on it. Which basically is directly ripped from my earlier EventToCommandBehavior. And then the circle is round again – user taps, view model command is called (just as Laurent Bugnion’s EventToCommand trigger did for Windows Phone) and the view model takes it further just like before.

There’s more to this behavior, but mostly it’s just reacting to events that occur when the ObservableCollection ItemsSource changes.

Some concluding remarks
Of course this behavior was geared to make the code I already had as much reusable as possible, but I think the way WinRT XAML apps and Windows Phone apps can be put together are remarkably similar – provided you make good use of MVVM and keep your code as clean as possible. So what did I have to do to move over my business and view model code to get this working? Well not very much, actually.

  • A tiny thing in my model library because I was so clever to use a BackgroundWorker somewhere in my models – which is not supported in WinRt
  • The Gas station view model was changed to do the conversion form business object geometry to Bing Maps’ Location in stead of the converter I originally - because my solution does not support converters.
  • I had to change some name spaces and data types. Mainly GeoCoordinate was now called Location.
  • Oh yeah – in stead of "clr-namespace" I had to use "using" for declaring namespaces in XAML. I used ReSharper toalt-enter trough the errors and add the namespaces almost automatically.

And that was about it. Of course, the code in it was quite trivial, but still. On the XAML side things were a bit more complicated:

  • Converters and Attached Dependency Properties were carried over with minimal changes.
  • I had to trash my geometry templates and had to write the behavior to emulate the templates – in a way, which admittedly was no small feat. But that’s a hole that only needs to be plugged once, and can now act as a base for possible better solutions.
  • I had to do some fiddling around with the DataTemplateSelector – that works a wee bit different, and will be subject of a future blog post.
  • ‘Tombstoning’ works a bit differently, but quite analogous. Been there, done that, wrote the blogpost.
  • The App Bar on Windows 8 has a lot more possibilities. And – thank Saint Sinofsky and his minions – it supports data binding out of the box. Moving from Windows Phone app bars to Windows 8 app bars is quite easy. Provided you used the BindableApplicationbar and MVVM of course ;-) 
  • I kinda 1:1 copied the data window (the popup with alphanumeric data that appears when you tap a shape) – that worked remarkably well, but you might want to do something about the styling for a real-world application. The data window is a wee bit small now and does fit in styling wise ;-)

This is still a work in progress, but I think for basic shape data binding this is already very usable. The Bing Maps control is very fast, courtesy of native code, no doubt. I hope this will help people.

Once again, for those who don’t feel scrolling all the way up: the source code. Also updated for RTM. Enjoy!

10 August 2012

A WinRT behavior to turn a FlipView into a kind of Windows 8 Panorama

IC425813(UPDATED for RTM August 18 2012)
One of the most beautiful controls of Windows Phone is the Panorama. It’s ideal for showing a lot related content on a small screen and enable the user to easily pan trough it. A visual cue for ‘there is more’ is provided by showing a little part of the next panel to the very right of the current data. A typical example is showed right.

It’s also one of the most abused controls (guilty as charged Your Honor), but still I wanted to port Catch’em Birds to Windows 8 – and I found out there was no ready-to-use control. After fighting with ScrollViewers and GridViewers and whatnot I came to this very simple behavior, which basically takes a FlipView and hammers it into a kind of Panorama.

Now the FlipView is designed to be a full-screen control so the behavior basically walks past all the items in the FlipView, shrinks them horizontally by a configurable percentage of the screen, and displaces the ‘next’ panel a little to the left (making it appear at the right side of the screen on the current panel). To make this look a little bit more fast and fluid, I have made the displacement itself animated, so that the ‘next’ screen not so much snaps as glides into view. The overall effect looks pretty nice to me. I hope Microsoft will think so as well, as my app is up for an App Excellence Lab soon ;-)
In my app it looks like this. I still lack a decent screen recorder for Windows 8, so I took out the video camera

So this behavior, most originally called “FlipViewPanoramaBehavior” is of course based upon my earlier WinRtBehaviors CodePlex project. It starts out like this, with the following dependency properties:
using System;
using System.Collections.Generic;
using System.Linq;
using System.Threading.Tasks;
using Win8nl.External;
using Win8nl.Utilities;
using WinRtBehaviors;
using Windows.Foundation;
using Windows.UI.Xaml;
using Windows.UI.Xaml.Controls;
using Windows.UI.Xaml.Media;
using Windows.UI.Xaml.Media.Animation;

namespace Win8nl.Behaviors
{
  /// <summary>
  /// A behavior to turn a FlipView into a kind of panorama
  /// </summary>
  public class FlipViewPanoramaBehavior : Behavior<FlipView>
  {
    #region AnimationTime

    /// <summary>
    /// AnimationTime Property name
    /// </summary>
    public const string AnimationTimePropertyName = "AnimationTime";

    public int AnimationTime
    {
      get { return (int)GetValue(AnimationTimeProperty); }
      set { SetValue(AnimationTimeProperty, value); }
    }

    /// <summary>
    /// AnimationTime Property definition
    /// </summary>
    public static readonly DependencyProperty AnimationTimeProperty = 
      DependencyProperty.Register(
        AnimationTimePropertyName,
        typeof(int),
        typeof(FlipViewPanoramaBehavior),
        new PropertyMetadata(250));

    #endregion

    #region NextPanelScreenPercentage

    /// <summary>
    /// NextPanelScreenPercentage Property name
    /// </summary>
    public const string NextPanelScreenPercentagePropertyName = 
      "NextPanelScreenPercentage";

    public double NextPanelScreenPercentage
    {
      get { return (double)GetValue(NextPanelScreenPercentageProperty); }
      set { SetValue(NextPanelScreenPercentageProperty, value); }
    }

    /// <summary>
    /// NextPanelScreenPercentage Property definition
    /// </summary>
    public static readonly DependencyProperty NextPanelScreenPercentageProperty = 
      DependencyProperty.Register(
        NextPanelScreenPercentagePropertyName,
        typeof(double),
        typeof(FlipViewPanoramaBehavior),
        new PropertyMetadata(10.0));
    #endregion
  }
}
So “AnimationTime” is the number of milliseconds the behavior takes to glide the next panel into view, and NextPanelScreenPercentage is an indication of how much screen real estate the next panel will take. Nothing special here yet.

If I want to muck around with a FlipView contents, I first have to find these contents. With some breakpoints and watches I found out I could use the following code to find the FlipViewItems:
/// <summary>
/// Find all Flip view items
/// </summary>
/// <returns></returns>
private List<FlipViewItem> GetFlipViewItems()
{
  var grid = AssociatedObject.GetVisualChildren().FirstOrDefault();
  if (grid != null)
  {
    return grid.GetVisualDescendents().OfType<FlipViewItem>().ToList();
  }
  return null;
}
Attentive readers might observe that neither GetVisualChildren nor GetVisualDescendents are part of the WinRT api, which is perfectly correct – they come from the VisualTreeHelperExtensions I ported from Windows Phone some time ago. Don’t start to download this stuff and build it together yourself – wait till the end and I will show the lazy way to do this.

Anyway – I wanted to move the FlipView’s contents fluently. That means I will use some Storyboards to work on Translations. So we identify the contents of each FlipViewItem and set its fist visual child’s Rendertransform to CompositeTransform, if that’s not already present:
/// <summary>
/// At compositions transforms to every item within every flip view item
/// </summary>
private void AddTranslates()
{
  var items = GetFlipViewItems();
  if (items != null && items.Count > 1)
  {
    foreach (var item in items)
    {
      var firstChild = item.GetVisualChild(0);
      if (!(firstChild.RenderTransform is CompositeTransform))
      {
        firstChild.RenderTransform = new CompositeTransform();
        firstChild.RenderTransformOrigin = new Point(0.5, 0.5);
      }
    }
  }
}
This assumes every FlipViewItem contains just one child. You better make sure it does for this to work, so put a Grid around it if you need more than one thing to sit in there.

Now the core of the whole behavior is this one piece of code:
/// <summary>
/// Does the actual repositioning and sizing of the items displayed in the Flipview
/// </summary>
private void SizePosFlipViewItems()
{
  AddTranslates(); // <-- moved from AssociatedObjectLoaded for RTM
  var size = AssociatedObject.ActualWidth*(NextPanelScreenPercentage/100);
  var shift = size - 15;

  var items = GetFlipViewItems();
  if (items != null && items.Count > 1)
  {
    // Make all items a bit smaller and make sure they are aligned left
    foreach (var item in items)
    {
      item.GetVisualChild(0).HorizontalAlignment = HorizontalAlignment.Left;
      item.GetVisualChild(0).Width = items[0].ActualWidth - size;
    }

    var selectedIndex = AssociatedObject.SelectedIndex;

    if (selectedIndex > 0)
    {
      StartTranslateStoryBoard(0, 0, 
                               items[selectedIndex - 1].GetVisualChild(0), 0);
    }

    StartTranslateStoryBoard(0, 0, items[selectedIndex].GetVisualChild(0), 
                             AnimationTime);

    if (selectedIndex + 1 < items.Count)
    {
      StartTranslateStoryBoard(-shift, 0,
                                items[selectedIndex + 1].GetVisualChild(0), 
                                AnimationTime);
    }
  }
}
First it calculates the new size of the FlipViewItems, and then it calculates how much it can shift the ‘next panel’ – basically, how much room is there between this panel and the next. This is currently a hard coded number, but feel free to make that a property as well ;-).

Then, for every FlipViewItem it makes the first visual child “size” smaller, and makes sure it’s aligned to the left (so space comes free and the right side). Then:
  1. It moves the panel that just disappeared to the left (if any) back  to it’s normal position, in no time (i.e. not animated – it’s invisible to the leftanyway, so why bother).
  2. It moves the current panel to its normal position, but it animates it. This is because if it’s moved in from the left, it moves a bit too far, as you might have noticed in the movie – so it glides back
  3. It moves the next panel (if any) a little bit to the left – animated, so it glides into view on the right hand side of the screen.
Now of course there is the slight matter of the method that make the storyboards to make it happen:
private static void StartTranslateStoryBoard(double desiredX, double desiredY, 
                                             FrameworkElement fe, int time)
{
  var translatePoint = fe.GetTranslatePoint();
  var destinationPoint = new Point(desiredX, desiredY);
  if (destinationPoint.DistanceFrom(translatePoint) > 1)
  {
    var storyboard = new Storyboard { FillBehavior = FillBehavior.HoldEnd };
    storyboard.AddTranslationAnimation(
         fe, translatePoint, destinationPoint,
         new Duration(TimeSpan.FromMilliseconds(time)),
         new CubicEase { EasingMode = EasingMode.EaseOut });
    storyboard.Begin();
  }
}
Once again, I use some extension methods from code ported from Windows Phone in the article I mentioned before, I underlined them to make them distinguishable from the standard API. Basically: this method accepts a FrameworkElement and moves it to a desired position in a desired time, using a storyboard that animates a translation. That is to say, unless it is already in that desired position. I think I will make this into a separate extension method in a utilities library one day but for the moment it’s doing fine.

All that’s left now is some wiring up, I cobbled that all together in one code block:
protected override void OnAttached()
{
  AssociatedObject.Loaded += AssociatedObjectLoaded;
  base.OnAttached();
}
protected override void OnDetaching()
{
  AssociatedObject.Loaded -= AssociatedObjectLoaded;
  AssociatedObject.SelectionChanged -= AssociatedObjectSelectionChanged;
  AssociatedObject.SizeChanged -= AssociatedObjectSizeChanged;
}

private void AssociatedObjectLoaded(object sender, RoutedEventArgs e)
{
  //AddTranslates(); deleted for RTM
  SizePosFlipViewItems();
  AssociatedObject.SelectionChanged += AssociatedObjectSelectionChanged;
  AssociatedObject.SizeChanged += AssociatedObjectSizeChanged;
}

private async void AssociatedObjectSelectionChanged(object sender, 
                                                    SelectionChangedEventArgs e)
{
  await Task.Delay(250); // Updated after bug report from SCPRedMage
  SizePosFlipViewItems();
}

private async void AssociatedObjectSizeChanged(object sender, 
                                               SizeChangedEventArgs e)
{
  await Task.Delay(250);
  SizePosFlipViewItems();
}
OnAttached and OnDetaching do their usual basic wiring and unwiring of events.
When the AssociatedObject (i.e. the FlipView) is first loaded the FlipViewItems’ first child gets their CompositeTransforms, then the initial screen layout is created by calling SizePosFlipViewItems. Then two events are wired up:
  • SelectionChanged
  • SizeChanged
Now the first one is logical – when the user selects the next panel (i.e. he scrolls it in from the left or right) the panels need to be arrange again so that the newly selected panel stays in view (it scrolls too much to the right, remember) and the ‘new’ next panel comes into view at the left hand side of the screen.

The SizeChanged intercept is necessary for when the user rotates his screen or snaps the application. For then the size of the screen changes, and the portion of the screen that the next panel may use is considerably smaller – in pixels. In my app this is taken care of by a Visual State Manager that listens to page events – basically something stolen from the LayoutAwarePage that’s in every template project – but that takes a while. Now I know I am going to be lambasted for this (and I have a pretty good idea by whom), but to solve this the SizeChanged handler waits a bit for actually calling SizePosFlipViewItems. And to prevent UI blocking I interestingly abused Task.Delay for that. It’s crude, but it works. As you may have seen in the movie when I snapped the app.

So there you have it. The code works, you have seen it in action. Its usage is ridicilously simple: make a FlipView, add items, and add this behavior to the FlipView. Done. You can download the the behavior here but you will need quite some base libs to get it working – as it uses a lot of my win8nl library on CodePlex. If you want to go the easy and quick way: just use the Win8nl NuGet package. That will get you the behavior and all the prerequisites, including MVVMLight.

Be aware that win8nl now uses the Reactive extensions. They are included in the NuGet package and they will come with it as a dependency

UPDATE: Please note there is a tiny code change since original publication: due to Microsoft optimizing the FlipView not all elements are initially loaded, so the check if every FlipViewItem child has a CompositeTransform has to performed at every manipulation.

UPDATE 2: There's a tiny update to AssociatedObjectSelectionChanged. And those who want a simple working sample, download the sources from codeplex and fire up FlipViewTest.XAML as the start page.