


Intro
My relation with Unity is a complex one. I adore the development environment. It allows me to weave magic and create awesome HoloLens and Windows Mixed Reality apps with it with an ease that defies imagination for someone who never tried it. I also have cursed them to the seventh ring of hell for the way the move (too) fast and break things. Some time ago Unity announced they would do away with the .NET backend. This does not mean you can't develop in C# anymore - you still do, but debugging becomes quite a bit more complicated. You can find how you can do it in various articles, forum posts, etc. They all have part of the story but not everything. I hope this fills the gap and shows the whole road to IL2CPP debugging in an easy to find article.
Context
Typically, when you build an app for Mixed Reality, you have a solution with C# code that you use while working inside the Unity Editor. You use this for typing code and trying things out. I tend to call this "the Unity solution" or "the editor solution". It is not a runnable or deployable app, but you can attach the Visual Studio debugger to the Unity editor by pressing Start in Visual Studio, and the the play button in Unity. Breakpoints will be hit, you can set watches, all of it. Very neat.
When you are done or want to test with a device, you build the app. This generates another solution (I call that the deployment solution) that actually is an UWP app. You can deploy that to a HoloLens or to your PC with Mixed Reality headset attached. This is essentially the same code but in a different solution. The nice part of that is that if you compile it for debug, you can also put in breakpoints and analyze code on a running device. Bonus: if you change just some code you don't have to rebuild the deployment solution over and over again to do another test on the device.
Enter IL2CPP (and bit of a rant, feel free to skip)
Unity, in their wisdom, have decided the deployment solutions in C# are too slow, they have deprecated the .NET 'backend', and so in stead of generating a C# UWP solution, they generate a C++ UWP solution. If you build, your C# code will be rewritten in C++, you will need to compile that C++ and deploy the resulting app to your device. Compilation takes a whole lot longer, if you change as much as a comma you need to build the whole deployment solution again, and the actual running code (C++) no longer resembles any code you have written yourself. And when they released this, you could also forget about debugging your C# code in a running app. Unity did not only move the cheese, they actually blew up part of the whole cheese storehouse.
With Unity 2018.2.x - they've basically sent over some carpenters to cover up the hole with plywood at plaster. And now you can sort-of debug your C# code again. But it's a complicated and rather cumbersome process.
Brave new world - requirements
I installed all of Desktop and UWP C++ development bits, probably a bit over the top.
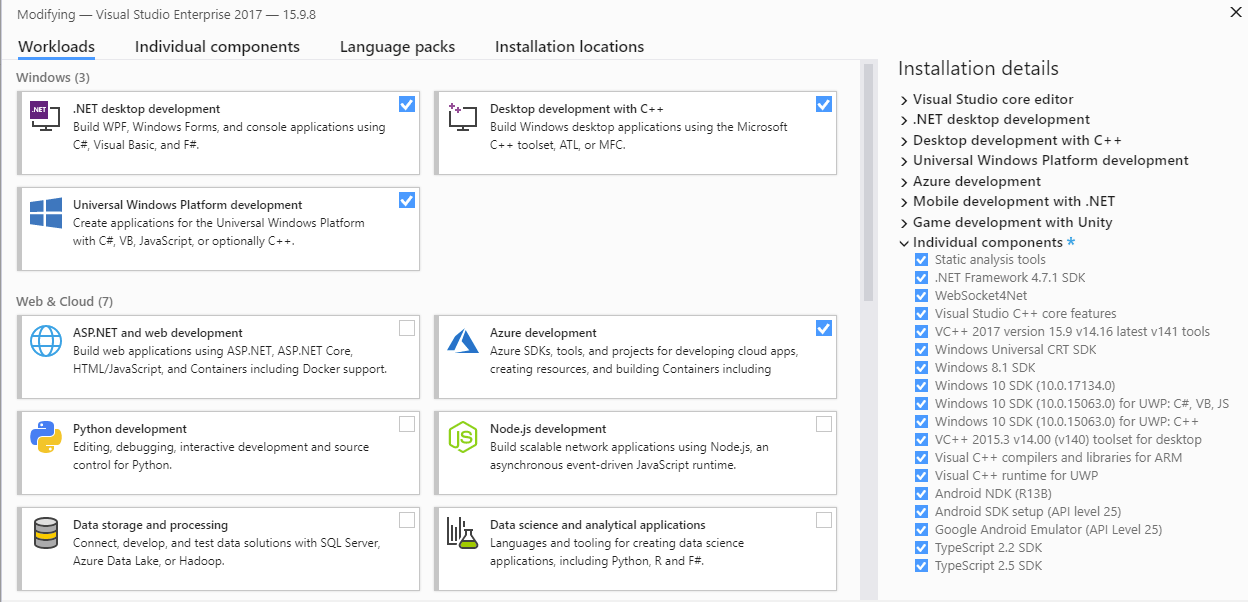
At one point I got complaints about the "VC++ 2015 (140) toolset" missing while compiling so I added that too. This is apparently something the Unity toolchain needs. Maybe this can be more efficient, needing less of this stuff, but this works on my machine. I really don't know anything about C++ development. I tried somewhere in the mid 90s and failed miserably.
Also crucial: install the Visual Studio tools for Unity, but chances are you already have, because we needed this too met .NET backends:
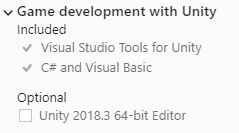
I did uncheck the Unity Editor option, as I used Unity 2018.3.6f1 in stead of the one Visual Studio tries to install. I tend to manage my Unity installs via the Unity Hub.
Build settings
In Unity, I use this settings for building the debuggable C++ app
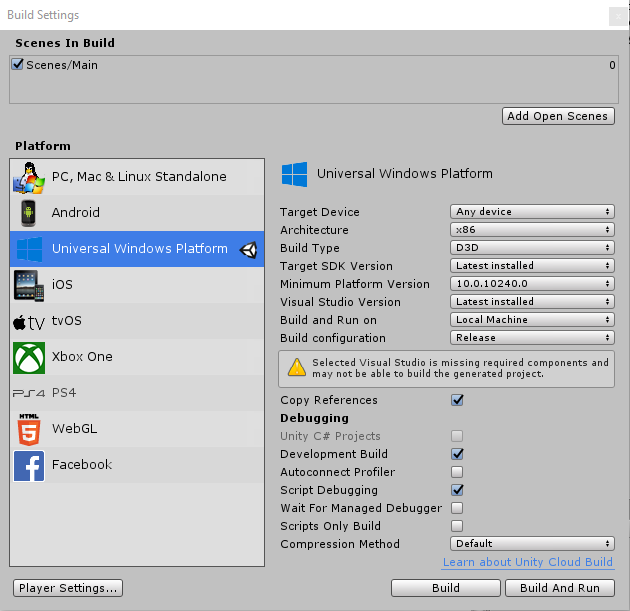
I am not entirely sure if the "Copy References" is really necessary but I have added it anyway. The warning about missing components is another nice Unity touch - apparently something is missing, but they don't tell you what. My app is building, so I suppose it's not that important for my setup.
App capability settings
Now this one is crucial. To enable debugging, Unity builds a specialized player with some kind of little server in it that enables debuggers to attach to it. This means, it needs to have network access. The resulting app is still a UWP app, so it's network capabilities need to be set. You can do that in either the resulting C++ solution's manifest or in the Unity editor, using the "Player Settings" button. Under "Publishing Settings" you will find this box where you can set capabilities

I just added all network related stuff for good measure. The advantage of doing it here is that it will be added back even if you need to rebuild the deployment solution from scratch. The drawback is that you might forget to remove capabilities you don't need and you will end up with an app asking for a lot of capabilities it doesn't use. For you to decide what works best.
Selecting the IL2CPP backend
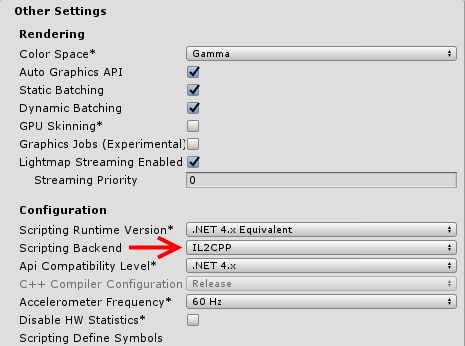
In case Unity or the MRTK2 does not do this for you automatically, you can find this setting by pressing the Player Settings button as well. In "Other settings" you can find the "Scripting Backend". Set this to IL2CPP.
Building and deploying the UWP C++ app.
A C++ UWP app generated by Unity looks like this:
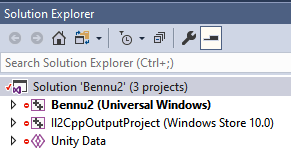
Now maybe this is obvious for C++ developers but make sure the app that is labeled "Universal Windows" is the startup project. I was initially thrown off kilter by the "Windows Store 10.0" link and assumed that was the startup project.
Important is to build and deploy the app for Debug, that has not changed since the .NET backend days. Choose target and processor architecture as required by your device or PC
![]()
Make sure the app actually gets deployed to wherever you want to debug it. Use deploy, not build (from the Build menu in Visual Studio)
And now for the actual debugging
First, start the app on the machine - be it a PC or a HoloLens, that does not matter - where it needs to be debugged
Go back to your Unity C# ('editor' ) solution. Set breakpoints as desired. And now comes the part that really confused me for quite some time. I am used to debug targets showing up here.
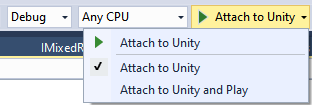
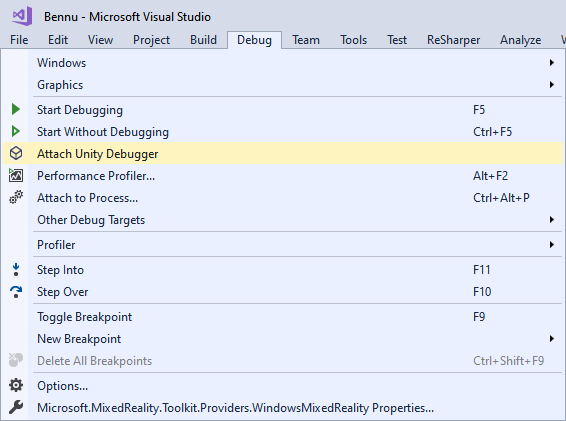
But they never do. So don't go there. This is only useful when you are debugging inside the Unity Editor. In stead, what you need to do is go to the Debug menu of the main Visual Studio Window and select "Attach Unity Debugger"
I've started the app on both my HoloLens and as a Mixed Reality app on my PC, and I can choose of no less than three debug targets now: the Unity editor on my PC, the app running on the HoloLens and the app running on the PC
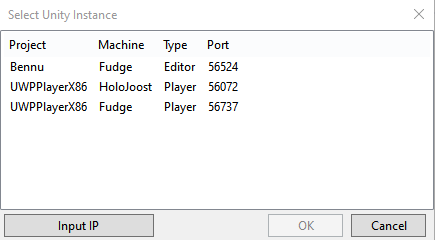
"Fudge" is the name of the gaming quality rig kindly built by a colleague a bit over a year ago, "HoloJoost" is my HoloLens. I selected the "Fudge" player. If you select a player, you will get an UAC prompt for the "AppContainer Network Isolation Diagnostics Tool". Accept that, and then this pops open:

Leave this alone. Don't close it, don't press CTRL-C.
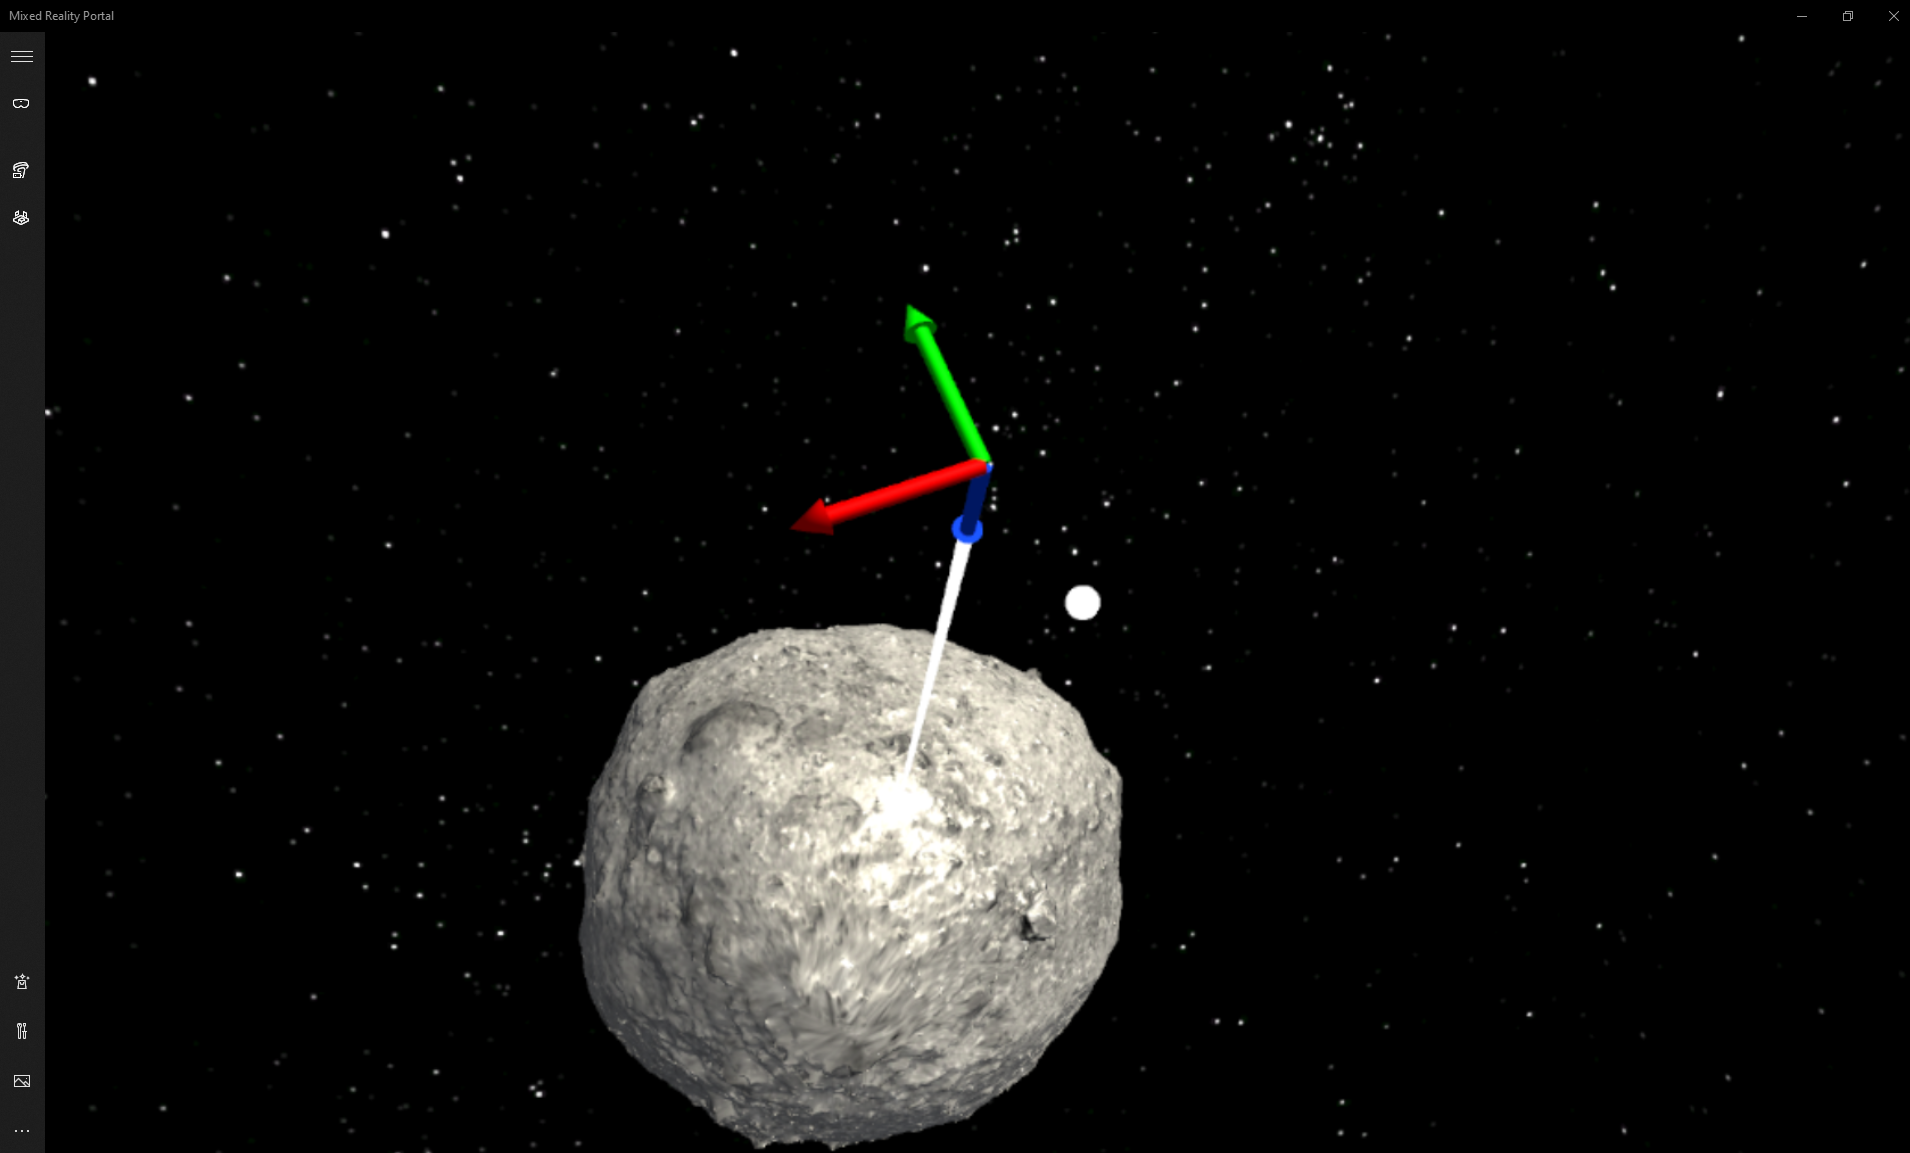
Now just go over to your Mixed Reality app, be it on your HoloLens or your Immersive Headset, and trigger an action that will touch code with a breakpoint in it. In my case, that happens when I tap the asteroid
And then finally, Hopper be praised:
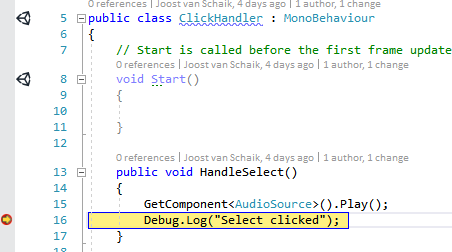
The debugger is back in da house.
Conclusions
This is not something I get overly happy about, but at least we are about three-quarters of where we were before. We can again debug C# code in a running app, but with a more convoluted build process, less development flexibility, and the need to install the whole C++ toolchain. But as usual, in IT, the only way is forward. The Mixed Reality Toolkit 2, that is used to built this asteroid project, requires Unity 2018.2.x. HoloLens 2 apps will be built with MRTK2 and thus we will have deal with it, move forward and say goodbye to the .NET backend. Unless we don't want to build for HoloLens 2 - which is no option at all for me ;)
No test project this time, as this is not about code but mere configuration. I will start blogging MRTK2 tidbits soon, though.
Credits
There is a host of people who gave me pieces of the puzzle that made it possible for to piece the whole thing together. In order of appearance:
- Simon 'Darkside' Jackson (fellow MVP who helped me to get to grips with MRTK2)
- Stephen Hodgson (fellow MVP, ditto above)
- Tautvydas Žilys of Unity itself who pointed me to this post in the forums
- Chris Tamez who pointed me to this manual for debugging in the Unity doc
- And last but certainly not least, my longtime good Microsoft friend from Italy Matteo Pagani who pointed me to this post by one Mark Plogas that showed me the final crucial missing piece about the Unity debugger entry in the Debug menu .