Showing posts with label Windows 8. Show all posts

01 October 2014

Visualizing geofences as circles on the map in Universal Apps

Intro

If you tried to work with geofences, you may have encountered this problem. You want to have an easy way to show where the darn things are on the map, so you can test the application. This is actually pretty simple, building upon stuff to draw circles on Windows Phone 8 I wrote earlier.

What is important to know – there are now more or universally applicable objects to depict a location. The first one is BasicGeoposition – this is a struct – that basically only holds latitude, longitude and elevation. The second one is Geopoint. You create a Geopoint from a BasicGeoposition. This kind of wrapper class that allows for setting of some additional location settings – like how coordinates and height should be interpreted. I don’t think any of this stuff is really used yet, but I have the feeling Geopoint is going to get more important over time, and anyway as a GIS person I tend to go with the fullest set of location designation. But you might as just well use just BasicGeoposition as a way to pass on coordinates in a universal app.

Do the math!

This is essentially the same method as I wrote before, but adapted for Geopoint. Some other changes come from my former colleague Jarno Peschier, who in his typical way saw possibilities to optimize speed up the circle calculation code (and optimizations actually work – I tested).

using System;
using System.Collections.Generic;
using Windows.Devices.Geolocation;

namespace MappingUtilities
{
  public static class GeopointExtensions
  {
    private const double circle = 2 * Math.PI;
    private const double degreesToRadian = Math.PI / 180.0;
    private const double radianToDegrees = 180.0 / Math.PI;
    private const double earthRadius = 6378137.0;
    
    public static IList<Geopoint> GetCirclePoints(this Geopoint center,
                                   double radius, int nrOfPoints = 50)
    {
      var locations = new List<Geopoint>();
      double latA = center.Position.Latitude * degreesToRadian;
      double lonA = center.Position.Longitude * degreesToRadian;
      double angularDistance = radius / earthRadius;

      double sinLatA = Math.Sin(latA);
      double cosLatA = Math.Cos(latA);
      double sinDistance = Math.Sin(angularDistance);
      double cosDistance = Math.Cos(angularDistance);
      double sinLatAtimeCosDistance = sinLatA * cosDistance;
      double cosLatAtimeSinDistance = cosLatA * sinDistance;

      double step = circle / nrOfPoints;
      for (double angle = 0; angle < circle; angle += step)
      {
        var lat = Math.Asin(sinLatAtimeCosDistance + cosLatAtimeSinDistance * 
                            Math.Cos(angle));
        var dlon = Math.Atan2(Math.Sin(angle) * cosLatAtimeSinDistance, 
                              cosDistance - sinLatA * Math.Sin(lat));
        var lon = ((lonA + dlon + Math.PI) % circle) - Math.PI;

        locations.Add(new Geopoint(new BasicGeoposition { 
        Latitude = lat * radianToDegrees, Longitude = lon * radianToDegrees }));
      }
      return locations;
    }
  }
}

I think this is the Haversine formula but I am not sure and the point is – it gives list of points that, when drawn on a map, gives a reasonable approximation of a circle, where ever you draw it. And that’s what this is about. The radius is the radius in meters, and the numberOfPoints is still the number of points that is used to draw the polygon. For that’s what we are making – as long as there are enough points, our eyes will see this as a circle.

The method is implemented as an extension method to Geopoint, and while I was at it, I added a helper method for BasicGeoposition as well, which was not quite rocket science.

public static IList<Geopoint> GetCirclePoints(this BasicGeoposition center,
                              double radius, int nrOfPoints = 50)
{
  return new Geopoint(center).GetCirclePoints(radius, nrOfPoints);
}

Geofences you said sir?

So far, I have been mumbling only about coordinates – stuff I tend to talk about a lot – but how do I go from geofences to things on a map? Well, pretty easily, actually. It turns out that a geofence has a property Geoshape of type IGeoshape, but since a geofence can only be a circle right now, you can try to cast it to a Geocircle. And a Geocircle has a Center property of type BasicGeoposition, and a Radius property in meters. And that’s what we needed to use the GetCirclePoints extension method. So it’s actually pretty easy to define a new extension method

using System.Collections.Generic;
using Windows.Devices.Geolocation.Geofencing;
using Windows.Devices.Geolocation;

namespace MappingUtilities.Geofencing
{
  public static class GeofenceExtensions
  {
    public static IList<Geopoint> ToCirclePoints(this Geofence fence, 
      int nrOfPoints = 50)
    {
      var geoCircle = fence.Geoshape as Geocircle;

      if (geoCircle != null)
      {
        return geoCircle.Center.GetCirclePoints(geoCircle.Radius, nrOfPoints);
      }
      return null;
    }
  }
}

I always do the as-and-if-null check. I could have make a hard cast, but I am all for defensive programming.

Now the thing is, the GeofenceMonitor has a Geofences collection that can be used to add geofences (duh) but of course you can also retrieve them. And thus you can make yet another simple extension method to retrieve a list of list of points of your current GeoFenceMonitor

using System.Collections.Generic;
using System.Linq;
using Windows.Devices.Geolocation;
using Windows.Devices.Geolocation.Geofencing;

namespace MappingUtilities.Geofencing
{
  public static class GeofenceMonitorExtensions
  {
    public static IList<IList<Geopoint>> GetFenceGeometries(this GeofenceMonitor monitor)
    {
      return monitor.Geofences.Select( p=> p.ToCirclePoints()).ToList();
    }
  }
}

And since the GeofenceMonitor is a static class with a singleton instance, getting all the points of all the geofences in you app in a handy list by one simple call goes like this:

GeofenceMonitor.Current.GetFenceGeometries();

And by iterating over them, you can draw shapes on the map. The fun thing is, since we now have Universal Apps, you can define all this code in a PCL and use it both on Windows Phone and Windows ,and reference this as a Binary. Today. No need to wait for Windows 10. So I put these methods in a PCL called MappingUtilities. And because the current GeofenceMonitor is a singleton, you can use this code in some button method in your app to just get a quick list of the active geofences and draw them on a map, without having to retrieve data from your models or viewmodels, or however you choose to implement your logic.

But there is a tiny detail though. Bing Maps does not using Geopoint or BasicGeoposition, but still the Location class, and that does not exist on Windows Phone.

One more thing to extend

Since I was creating extension methods anyway, I made a new assembly, this time Windows specific, called MappingUtilities.Windows - I bet you did not see that one coming :) – and added the following two extension methods:

using System.Linq;
using Bing.Maps;
using System.Collections.Generic;
using Windows.Devices.Geolocation;

namespace MappingUtilities
{
  public static class PointHelpers
  {
    public static LocationCollection ToLocationCollection(
      this IList<Geopoint> pointList)
    {
      var locations = new LocationCollection();
      foreach (var p in pointList)
      {
        locations.Add(p.ToLocation());
      }
      return locations;
    }

    public static Location ToLocation(this Geopoint location)
    {
      return new Location(location.Position.Latitude, 
                          location.Position.Longitude);
    }
  }
}

And these you can simply use to quickly turn a Geopoint into a Location, or a list of Geopoints into a LocationCollection. How this is used is displayed in the demo solution.

Wrapping it up

The demo solution creates two geofences, and shows how the location of said fences can be displayed pretty easily by calling the GetFenceGeometries extension method, both on Windows Phone and Windows.

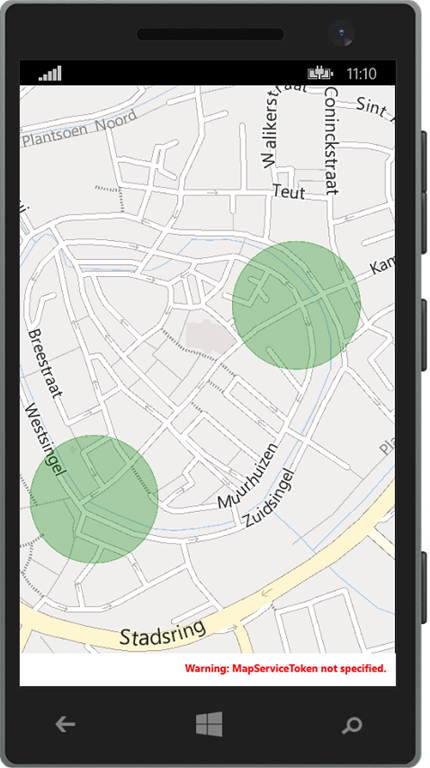
image image

The drawing on the map is done by a simple method that I won’t go into here. I wish to stress the fact that the creation of geofences is in the Shared portion of the app, as well as the facts that these geofences are pretty minimal – I just create them with the default settings - and that I don’t do anything with these geofences apart from creating them. The only thing what this app shows is how easy it is to display geofences using this extension methods, if you have geofences.

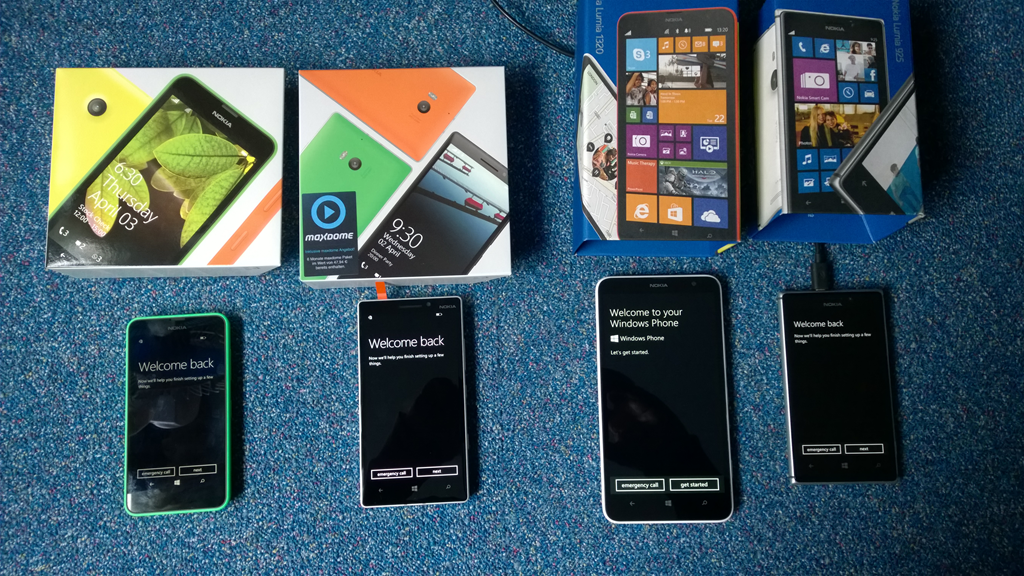
If you want to know more about using geofences in Universal Apps and how you could actually be doing something useful with them, please visit my talk on October 18th 2014 where I will be doing a session about this subject on the Lowland Windows Phone Hacker day. This day is organized in a joint effort by both the Dutch and Belgian developer communities in Tilburg, the Netherlands, a place very near the Belgian-Dutch border. Apart from great content - we also have some prizes you may be interested in
image

Just saying :)
16 July 2014

Cross-platform behavior for making screenshots in Windows (Phone) 8.1

Currently I am developing an app that should be able to share or save whatever is on the screen. I came upon this article by Loek van den Ouweland about RenderTargetBitmap and wondered if I could a) make this more generally (re)usable and b) make it play nice with MVVM.

The answer was – you guessed it – a behavior. The fun thing is, you can drag it onto any UI element, and it will create a screenshot of whatever what’s inside that element ( and that’s not necessary the whole screen!) and save it to storage. Two dependency properties, Target and Prefix, determine what message the behavior listens to, and what the file prefix is.

The main code of the functionality – which still looks a lot like Loek’s original sample – is in the behavior itself. To invoke it from the viewmodel, I call in the help of the MVVMLight messenger. So I start with the message that the viewmodel and the behavior use to communicate:

using GalaSoft.MvvmLight.Messaging;

namespace WpWinNl.Behaviors
{
  public class ScreenshotMessage : MessageBase
  {
    public ScreenshotMessage(object sender = null, object target = null, 
      ScreenshotCallback callback = null) : base(sender, target)
    {
      Callback = callback;
    }

    public ScreenshotCallback Callback { get; set; }
  }

  public delegate void ScreenshotCallback(string fileName);
}

This is a standard MVVMLight message, with the added extra that it can carry an optional payload of a callback. The behavior I created saves the file to a KnownFolder, but it can send the name of the file that’s been created back to the calling object by calling said callback.

The basics of the behavior – implemented once again as a SafeBehavior – is actually pretty simple:

using System;
using System.Runtime.InteropServices.WindowsRuntime;
using System.Threading.Tasks;
using Windows.Graphics.Imaging;
using Windows.Storage;
using Windows.UI.Xaml;
using Windows.UI.Xaml.Media.Imaging;
using GalaSoft.MvvmLight.Messaging;

namespace WpWinNl.Behaviors
{
  public class ScreenshotBehavior : SafeBehavior<FrameworkElement>
  {
    protected override void OnSetup()
    {
      Messenger.Default.Register<ScreenshotMessage>(this, ProcessMessage );
      base.OnSetup();
    }

    protected override void OnCleanup()
    {
      Messenger.Default.Unregister(this);
      base.OnCleanup();
    }

    private async void ProcessMessage(ScreenshotMessage m)
    {
      if (m.Target != null && Target != null)
      {
        if (m.Target.Equals(Target))
        {
          await DoRender(m.Callback);
        }
      }
      else
      {
        await DoRender(m.Callback);       
      }
    }
  }
}

So it listens to a ScreenshotMessage coming by. When Target (a dependency property in this behavior) is equal to the target specified in the message, the rendering is done. Think of Target as a shared key – this enables a viewmodel to fire a specific behavior using – usually - a string. This I show in the sample solution. If both the behavior’s target and the message’s target are null, it fires as well. You can use this if you only have one behavior and one call. If, however, the behavior is used on multiple places I strongly recommend specifying Target, or else you might get very interesting race conditions.

The actual rendering method is nearly all Loek’s code with some little adaptions:

private async Task DoRender(ScreenshotCallback callback)
{
  var renderTargetBitmap = new RenderTargetBitmap();
  await renderTargetBitmap.RenderAsync(AssociatedObject);
  var pixelBuffer = await renderTargetBitmap.GetPixelsAsync();

  var storageFile = 
    await KnownFolders.SavedPictures.CreateFileAsync(
      string.Concat(Prefix, ".png"),
      CreationCollisionOption.GenerateUniqueName);
  using (var stream = await storageFile.OpenAsync(FileAccessMode.ReadWrite))
  {
    var encoder = 
await BitmapEncoder.CreateAsync(BitmapEncoder.PngEncoderId, stream); encoder.SetPixelData( BitmapPixelFormat.Bgra8, BitmapAlphaMode.Ignore, (uint) renderTargetBitmap.PixelWidth, (uint) renderTargetBitmap.PixelHeight, 96d, 96d, pixelBuffer.ToArray()); await encoder.FlushAsync(); if (callback != null) { callback(storageFile.Name); } } }

It creates an unique file based on the Prefix dependency property in the “SavedPictures” known folder, renders the screen as a png file, saves it, and if so desired calls a callback transmitting the name back to that callback – most likely a method of the viewmodel, which can then act on it.

The rest of the behavior are the two dependency properties that I leave out for brevity's sake.You don’t need to use them at all – if you don’t set Prefix, it will use “Screenshot”

To use it: as stated earlier, drag it on top of the UI element you want to make screenshots of, then add for instance the following code to your viewmodel:

public ICommand ScreenshotCommand
{
  get
  {
    return new RelayCommand(() =>
    {
      var m = new ScreenshotMessage(this, 
        "screenshot", MyCallback);
      Messenger.Default.Send((m));
    });
  }
}

private void MyCallback(string name)
{
  Debug.WriteLine(name);
}
In the message I have set the target to "screenshot", so in the XAML it should now says
<Behaviors:ScreenshotBehavior Target="screenshot" Prefix="MyScreenshot"/>

or else the behavior won’t respond to the message. When it’s done, it writes the name of the created file to the console – not very useful in production scenario’s, but it shows it’s working. In this callback you can for instance inform the user the file has been saved, activate a share contract or whatever you feel is neccesary.

The fun thing is, of course, that in this awesome world we live today behaviors can actually be cross-platform and be defined in a PCL and run both on Windows Phone 8.1 as on “big Windows” 8.1 :).

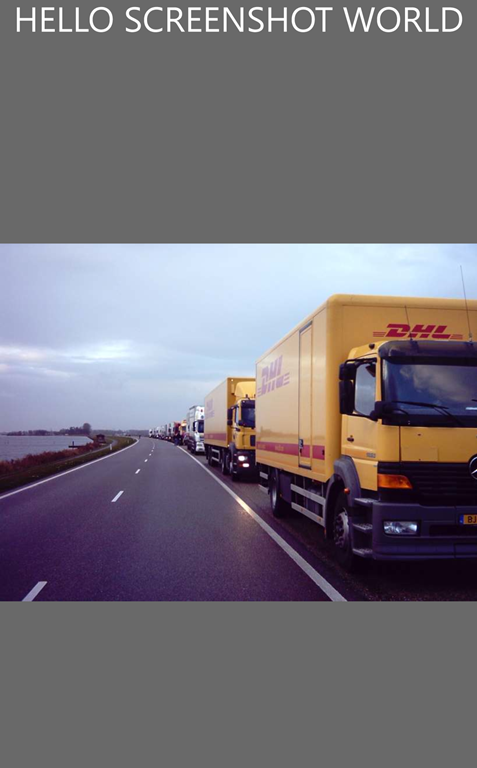
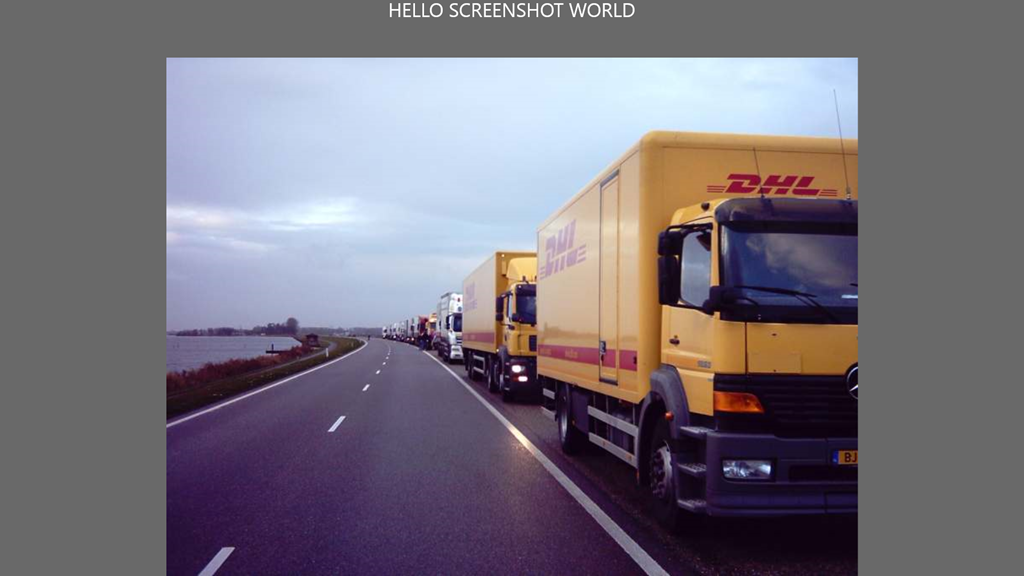
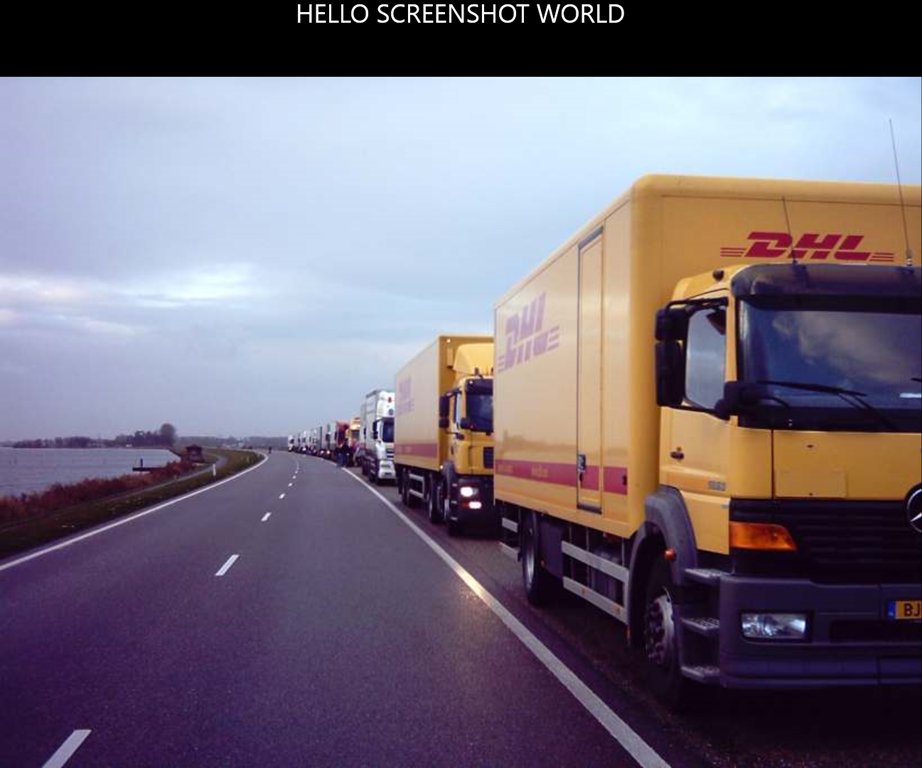
MyScreenshotMyScreenshot (2)

In the demo solution, that contains both a Windows Phone App, a Windows App, and a shared project you will see I have once again dragged the Main.Xaml to the shared project just for the fun of it. Don’t forget to set access to the pictures library in both the app manifests. I always forget that.

MyScreenshotFor Windows, the pictures end up in my “USERPROFILE%\Picures” folder, in Windows Phone they end up in “Pictures\Saved Pictures”.

Interesting detail – I have set the application’s root grid background to gray. If I don’t set a color, the background of the picture on Windows is not black, but cropped to 1297x1080 in stead of 1920x1080 as is my native resolution. I have not been able to determine yet why this is.

I built this behavior on top of my WpWinNl 2.0.3 package, but you can easily adapt it to get it to work as a normal behavior just using the procedure I described here.

Oh and the picture? It’s just an old picture of my wife’s Mercedes truck back in 2004, when she and a colleague joined a Guinness Book of records attempt to create the longest truck convoy ever. This is a short stop at dyke road shoulder before the actual 9.5 km long convoy was assembled. Interesting detail: all 416 drivers were women. The convoy drove 22 km without any problems, and as my wife so aptly said – it was the first time she joined a traffic jam for fun.

25 June 2014

Building multi-resolution popups in an Universal App

With the advent of Windows Phone 8.1 multiple resolution are now also becoming a fact of life for Windows Phone developers (as they already were for Windows Store developers). This has a few side effects, which will require you to think about the size of things that need to cover part of the screen. Particularly you can get into trouble with animations built with visual states, which tend to have fixed number in them. I already dabbled into this when I ported Two Phone Pong to Windows 8.1 and had to make a screen-size independent scroll-into-view pane.

Now, for a demo app I have been working on, I wanted to make a popup that always used 1/3th of the screen. That used to be easy, as we had only one resolution, more or less, and for the rest Windows Phone 8 did some auto scaling. Now it needs a little more work. Very little, as it turned out I almost had all the pieces in place:

  • I already had the UnfoldBehavior, which can be used to let UI elements appear and disappear by ‘folding’ them in or out.
  • I already had the SizeListenerBehavior, which allows me to data bind to the actual width and height of an element

The only thing that was missing was this very simple converter:

using System;
using System.Globalization;

namespace WpWinNl.Converters
{
  public class PercentageConverter : BaseValueConverter
  {
    public override object Convert(object value, Type targetType, 
      object parameter, CultureInfo culture)
    {
      double parmValue;
      if (value is double && double.TryParse(parameter.ToString(), 
                                            out parmValue))
      {
        value = (double)value * parmValue / 100;
      }
      return value;
    }

    public override object ConvertBack(object value, Type targetType, 
      object parameter, CultureInfo culture)
    {
      if (value is double && (parameter is double || parameter is int))
      {
        value = (double)value / 100 / (double)parameter;
      }
      return value;
    }
  }
}

Basically all it does is dividing the incoming value by 100 and multiply it with the parameter value, so if you supply “33” as ConverterParameter is will multiply the incoming value by 0.33, effectively dividing it by 3 (ish).

So now I can define a simple app with a map (for instance), and when the popup is displayed, it always takes the bottom third of the screen. Regardless of screen resolution.

On the 4” WVGA (800x480) emulator this looks like this:

imageimage

While on a 1080p 6” emulator it looks like this:

imageimage

Added bonus: the popup resizes automatically as you rotate the phone. It always takes the bottom third of the screen.

The way to achieve this is pretty simple:

<!-- some stuff snipped -->
<Grid>
  <interactivity:Interaction.Behaviors>
    <behaviors:SizeListenerBehavior x:Name="ContentRootListener"/>
  </interactivity:Interaction.Behaviors>
  <!-- some stuff snipped -->
  
  <Grid Grid.Row="1" Margin="19,9.5,19,0">
    <maps:MapControl>
    </maps:MapControl>
    <!-- the Grid below is the actual popup window -->
    <Grid Height="{Binding WatchedObjectHeight, 
      ElementName=ContentRootListener, Converter={StaticResource PercentageConverter}, 
      ConverterParameter=33}" VerticalAlignment="Bottom" Background="Blue" >
      <interactivity:Interaction.Behaviors>
        <behaviors:UnfoldBehavior RenderTransformY="1" Direction="Vertical" 
                                  Activated="{Binding IsOpen}"/>
      </interactivity:Interaction.Behaviors>
      <StackPanel>
        <TextBlock Text="This is my popup" FontSize="22"></TextBlock>
        <StackPanel Orientation="Horizontal">
          <TextBlock Text="It's height is:" FontSize="22"></TextBlock>
          <TextBlock Text="{Binding WatchedObjectHeight, 
            ElementName=ContentRootListener, Converter={StaticResource PercentageConverter}, 
            ConverterParameter=33}" 
            FontSize="22"></TextBlock>
        </StackPanel>
      </StackPanel>
    </Grid>
  </Grid>
</Grid>
  • The top grid has a SizeListenerBehavior. This enables me to bind to the ActualHeight and of the top grid as it changes by binding to WatchedObjectHeight of the SizeListenerBehavior.
  • The height of the popup is set like by actually binding to said value. By using the converter with a parameter of 33 it will – when activated – always use 1/3rd of the screen – or 1/3rd of whatever element your SizeListenerBehavior is sitting on.
  • By setting the UnfoldBehavior’s RenderTransformY to 1 and the Direction to Vertical the popup will open from the bottom up. This is not new, that was already in the original article about UnfoldBehavior.

I have included a small demo solution to show off this little trick. It uses my pre-release version of WpWinNl 2.0.x and a little MVVMLight, but you could use this just as easy from a non-MVVM app. But I still think the beauty of this all is that can be initiated from a viewmodel ;)

In addition, although the demo solution only contains a Windows Phone app, this trick works just as well as on Windows Store apps, as both UnfoldBehavior and SizeListenerBehavior are already in the new WpWinNl NuGet package.

24 June 2014

Messaging class for detecting and broadcasting that your Universal app is running in the background

Some time ago I discovered that you can trap Window.Current.VisibilityChanged in a Windows 8 app to check if the app was running in the background, and that you can use that moment to pause a game and/or save the state to storage. The fun thing is, this now works in Universal apps too, that is – and thus, also on Windows Phone 8.1.Although we can discuss if  the app is really running in the background or that is actually being suspended when it runs on Windows Phone – the mechanism is the same and it can be used to the same end.

So make this more easy to use, I made this very simple class, based upon the MVVMLight MessageBase class:

using Windows.UI.Xaml;
using GalaSoft.MvvmLight.Messaging;

namespace WpWinNl.Messages
{
  public class WindowVisibilityMessage : MessageBase
  {
    public WindowVisibilityMessage(bool visible, object sender = null, 
object target = null) :base(sender, target) { Visible = visible; } public bool Visible { get; protected set; } public static void Setup() { Window.Current.VisibilityChanged += (s, f) => Messenger.Default.Send(new WindowVisibilityMessage(f.Visible)); } } }

and all you have to use it, is to simply put

protected override void OnLaunched(LaunchActivatedEventArgs e)
{
   WindowVisibilityMessage.Setup();
   //Rest of code omitted
 

in the first line of OnLaunched in the App.Xaml.cs

Now anywhere in your app you can now listen for the WindowVisibilityMessage to come by and act on it, like this:

Messenger.Default.Register<WindowVisibilityMessage>(this, p =>
{
  if (p.Visible)
  {
    //do something 
  }
  else
  {
    //do something else
  }
});

And that’s all. The source of this class is already on codeplex and it’s also in the full WpWinNl NuGet package that I released yesterday. Since this class and it’s use is prettysimple and straightforward, I am going to skip a sample solution. A more comprehensive sample where this class plays a minor supporting role is coming soon

06 May 2014

Writing behaviors in PCL for Windows Phone 8.1 and Windows 8.1

This article was updated after a tip from Daniel Plaisted – see comments

I was happily adding Windows Phone 8.1 support to WpWinNl – or actually support for Universal Windows Apps - when I noticed that basically all I was doing was linking files from the Windows 8.1 project – without any changes. Convergence FTW! Although that made adding the support as such pretty simple, I also envisioned a maintenance nightmare coming towards me as would not only need to maintain links between Windows 8.1 and Windows Phone 8.0, but also between Windows 8.1 and Windows Phone 8.1. Maybe it was time to go PCL. That went pretty well, until I hit a major roadblock.

This roadblock, my friends, is very simple: the behaviors SDK, and thus everything in Microsoft.Xaml.Interactivity, is not available to PCL. This has probably to do with the fact that the behaviors SDK for Windows 8 is a separate entity, not part of the core framework, that was added later. This same characteristic has moved over to Windows Phone 8.1. It basically boils down to this: every behavior must implement Microsoft.Xaml.Interactivity.IBehavior and this is sitting in two separate assemblies – one for Windows, one for Windows Phone. On my Surface Pro they are sitting in C:\Program Files (x86)\Microsoft SDKs\Windows\v8.1\ExtensionSDKs\BehaviorsXamlSDKManaged\12.0\ for Windows 8.1 and in C:\Program Files (x86)\Microsoft SDKs\WindowsPhoneApp\v8.1\ExtensionSDKs\BehaviorsXamlSDKManaged\12.0\ for Windows Phone 8.1

Now what?

Of course, like I wrote before, you can moan and complain about this and send venomous tweets to Joe Belfiore, Cliff Simpkins or just the first Windows Phone MVP you can find – or you can pause and think if there’s a way around it. This is the thing I love to do – explore, thinker, invent – and come to a solution. Because as it turns out, my friends, there is one.

imageThe key to the solution is this pretty odd article that, believe it or not, was sent to a closed mailing list of Windows Phone MVPs to collect opinions on – by none other than Matthijs Hoekstra, just the day before I wrote this. Then I thought it was a crazy idea - today I find it an invaluable clue. Talking about coincidences. It’s like basic research – you never know where the next life saving idea will be coming from ;-) .

It’s called the “Bait and switch PCL trick” and it basically makes use of a very odd NuGet trick – it will always prefer a native platform library over a PCL. If you make a NuGet package that contains both a PCL and a native version, the PCL is then only used at compile time. So what I did was create this crazy NuGet package called CrossPlatformBehaviorBase (I think I am going to change that later) that basically has three projects in it: once PCL, one Windows Phone 8.1, and one Windows 8.1.

The key thing is that the implementation for Windows Phone and Windows are the same (in fact, the Windows Phone 8.1 implementation is linked from the Windows implementation, but the PCL is slightly different. The PCL version is a copy of the normal IBehavior interface, namespace and all:

using Windows.UI.Xaml;

namespace Microsoft.Xaml.Interactivity
{
  public interface IBehavior
  {
    DependencyObject AssociatedObject { get; }

    void Attach(DependencyObject associatedObject);

    void Detach();
  }
}

Whereas the Windows Phone and Windows implementations look like this:

[assembly: System.Runtime.CompilerServices.TypeForwardedTo(
typeof(Microsoft.Xaml.Interactivity.IBehavior))]

Indeed, that is all. A type forwarding statement to convince the compiler to look for the right IBehavior at runtime. I did not know this trick, but Daniel Plaisted alerted me in the comments.

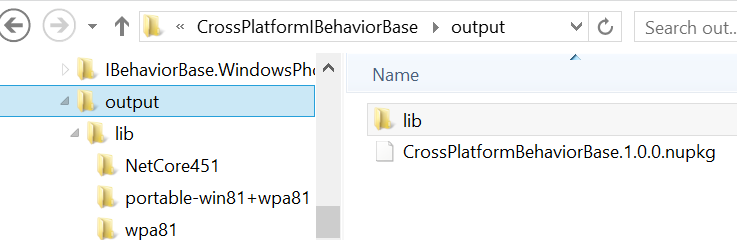
imageIf you build for release this will create three projects neatly conforming to NuGet naming specifications and finally run a little command file that creates a NuGet package in the output folder directly under the solution folder.

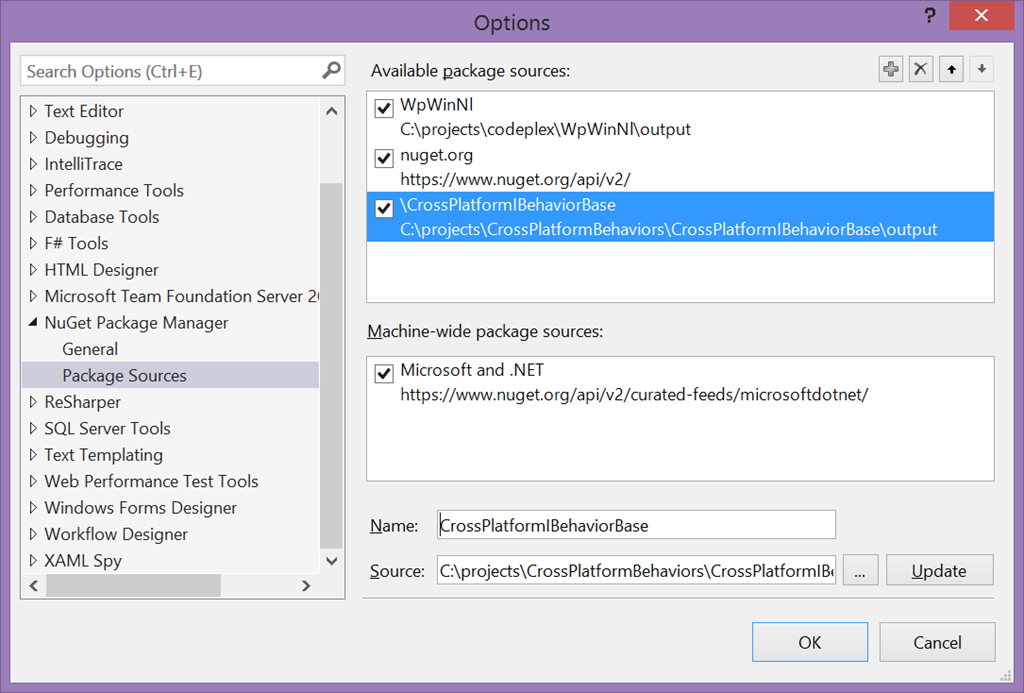
To be able to install the package, you need to specify that folder as a NuGet source:

image

imageMind you, in the future this will all be on NuGet so you won’t have to put up with this. For now,  am just explaining how it’s done.

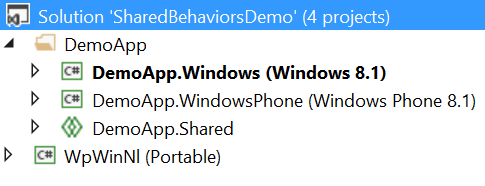
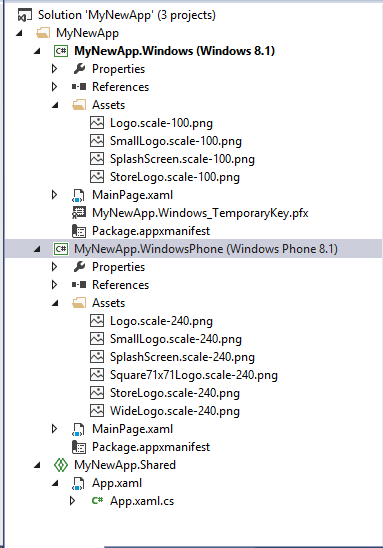
Anyway, I went ahead and created an Universal Windows App DemoApp, and added a Windows Phone 8.1/Windows 8.1 PCL “WpWinNl” to the solution.

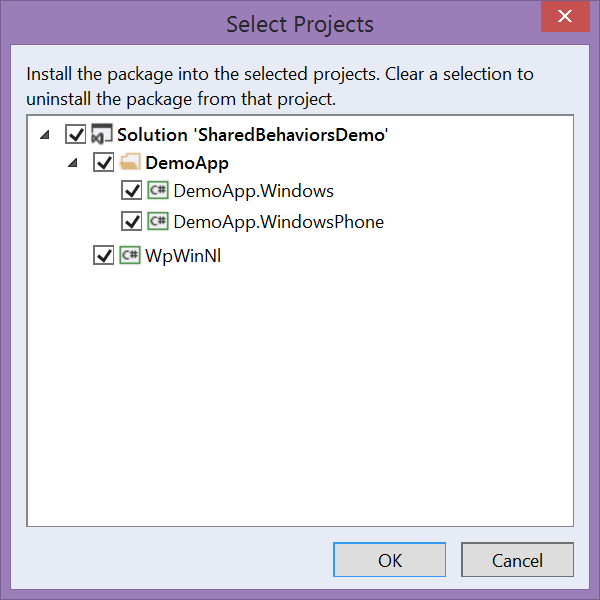
The newly created NuGet package needs to be installed in all three projects: 

imageAnd then I started in copying stuff from WpWinNl,starting with the Behavior base class that I created to maintain compatibility with ‘Silverlight style’ behaviors:

using Windows.UI.Xaml;

namespace WpWinNl.Behaviors
{
  public abstract class Behavior : DependencyObject, IBehavior
  {
    public DependencyObject AssociatedObject { get; set; }

    public virtual void Attach(DependencyObject associatedObject)
    {
      AssociatedObject = associatedObject;
    }

    public virtual void Detach()
    {
    }
  }
}

This will compile fine, now I have the replacement IBehavior in the PCL version. We continue with the Behavior<T> which of course compiles as well:

namespace WpWinNl.Behaviors
{
  public abstract class Behavior<T> : Behavior where T: DependencyObject
  {
    [System.ComponentModel.EditorBrowsable(
       System.ComponentModel.EditorBrowsableState.Never)]
    public new T AssociatedObject { get; set; }

    public override void Attach(DependencyObject associatedObject)
    {
      base.Attach(associatedObject);
      this.AssociatedObject = (T)associatedObject;
      OnAttached();
    }

    public override  void Detach()
    {
      base.Detach();
      OnDetaching();
    }

    protected virtual void OnAttached()
    {
    }

    protected virtual void OnDetaching()
    {
    }
  }
}

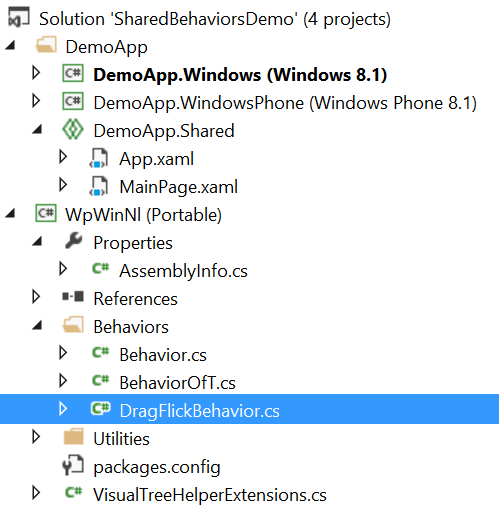
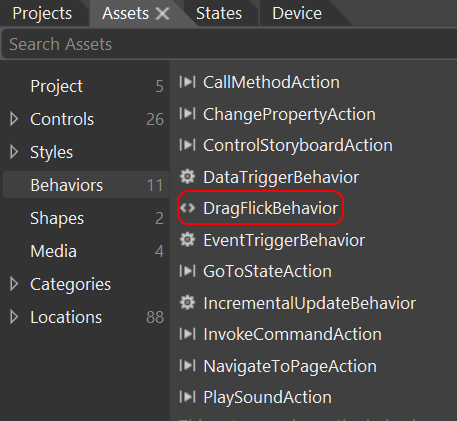
imageWhich basically comes over from the existing WpWinNl implementation unchanged. For kickers, I then put my infamous DragFlickBehavior, and all my animation code that has been featured on this blog multiple times on top of it and lo and behold – with a minor addition it just works. And I was able to delete all #ifdef statements for Windows Phone out, leaving only the former ‘just windows’ code. All in PCL. And all usable both on Windows Phone and Windows.

image
As coupe de grace I put the whole of MainPage.xaml in the shared portion, opened Blend and sure enough – there was my DragFlickBehavior:

So I dropped a date picker, a text box and a button on the screen and dragged my PCL-DragFlickBehavior on top on all three:

<Page
    xmlns="http://schemas.microsoft.com/winfx/2006/xaml/presentation"
    xmlns:x="http://schemas.microsoft.com/winfx/2006/xaml"
    xmlns:d="http://schemas.microsoft.com/expression/blend/2008"
    xmlns:mc="http://schemas.openxmlformats.org/markup-compatibility/2006"
    
    xmlns:Interactivity="using:Microsoft.Xaml.Interactivity"
    xmlns:behaviors="using:WpWinNl.Behaviors"

    x:Class="DemoApp.MainPage"
    mc:Ignorable="d">

  <Grid Background="{ThemeResource ApplicationPageBackgroundThemeBrush}">
    <Button Content="Button" HorizontalAlignment="Left" Height="37" 
      Margin="101,114,0,0" VerticalAlignment="Top" Width="108">
      <Interactivity:Interaction.Behaviors>
        <behaviors:DragFlickBehavior/>
      </Interactivity:Interaction.Behaviors>
    </Button>
    <DatePicker HorizontalAlignment="Left" Margin="48,230,0,0"
VerticalAlignment="Top"> <Interactivity:Interaction.Behaviors> <behaviors:DragFlickBehavior/> </Interactivity:Interaction.Behaviors> </DatePicker> <TextBlock HorizontalAlignment="Left" Height="42" Margin="132,310,0,0" TextWrapping="Wrap" Text="Blabla" VerticalAlignment="Top" Width="121"> <Interactivity:Interaction.Behaviors> <behaviors:DragFlickBehavior/> </Interactivity:Interaction.Behaviors> </TextBlock > </Grid> </Page>

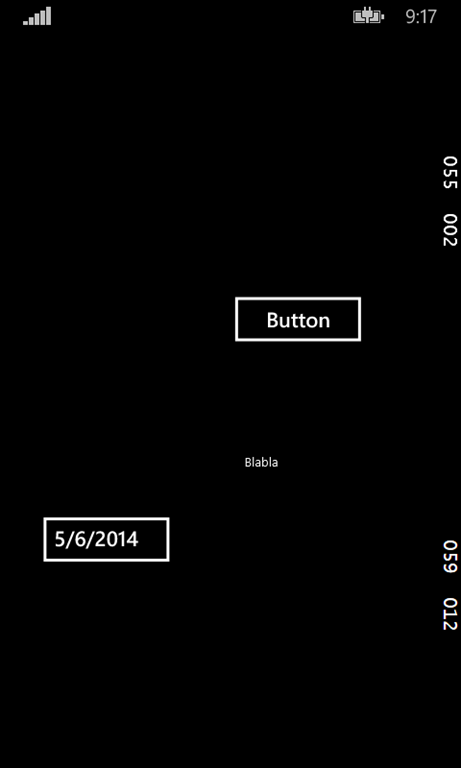
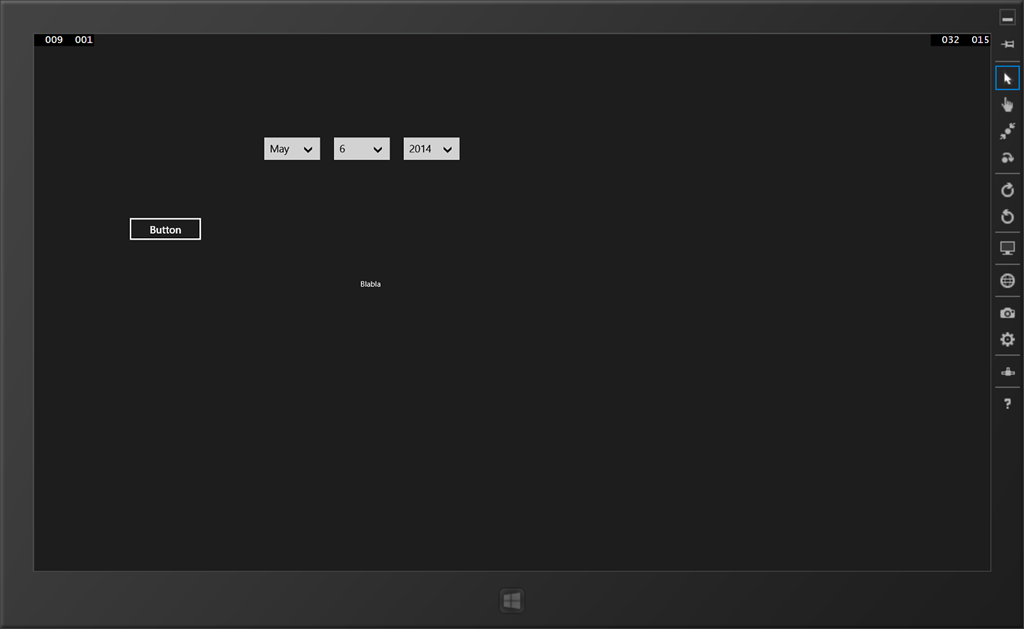
And sure enough:imageimage


The screen shows up and you can happily drag the items along, although dragging a Windows Phone date picker is quite a challenge.

So there you have it – behaviors completely defined in PCL, courtesy of a little NuGet trick. Could the Windows Phone and/or Windows Team have done this themselves? Possibly – but don’t forget I just sailed past anything that is not managed, like C++. And if there ain’t any challenges for MVPs to meet, fat lot of use we would be, eh? ;-)

A zip file with both the NuGet package and the Universal Windows App can be found here. For now it’s a kind of proof of concept, soon I will be putting this NuGet package out on NuGet itself and use it for the new version of WpWinNl. After some rigorous testing ;).

Update – after some thinking I decided to call this IBehaviorPortable and have uploaded it to NuGet with that name.

30 April 2014

A screen-size independent scroll-into-view pane for Windows Phone and Windows Store apps

In this article I introduced MoveObjectBehavior and a way to use it to make Facebook-app like scroll-into-view panes. All very nice, but with a minor drawback – it basically needs a fixed screen size. That’s OK under Windows Phone 8 (albeit it does not look so good on a Lumia 1520) but still – you got away with it.

That is no longer the case in Windows Phone 8.1, and it never was the case in Windows 8. You have to take multiple screen sizes into account now, and in the case of Windows 8 the screen size can change while the app is running – as the user can arbitrarily change the horizontal space an app is using while it’s running.

Like this:

Scroll-into-view pane for Windows 8

Now MoveObjectBehavior has an ActivatedXValue Property and of course I could try, in stead of setting a fixed value, to bind that to the value of ActualWidth of the Page. Unfortunately that is not a Dependecy Property, so although it works initially, changes to it’s value are not populated. Yet, as you can see above, it can be done, and with a pretty animation as well.

This, of course, is were a second behavior comes in handy. Meet SizeListenerBehavior:

using Windows.UI.Xaml;

namespace WpWinNl.Behaviors
{

  /// <summary>
  /// This behavior listens to a size change of the attached object
  /// and puts the resulting size into two bindable dependecy properties
  /// </summary>
  public class SizeListenerBehavior : SafeBehavior<FrameworkElement>
  {
    protected override void OnSetup()
    {
      AssociatedObject.SizeChanged += AssociatedObjectSizeChanged;
      base.OnSetup();
      PropagateSizes();
    }

    protected override void OnCleanup()
    {
      AssociatedObject.SizeChanged -= AssociatedObjectSizeChanged;
      base.OnCleanup();
    }

    void AssociatedObjectSizeChanged(object sender, SizeChangedEventArgs e)
    {
      PropagateSizes();
    }

    private void PropagateSizes()
    {
      WatchedObjectHeight = AssociatedObject.ActualHeight;
      WatchedObjectWidth = AssociatedObject.ActualWidth;
    }
  }
}

It is very simple - it listens to the SizeChanged event that does get triggered on any size change, then populates that to two dependency properties. And those are bindable. I omitted both properties from the code above as they are fairly standard. So if you give the behavior a name you can use Element binding to bind this properties to MoveObjectBehavior.

Which is done like this:

<Page
    x:Class="SizeListener.MainPage"
    xmlns="http://schemas.microsoft.com/winfx/2006/xaml/presentation"
    xmlns:x="http://schemas.microsoft.com/winfx/2006/xaml"
  xmlns:d="http://schemas.microsoft.com/expression/blend/2008"
    xmlns:mc="http://schemas.openxmlformats.org/markup-compatibility/2006"
    xmlns:interactivity="using:Microsoft.Xaml.Interactivity"
    xmlns:behaviors="using:WpWinNl.Behaviors"
    mc:Ignorable="d" 
DataContext="{Binding Source={StaticResource DemoViewModelDataSource}}"> <Page.BottomAppBar > <CommandBar x:Name="BottomBar"> <AppBarButton Icon="Help" Command="{Binding MyCommand}"> </AppBarButton> </CommandBar> </Page.BottomAppBar > <interactivity:Interaction.Behaviors> <behaviors:SizeListenerBehavior x:Name="pageRootSizeListener"/> </interactivity:Interaction.Behaviors> <Grid Background="{ThemeResource ApplicationPageBackgroundThemeBrush}" > <Grid> <interactivity:Interaction.Behaviors> <behaviors:MoveObjectBehavior Activated="{Binding ShowSettings}" Duration="1000" ActivatedXValue="{Binding WatchedObjectWidth, ElementName=pageRootSizeListener}"/> </interactivity:Interaction.Behaviors> <Grid Background="Green"> <Grid Margin="50"> <TextBlock FontSize="50">THIS IS MY MAIN PAGE</TextBlock> </Grid> </Grid> <Grid RenderTransformOrigin="0,0.5" Background="Blue"> <Grid.RenderTransform> <CompositeTransform ScaleX="-1"/> </Grid.RenderTransform> <Grid> <Grid RenderTransformOrigin="0.5,0.5" Margin="50" > <Grid.RenderTransform> <CompositeTransform ScaleX="-1"/> </Grid.RenderTransform> <TextBlock FontSize="50">THIS IS MY MESSAGE PAGE</TextBlock> </Grid> </Grid> </Grid> </Grid> </Grid> </Page>

You see the parts that are actually do the work underlined, red and bold (so I hope that this is clear for everyone, even color blind people).

The trick with the mirroring grids to put stuff to the left (and the right) of your screen is described in my article, Aligning XAML elements outside the screen using scaling (for a Facebook-like GUI), so I won’t repeat that here.

The demo solution can be found here. If you are looking for the source in the code, you can keep looking, as it’s been sitting in my WpWinNl library on CodePlex for a while – but I just did not have the time to blog about it. If you want just the behavior’s source, that’s here.

02 April 2014

Code sharing strategies between Windows Phone 8.1 and Windows 8.1 with the new Universal Windows apps

With the announcement of the new SDK for Windows Phone Microsoft now really starts to stress the companionship of Windows and Windows Phone, and makes it a lot easier to build apps that run on both platforms. Windows Phone apps now reside under ‘Store Apps’ and although you can still write Windows Phone only apps, it’s pretty clear to me what the preferred way to go for new Windows Phone apps is

image

Two new kinds of Windows Phone apps

Let me make one thing clear: no-one is going to push you. Windows Phone 8.1, like it’s predecessor, will run 8.0 apps fine. You can go on re-using the skillset you have acquired, still using the XAML style you are used to. In fact, Microsoft stresses this point even more by including Windows Phone Silverlight 8.1 apps, which are a bit of a halfway station: your XAML largely stays the same, but it gives you access to the new APIs. Yet I feel the crown jewel of the new SDK is the new Universal Windows app and, in it’s slipstream, the enhanced PCL capabilities. But once again – no-one is forcing you this way. Microsoft are very much about going forward, but also about protecting your existing skills and assets.

One solution, two apps

One thing up front: ‘one app that runs everywhere’ is a station that we still have not reached. You are still making two apps – one for Windows Phone, one for Windows. In this sense, it’s basically the same approach as before where you used code sharing with linked files. That was quite a hassle, and now Visual Studio supports a formal way to share files between projects. This makes maintaining oversight dramatically easier, and it gets rid of the confounded “This document is opened by another project’ dialog too. Plus – and that’s a very big plus – the code you can use on both platforms has become a lot more similar.

Going universal

imageOne warning in advance – if you going for the Universal Windows app, you’re going all the way. It means that for your Windows Phone app in most cases you are basically writing a Windows 8 app - using XAML and APIs that are familiar for Windows Store apps programmers, but not necessarily for Windows Phone developers. If you already have some experience writing Windows Store this won’t be a problem. If you have never done that before, some things may look a bit different.

So, I have created a new blank Universal Windows app and it shows like displayed on the right:

Initially, it only shows the App.Xaml.cs as shared. This has one great advantage already – you can go in and disable the frame rate counter for both apps in one stroke :-):

        protected override void OnLaunched(LaunchActivatedEventArgs e)
        {
#if DEBUG
            if (System.Diagnostics.Debugger.IsAttached)
            {
                //this.DebugSettings.EnableFrameRateCounter = true;
            }
#endif

Switching contexts

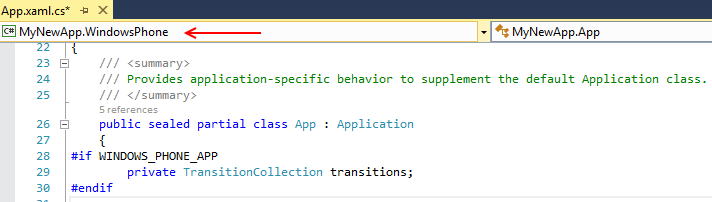
If you go through the shared App.Xaml.cs you will notice a few more things: at several places in the file it says #if WINDOWS_PHONE_APP, and I also want to point out this little thing on top, the context switcher.

image

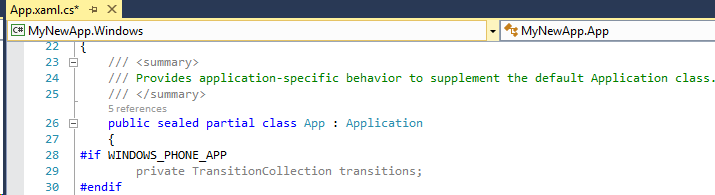
You can set the context switcher to ‘MyNewApp.Windows and you will see the Windows app code greyed out. This way, you can very quickly see which code is executed in which version and which not

image

Sharing code – sharing XAML

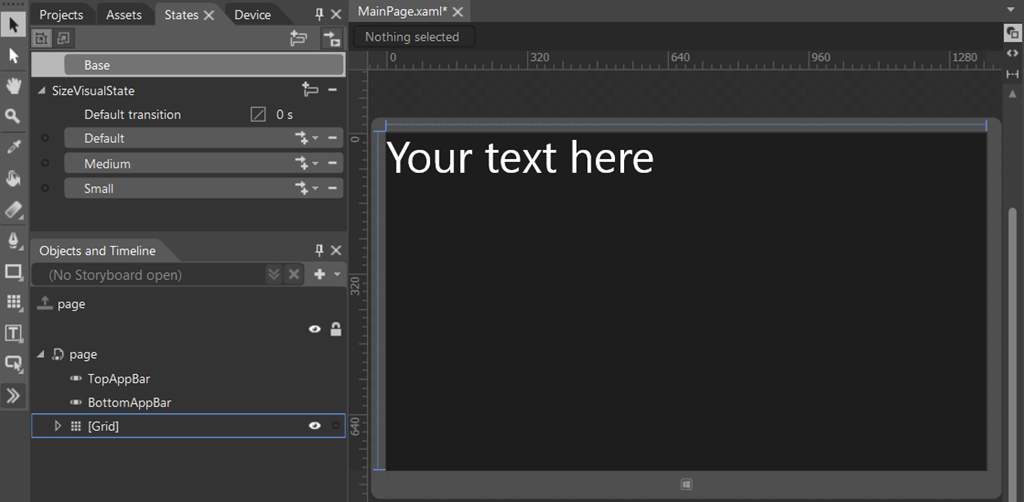
So I went to the Windows Store app, opened Blend, added some text and two tool bar buttons:

<Page
    x:Class="MyNewApp.MainPage"
    xmlns="http://schemas.microsoft.com/winfx/2006/xaml/presentation"
    xmlns:x="http://schemas.microsoft.com/winfx/2006/xaml"
    xmlns:local="using:MyNewApp"
    xmlns:d="http://schemas.microsoft.com/expression/blend/2008"
    xmlns:mc="http://schemas.openxmlformats.org/markup-compatibility/2006"
    mc:Ignorable="d">
  <Page.BottomAppBar>
    <CommandBar>
      <AppBarButton Icon="Accept" Label="AppBarButton" Click="AppBarButton_Click"/>
      <AppBarButton Icon="Cancel" Label="AppBarButton"/>
    </CommandBar>
  </Page.BottomAppBar>

    <Grid Background="{ThemeResource ApplicationPageBackgroundThemeBrush}">
      <TextBlock HorizontalAlignment="Left" 
                 Height="37" Margin="90,53,0,0" TextWrapping="Wrap" 
                 Text="Hello World" 
                 VerticalAlignment="Top" Width="383" FontSize="29.333"/>

    </Grid>
</Page>

And added some code behind.

private async void AppBarButton_Click(object sender, RoutedEventArgs e)
{
  var m = new MessageDialog("Hello world");
  await m.ShowAsync();
}

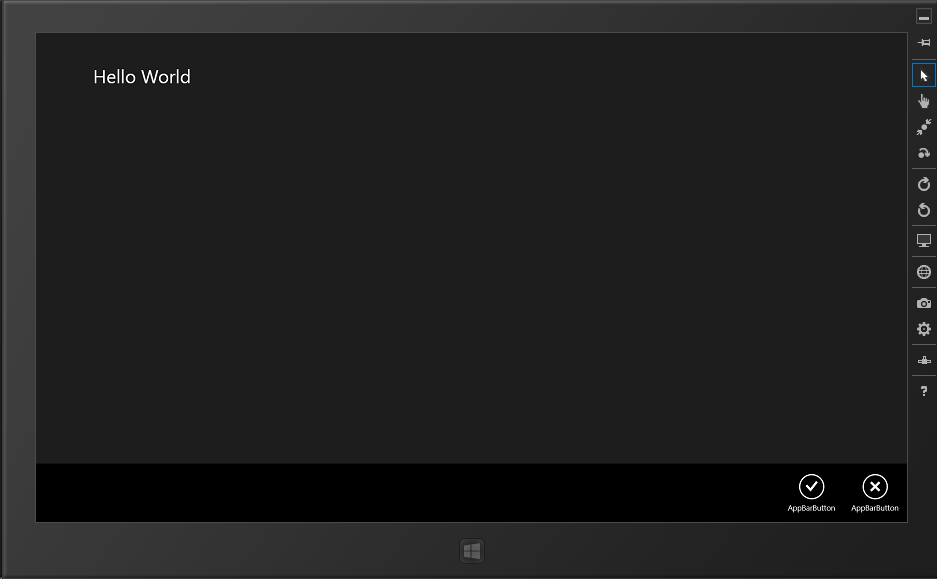
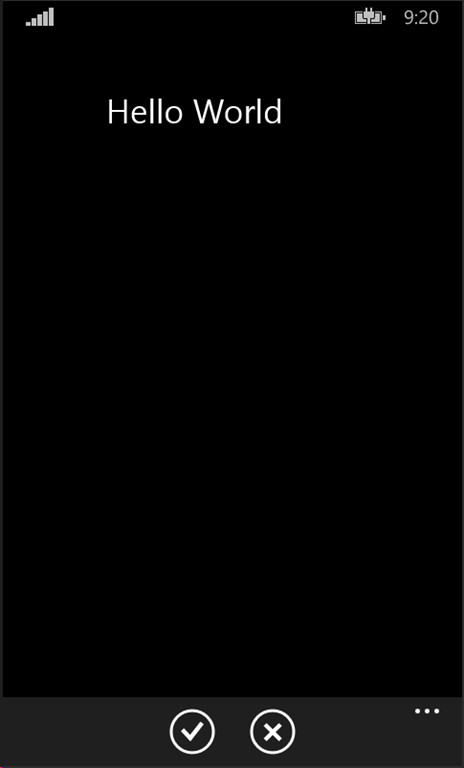
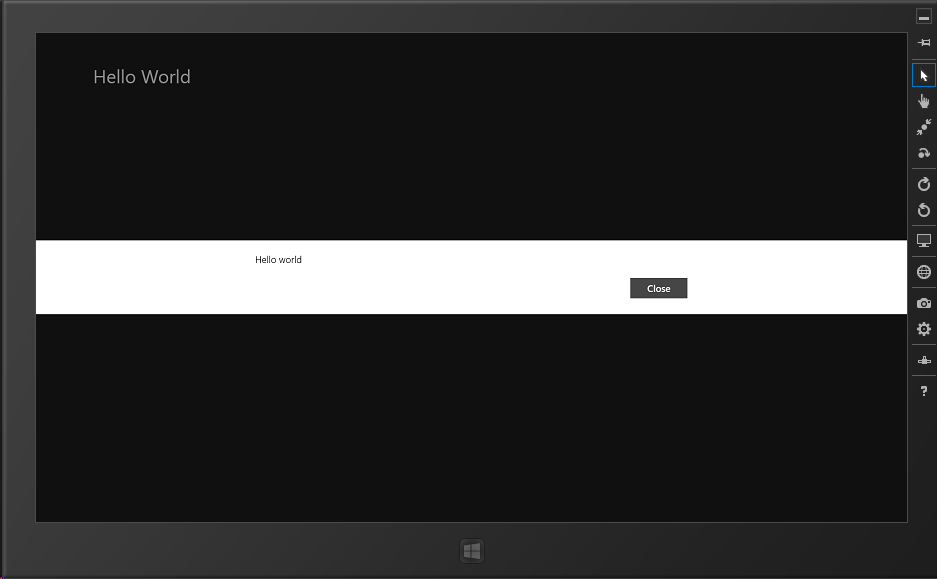
Now this won’t make for a spectacular app. If you run it, it will basically show:

imageimage

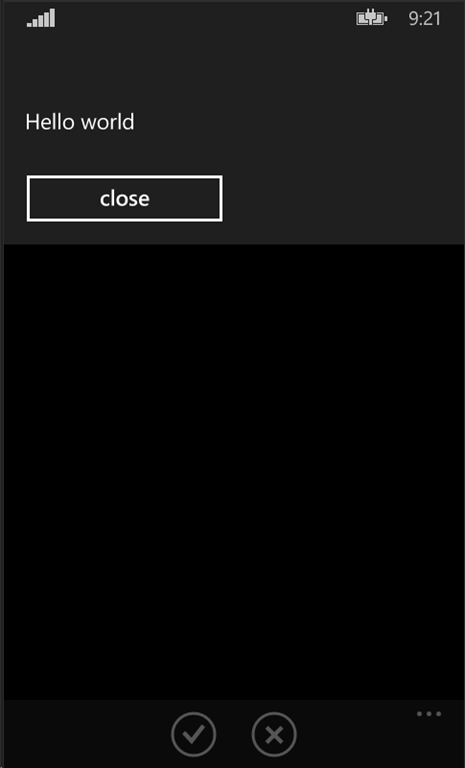
It amaaaaazing, right ;-)? But then I went a bit overboard – I imagemoved MainPage.xaml and imageMainPage.xaml.cs to the Shared project, and removed it from the Windows Phone 8.1 project. Run the Windows Store App again – still works. Run the Windows Phone 8.1 app, and sure enough…

Now this may seem pretty cool – and in fact it is - but it would not be something I would recommend using just like that. Windows Phone is a different beast, the way people use a phone app differs from how they use a Store app on a tablet, and usually you have to think different about how the layout works on a tablet. Case in point – the app bar. Windows Phone has only room for four buttons. The Secondary Commands show up as menu items, not as buttons. The Top bar does not show up at all. So blindly copying a UI from Windows Phone to Windows Store and back is not a smart thing to do. But the fact that it works, is in itself pretty cool.

Sharing code – in a more practical way

In practice, I have found you almost never share whole pages between phone apps and store apps, for a number of reasons:

  • Phone design does not always translate easily to tablet design and vice versa (as pointed out above).
  • For phone, space is a premium, and you don’t want to drag along all kinds of stuff that’s only used on a tablet - think super-high-res stuff, or all kinds of elaborate XAML constructions to accommodate that
  • If you use controls on one platform that simply are not present on the other, or if you use native controls (for example, maps)

To maximize code sharing, you can for instance use partial classes. That works like this: in your code behind MainPage.Xaml.cs you declare the class “partial”.

namespace MyNewApp
{
  /// <summary>
  /// An empty page that can be used on its own or navigated to within a Frame.
  /// </summary>
  public sealed partial class MainPage : Page
  {
    public MainPage()
    {
      this.InitializeComponent();
    }
  }
}
And then in the shared project you create a new file MainPage.Xaml.cs (or MainPage.cs), with just this:
namespace MyNewApp
{
  /// <summary>
  /// An empty page that can be used on its own or navigated to within a Frame.
  /// </summary>
  public sealed partial class MainPage : Page
  {
    public MainPage()
    {
      this.InitializeComponent();
    }
  }
}

And this still gives the same result. Partial classes in shared projects can be pretty powerful. From the partial class in shared code you can call for instance back to methods in the non-shared portion, provided that those called methods are present in both the non-shared portions of the class (so both the MainPage.Xaml.cs). You can even call methods in referenced PCLs. Just keep in mind that in the background it just works like shared files and you can do a lot to minimize duplication.

More ways of sharing

Another way of sharing code is putting most of it in the shared portion – even stuff that’s not present on both platforms – but then using the #ifdef WINDOWS_PHONE_APP and #ifdef WINDOWS_APP directives. This is largely a matter of preference. For smaller classes with little differences I tend to choose this route, for larger classes or code behind files I tend to go for partial classes.When I am working on stuff that is particularly phone-related, I don’t want my code cluttered by Windows code, and vice versa.

A third way of sharing pieces of UI would be creating user controls in shared code. They can be reused within pages that are in itself not shared.

Finally – don’t forget that everything can be shared in the shared images. Apart from XAML and code this includes, for instance:

  • Images
  • Resource files (styles, templates, localization, etc)
  • Data files

And PCL?

In the past, I have never been a fan of PCL, because of their limitations. This has been greatly improved by the new model and I actually start to like it. If you make a PCL for use in Windows 8.1 and Windows Phone 8.1 you can put almost everything in it that can be stuffed in a shared project, including user controls – although of course you can’t do elaborate partial classes callback tricks into non-shared code. This is because a PCL needs to stand on itself. So only everything that is available in both platforms fits in, so for instance almost everything map-related is out (with a few notable and very important exceptions: Geolocation (GPS tracking) and Geofencing (that is now available on Windows Phone too!).

Still – PCL is only useful if you are building stuff that

  • Needs to be reusable over multiple different apps
  • Needs to be usable on both Windows Phone and Windows Store

With this respect, there is not much difference in building platform-specific libraries and distributing them vi NuGet. This is more for the advanced programmer who is starting to build his own toolkit. This means you, by the time you are working on your third app :-)

Code sharing recap

  • Code, XAML or assets that can be shared within one app for both platform can go into a shared project. For code that does not fit entirely you can use
    • Partial classes
    • #ifdef directives
  • Code, XAML or assets that can be shared over multiple apps for both platform can go into a PCL

Conclusion

Build for Both has become a lot easier. You still have to deliver two apps, but making them as one has become a lot easier. Making clever use of the of partial classes and #ifdef makes it easier too, although this requires some thinking. Still, you have to take into account how both platforms behave differently.

A new exiting story for Windows Phone and Windows developers has begun.

The ‘demo solution’, which is hardly worth it’s name in this case, can be downloaded here.

26 February 2014

Drawing circles on Windows Phone Here Maps and Windows Store Bing Maps

One of the areas where the mapping systems for Windows Phone and Windows 8 are lacking, is the ability to draw circles. In particular in Windows Store apps, where you have the ability to use geofences, it would come in pretty handy to be able to draw the outline of a geofence (typically a circle, as this is the only supported type right now) on the map – if only for testing purposes.

To this end I have created a set of extension methods, both for Windows Phone 8 and for Windows Store apps. In the first case, they cannot be used to display the location of a geofence as there are no geofences in Windows Phone 8, but well – drawing circles may come in handy anyway.

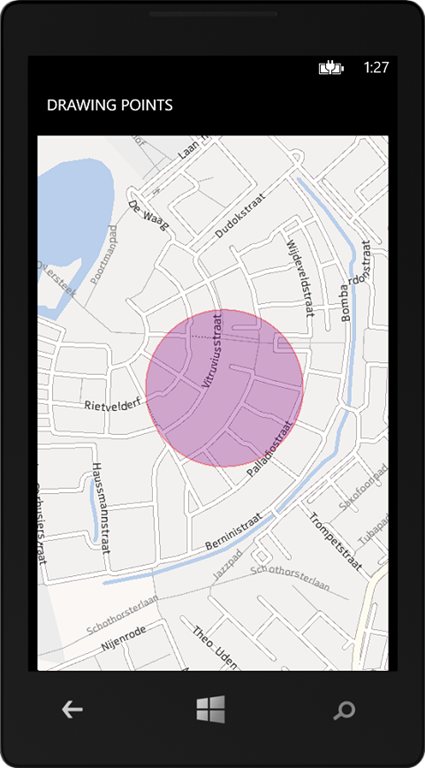
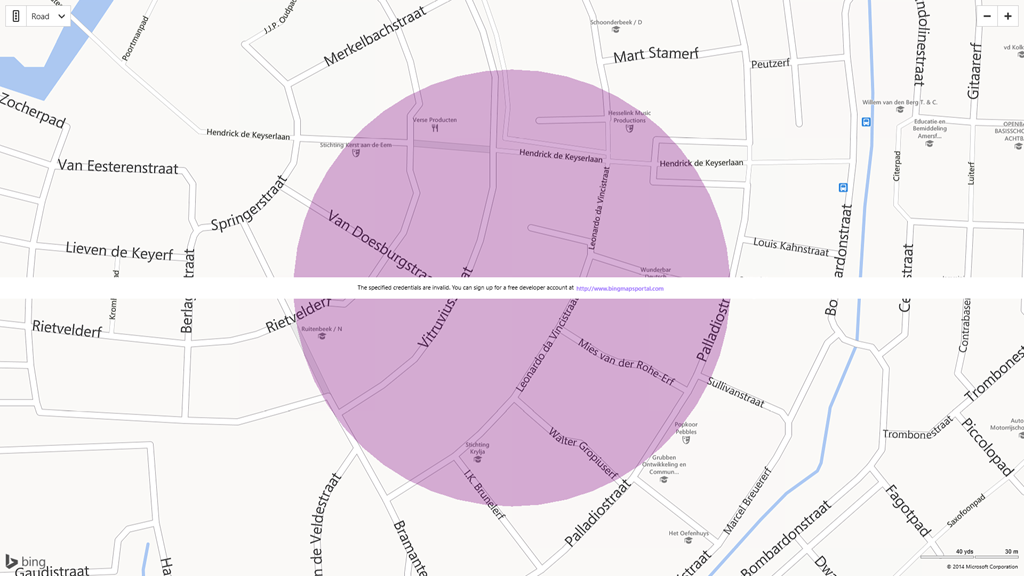
The results look something like this

imageScreenshot (16)

These are not circles – they look like circles. Basically they are just normal polygons, but their points are drawn in a form to resemble a circle. Would you zoom in very far, you would actually be able to see this. Would you calculate it’s surface area, you would actually find it  fraction smaller than a real circle area. But what the heck – it serves the purpose.

I have created a few extension methods to get this done. I will start with Windows Phone code - hey, I am not a Windows Phone MVP for nothing, right? ;-) -which starts off with this piece of math:

using System;
using System.Collections.Generic;
using System.Device.Location;

namespace WpWinNl.Utilities
{
  public static class GeoCoordinateExtensions
  {
    public static GeoCoordinate GetAtDistanceBearing(this GeoCoordinate point, 
                                                     double distance, double bearing)
    {
      const double degreesToRadian = Math.PI / 180.0;
      const double radianToDegrees = 180.0 / Math.PI;
      const double earthRadius = 6378137.0;

      var latA = point.Latitude * degreesToRadian;
      var lonA = point.Longitude * degreesToRadian;
      var angularDistance = distance / earthRadius;
      var trueCourse = bearing * degreesToRadian;

      var lat = Math.Asin(
          Math.Sin(latA) * Math.Cos(angularDistance) +
          Math.Cos(latA) * Math.Sin(angularDistance) * Math.Cos(trueCourse));

      var dlon = Math.Atan2(
          Math.Sin(trueCourse) * Math.Sin(angularDistance) * Math.Cos(latA),
          Math.Cos(angularDistance) - Math.Sin(latA) * Math.Sin(lat));

      var lon = ((lonA + dlon + Math.PI) % (Math.PI * 2)) - Math.PI;

      var result = new GeoCoordinate(lat * radianToDegrees, lon * radianToDegrees);

      return result;
    }
  }
}

This is a method that, given a coordinate, a distance in meters, and a bearing (in degrees) gives you another point. So a entering 50 for distance and 180 for bearing would give you a point 50 meters south of your original point. An impressive piece of math, if I may say so. Which I totally stole from here - as I am into maps, not so much into math. Having this, it’s pretty easy to add a second extension method:

public static IList<GeoCoordinate> GetCirclePoints(this GeoCoordinate center, 
                                   double radius, int nrOfPoints = 50)
{
  var angle = 360.0 / nrOfPoints;
  var locations = new List<GeoCoordinate>();
  for (var i = 0; i <= nrOfPoints; i++)
  {
    locations.Add(center.GetAtDistanceBearing(radius, angle * i));
  }
  return locations;
}

It divides the circle of 360 degrees in the number of points you want, and then simply adds points to the shape at the same distance but at every 360/points degrees. The higher the number of points, the more the shape will look like a real circle. Drawing the circle on a Windows Phone map is child’s play now:

void MainPageLoaded(object sender, RoutedEventArgs e)
{
  var location = new GeoCoordinate(52.181427, 5.399780);
  MyMap.Center = location;
  MyMap.ZoomLevel = 16;

  var fill = Colors.Purple;
  var stroke = Colors.Red;
  fill.A = 80;
  stroke.A = 80;
  var circle = new MapPolygon
  {
    StrokeThickness = 2,
    FillColor = fill,
    StrokeColor = stroke,
    StrokeDashed = false,
  };

  foreach( var p in location.GetCirclePoints(150))
  {
    circle.Path.Add(p);
  }

  MyMap.MapElements.Add(circle);
}

This draws a circle of 150 meters around my house. 

For Windows Store, the story is nearly the same. The differences are:

  1. You will need to install the Bing Maps SDK for Windows 8.1 Store apps
  2. The Bing Maps SDK does not understand System.Device.Location.GeoCoordinate you will need to make the extension method on Bing.Maps.Location

It’s very unfortunate that the mapping APIs for Windows Phone and Windows Store lack convergence even at the point of something as basic the naming of location types. I hope this will get more attention in the future, as mapping is something that I really care about - in case you had not noticed that from this blog ;-).

However, clever use of C# aliasing brings this convergence a bit closer. I changed the top of this file to

using System;
using System.Collections.Generic;
#if WINDOWS_PHONE
using GeoCoordinate = System.Device.Location.GeoCoordinate;
#else
using GeoCoordinate=Bing.Maps.Location;
#endif

et voilá, this file compiles under both Windows Phone and Windows Store (provided you have the Map SDK installed). You can forget about PCLs, but sharing code is definitely a possibility now as far as this little method goes.

Drawing a shape in the Windows Store app is now nearly the same:

void MainPageLoaded(object sender, RoutedEventArgs e)
{
  var location = new Location(52.181427, 5.399780);
  MyMap.Center = location;
  MyMap.ZoomLevel = 18;
  var fill = Colors.Purple;
  fill.A = 80;
  var circle = new MapPolygon
  {
   FillColor = fill,
  };

  foreach (var p in location.GetCirclePoints(150))
  {
    circle.Locations.Add(p);
  }

  var layer = new MapShapeLayer();
  layer.Shapes.Add(circle);

  MyMap.ShapeLayers.Add(layer);
}

Although attentive readers might notice there is no stroke color defined (as MapPolygon in Windows Store does not feature a separate outer shape border) and adding shapes to a map regrettably also works a bit differently. The API of both mapping systems definitely could benefit from some attention here. But anyway – it get’s the job done now at this point.

Full demo solution is downloadable here. One more time – to be able to compile this you will need to install the Bing Maps SDK for Windows 8.1 Store apps first!

23 February 2014

A behavior to replace LayoutAwarePage in Windows Store and Windows Phone apps

Sometimes I think up things all by myself, sometimes I have to read something first to let the ole’ light bulb in my brain go ‘ping’. This post is of the 2nd category, and was inspired by this brilliant piece by C# MVP Iris Classon who is – apart from a very smart and respected coder – also a living and shining (not to mention colorful) axe at the root of the unfortunate gender bigotry that is still widespread in the IT world – a lot of people still think seem convinced “women can’t code, if they do they do it badly, and those who do are socially inept, boring and ugly”. Which is demonstrably untrue – coding requires just a brain and determination - but I am convinced it still shies a lot of brain power out of IT.

Anyway – what I basically did was take Iris’ idea an turn it into – you guessed it – a behavior, to make it more reusable.

To demonstrate how it works, I created the following Store app with a very compelling UI:

image

There is only one text of 75pt there. And then I created three Visual States:

  • Default, which does basically nothing
  • Medium, which changes the font size to 50pt
  • Small, which changes the font size to 25pt

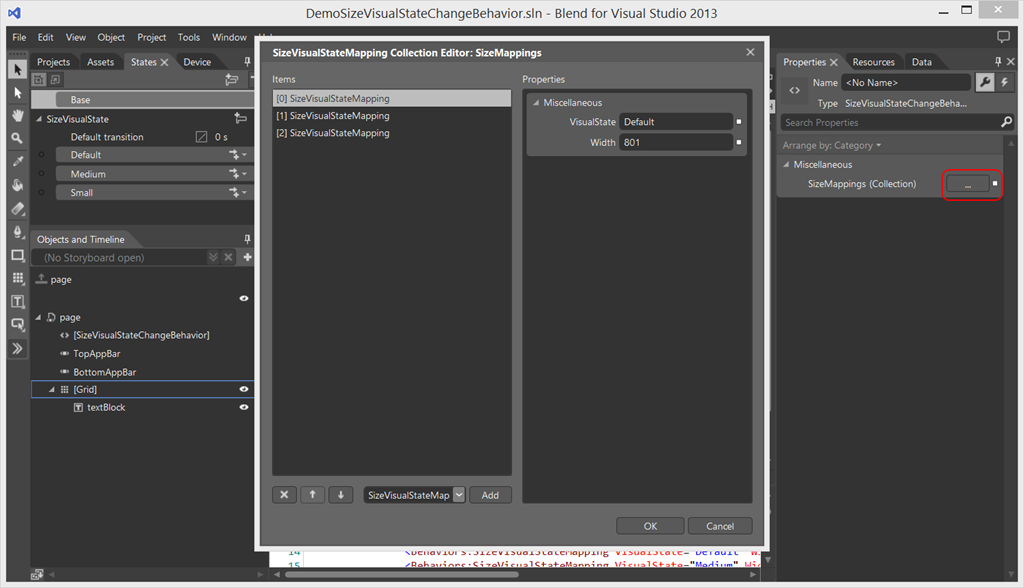
How this is done is amply explained by Iris’ post so I don’t feel very compelled to repeat that here. After creating the states I brought in my WpWinNl nuget package, and added my new SizeVisualStateChangeBehavior to the page. Then I added three entries to “SizeMappings” to the behavior by clicking on the indicated ellipses on the right:

image

  • “Default” with width 801
  • “Medium” with width 800
  • “Small” with width 500

From 801 up to infinity the the Default state will be used (showing the text in it’s default size), between 800 and 501 the Medium state will be used (50pt), and from 500 and lower, the Small state (25pt). And voilá, automatic sizing of items done by filling in some boxes in Blend – or typing in some XAML in Visual Studio if that’s more of your thing. Notice you can add any number of Visual States for any range of widths, just as long as there is one “Default” state that has a width that’s one higher than the largest none-default width. Notice SizeVisualStateMappings can have any name you like as well, as long as they correspond with names of Visual States.

For extra credit, by the way, I made this behavior attachable to Control objects rather than Page, so it can be used inside (user) controls as well. And with some #ifdef directives it also works for Windows Phone, which might come in handy with more and more of resolutions entering the Windows Phone arena.

As to how this behavior works, it’s not quite rocket science. First, we have this hugely complex class :-P that holds one SizeVisualStateMapping:

namespace WpWinNl.Behaviors
{
  public class SizeVisualStateMapping
  {
    public string VisualState { get; set; }
    public int Width { get; set; }
  }
}

The actual behavior’s setup almost immediately shows what I am doing – I simply latch on to the SizeChanged event of the object that the behavior is attached to:

using System.Collections.Generic;
using System.Diagnostics;
using System.Linq;
#if WINDOWS_PHONE
using System.Windows;
using System.Windows.Controls;
#else
using Windows.UI.Xaml;
using Windows.UI.Xaml.Controls;
#endif

namespace WpWinNl.Behaviors
{
  public class SizeVisualStateChangeBehavior : SafeBehavior<Control>
  {
    protected override void OnSetup()
    {
      AssociatedObject.SizeChanged += AssociatedObjectSizeChanged;
      base.OnSetup();
      UpdateVisualState();
    }
    
    private void AssociatedObjectSizeChanged(object sender, SizeChangedEventArgs e)
    {
      UpdateVisualState();
    }
  }
}
The core of the behavior’s functionality is the UpdateVisualState method:
private void UpdateVisualState()
{
  if (SizeMappings != null)
  {
    SizeVisualStateMapping wantedMapping = null;
    var wantedMappings = 
SizeMappings.Where(p => p.Width >= AssociatedObject.ActualWidth); if (wantedMappings.Any()) { wantedMapping = wantedMappings.OrderBy(p => p.Width).First(); } else { var orderedMappings = SizeMappings.OrderBy(p => p.Width); if (AssociatedObject.ActualWidth < orderedMappings.First().Width) { wantedMapping = orderedMappings.First(); } else if (AssociatedObject.ActualWidth > orderedMappings.Last().Width) { wantedMapping = orderedMappings.Last(); } } if (wantedMapping != null) { VisualStateManager.GoToState(AssociatedObject, wantedMapping.VisualState,
false); } } }

Which simply tries to find a SizeVisualStateMapping that’s fit for the current width of the associated object. If it finds that, it tells the VisualStateManager to go to that state, which proceeds to do the actual work. And that’s basically all. All that's left are an Dependency Property SizeMapping of type List<SizeVisualStateMapping> SizeMappings that holds the actual mapings, and a Cleanup method that detaches the behavior from the SizeChanged event again.

Full details, and a working solution including this behavior, can be found here. If you run this app in split screen and slowly makes it’s window width smaller, you will notice the text getting smaller. Be aware that the change only fires when you actually let the window divider control go – as long as you keep it active (by touching or dragging it) nothing will happen.

14 February 2014

Build for both–an instruction video pivot page for Windows store apps

For my game 2 Phone Pong – and its Windows 8.1 counterpart 2 Tablet Pong, that at the time of this writing is going through some interesting certification challenges  – I created a page with video instructions. I did not feel much like writing a lot of text on how to connect the apps and play the game – a short video usually tells so much more. That proved to be less straightforward than I had hoped, so I thought it a good idea to share how I got it to work.

Both platforms have their own limitations and idiosyncrasies. Windows 8 does not have a Pivot, and Windows Phone makes life pretty difficult when it comes to playing multiple videos on one page. I have solved the first problems by creating FlipViewPanoramaBehavior and I was successfully able to reuse that behavior, although it’s now running on top of the official Windows RT Behavior SDK, no longer using my stopgap project WinRtBehaviors.

In this post I will show you how to build a video page for Windows Store apps – the next one will show you how to do the same for Windows Phone. The Windows version is actually the most simple

When I set out to create the video instruction page I wanted it to do the following:

  • Start the video on the current visible pivot item automatically – and start the first video on the first pivot as soon as the user access the page.
  • Repeat that movie automatically when it ends
  • Stop it as soon as the user selects a different pivot item

This gives the following effect:

Store video instruction page demo

How I got to this, is explained below

Setting the stage

The beginning is pretty simple - it usually is ;-)

  • Created an Blank XAML store app
  • Bring in my WpWinNl library from Nuget
  • Add an empty page “Help.xaml”
  • Go to App.xaml.cs and change rootFrame.Navigate(typeof(MainPage), e.Arguments); to rootFrame.Navigate(typeof(Help), e.Arguments);
  • Bring in a couple of video’s you want to use. I took three of my actual instruction videos from 2 Tablet Pong.

The XAML basics

The page contains the usual stuff for a nice page header, but as far as the video instruction part is concerned, it only contains the following things:

  • A FlipView with some (very minor) styling for the header text
  • My FlipViewPanoramaBehavior attached to it
  • A few FlipViewItems, each containing a grid with a header and a MediaElement with the Video in it

That looks more or less like this:

<FlipView x:Name="VideoFlipView"  >
  <FlipView.Resources>
    <Style TargetType="TextBlock">
      <Setter Property="FontSize" Value="30"></Setter>
    </Style>
  </FlipView.Resources>
  <interactivity:Interaction.Behaviors>
    <behaviors:FlipViewPanoramaBehavior/>
  </interactivity:Interaction.Behaviors>
  <FlipViewItem >
    <Grid>
      <Grid.RowDefinitions>
        <RowDefinition Height="40"></RowDefinition>
        <RowDefinition Height="Auto"></RowDefinition>
      </Grid.RowDefinitions>
      <TextBlock Text="Connect via WiFi" ></TextBlock>
      <MediaElement x:Name="FirstMovieMediaElement" 
        Source="Video/ConnectWiFi.mp4" Grid.Row="1" >
       </MediaElement >
    </Grid>
  </FlipViewItem>
  <!-- More FlipViewItems with video -->
</FlipView>

Important to see is that both the FlipView and the first FlipViewItem have a name, this is because we need to reference it form the page code.

Some code to make it work

First order or business is getting this thing on the road, so we need to define some starter events in the constructor:

using System.Linq;
using Windows.UI.Xaml;
using Windows.UI.Xaml.Controls;
using Windows.UI.Xaml.Navigation;
using WpWinNl;
using WpWinNl.Utilities;

namespace Win8VideoPivot
{
  public sealed partial class Help : Page
  {
    public Help()
    {
      InitializeComponent();
      VideoFlipView.SelectionChanged += SelectedIndexChanged;
      FirstMovieMediaElement.MediaOpened += 
        FirstMovieMediaElementMediaOpened;
    }
  }
}

Next up is a little helper property that give us a short cut to all the MediaElements on the page, using a helper method from WpWinNl:

private IEnumerable<MediaElement> AllMediaElements
{
  get
  {
    return VideoFlipView.GetVisualDescendents().OfType<MediaElement>();
  }
}
The main method of this page is StartMovieOnSelectedFlipViewItem - that finds the MediaElement on the current selected FlipViewItem, stops MediaElements on all the other FlipViewItems, and kicks off the current one to play it's movie:
private void StartMovieOnSelectedFlipViewItem()
{
  var pivotItem = (FlipViewItem)VideoFlipView.SelectedItem;
  var mediaItem = pivotItem.GetVisualDescendents().OfType<MediaElement>().FirstOrDefault();
  AllMediaElements.Where(p => p != mediaItem).ForEach(p => p.Stop());

  if (mediaItem != null)
  {
    mediaItem.Play();
  }
}

In the constructor we wired up FirstMovieMediaElementMediaOpened, to be fired when the first MediaElement has opened it's media file. It does, as you would expect, start the first movie file by simply calling StartMovieOnSelectedFlipViewItem  What it also does is setting all the MediaElement’s AutoPlay properties to false, and attach a method to their MediaEnded property, so that a movie is automatically restarted again when it ends.

private void FirstMovieMediaElementMediaOpened(object sender, RoutedEventArgs e)
{
  AllMediaElements.ForEach(p =>
  {
    p.MediaEnded += MovieMediaElementMediaEnded;
    p.AutoPlay = false;
  });
  StartMovieOnSelectedFlipViewItem();
}

private void MovieMediaElementMediaEnded(object sender, RoutedEventArgs e)
{
  ((MediaElement)sender).Play();
}

This might seem a mighty odd place to do it here, and not in the constructor – but I have found that it simply does not have the desired effect when I placed this code in a constructor. A typical ‘yeah whatever’ thing.

The only thing that is now missing is SelectedIndexChanged, that we also wired up in the constructor to be executed when a new FlipViewItem is selected:

private void SelectedIndexChanged(object sender, SelectionChangedEventArgs e)
{
  StartMovieOnSelectedFlipViewItem();
}

It simply restarts a movie that ends all by itself. Note – this is not fired when a movie is stopped by code.

And for good measure, to make sure we don’t introduce all kinds of memory leaks, we detach all the events again in the OnNavigatedTo

protected override void OnNavigatedFrom(NavigationEventArgs e)
{
  base.OnNavigatedFrom(e);
  AllMediaElements.ForEach(p =>
  {
    p.MediaEnded -= MovieMediaElementMediaEnded;
  });
  VideoFlipView.SelectionChanged -= SelectedIndexChanged;
  FirstMovieMediaElement.MediaOpened -= FirstMovieMediaElementMediaOpened;
}

That’s all there is to it – you will find that most of the work will actually go into making videos that are good enough to convey the minimal message without enormously blowing up the size of your app. The code itself, as you see, is pretty easy.

Full demo solution can be found here.

Oh by the way – I did not suddenly do a 180 of MVVM versus code behind – this is just pure view stuff, no business logic needed to drive it, so it’s OK to use code behind in this case.

01 February 2014

Build for both–a very simple wp8 style app bar hint control for Windows Store apps

Windows Phone users are very familiar with the concept of an app bar at the bottom that, in collapsed state, gives a kind of indication that it’s available. In Windows Store apps app bars are just invisible, unless you specifically activate them by swiping in from the top or the bottom. There have been earlier attempts to solve this UI difference by my fellow Dutch MVP Fons Sonnemans who created the Peeking App Bar. Microsoft itself has apparently become aware of the fact default invisible app bars may not always be ideal, and has created a kind of a hint of an app bar that very much looks like they had some inspiration from Windows Phone – which is now used in the Windows Mail app:

image

Now there are already solutions out there, most notably this one by recently appointed MVP Dave Smits. They work indeed. But I like to make things simple, so I made a very simple. So in a typical programmer fashion, I rolled my own :-)

So I created my HintBar control, which is actually laughably simple. The XAML is only this, and most of it is declaration too:

<UserControl
    x:Class="WpWinNl.Controls.HintBar"
    xmlns="http://schemas.microsoft.com/winfx/2006/xaml/presentation"
    xmlns:x="http://schemas.microsoft.com/winfx/2006/xaml"
    xmlns:d="http://schemas.microsoft.com/expression/blend/2008"
    xmlns:mc="http://schemas.openxmlformats.org/markup-compatibility/2006"
    mc:Ignorable="d"
    d:DesignHeight="14"
    d:DesignWidth="400" x:Name="ControlRoot">

  <Grid x:Name="HintBarGrid" 
        Background="{Binding Background, ElementName=ControlRoot}" 
        Tapped="HintBarGridTapped">
    <TextBlock  x:Name="HintBarText" Text="&#xE10C" 
                FontFamily="Segoe UI Symbol" FontSize="21.333" 
                HorizontalAlignment="Right"  RenderTransformOrigin="0.5,0.5" 
                VerticalAlignment="Center" Margin="0,0,50,0"/>
  </Grid>
</UserControl>

So it’s basically a simple grid that does something when the user taps on it. In the grid there’s only a TextBlock with one ‘glyph’ in it – using the special Segoe UI Symbol character set that Microsoft uses to store all kinds of symbols in. &#xE10C is simply the code for a symbol containing three dots.

The code is not very complex either. It’s basically two attached dependency properties:

  • AssociatedCommandBar, to which you can bind the CommandBar to open when the hint bar is tapped
  • ForeGround, which you can use to change the color of the three dots

If you don’t understand what attached dependency properties are: they are basically the property equivalent of extension methods, and what’s more important – you can data bind to them.

So the AssociatedCommandBar looks like this. It does nothing special

#region Attached Dependency Property AssociatedCommandBar
public static readonly DependencyProperty AssociatedCommandBarProperty =
	 DependencyProperty.RegisterAttached("AssociatedCommandBar",
	 typeof(CommandBar),
	 typeof(HintBar),
	 new PropertyMetadata(default(CommandBar)));

// Called when Property is retrieved
public static CommandBar GetAssociatedCommandBar(DependencyObject obj)
{
  return obj.GetValue(AssociatedCommandBarProperty) as CommandBar;
}

// Called when Property is set
public static void SetAssociatedCommandBar(
   DependencyObject obj,
   CommandBar value)
{
  obj.SetValue(AssociatedCommandBarProperty, value);
}
#endregion

The other property is only a brush defining the text color, and the only thing it does is transferring its value to the text:

#region Attached Dependency Property ForeGround
public static readonly DependencyProperty ForeGroundProperty =
	 DependencyProperty.RegisterAttached("ForeGround",
	 typeof(Brush),
	 typeof(HintBar),
	 new PropertyMetadata(default(Brush), ForeGroundChanged));

// Called when Property is retrieved
public static Brush GetForeGround(DependencyObject obj)
{
  return obj.GetValue(ForeGroundProperty) as Brush;
}

// Called when Property is set
public static void SetForeGround(
   DependencyObject obj,
   Brush value)
{
  obj.SetValue(ForeGroundProperty, value);
}

// Called when property is changed
private static void ForeGroundChanged(
 object sender,
 DependencyPropertyChangedEventArgs args)
{
  var thisObject = sender as HintBar;
  if (thisObject != null)
  {
    thisObject.HintBarText.Foreground = args.NewValue as Brush;
  }
}
#endregion

And the rest of the ‘real code’ of the control is just this:

using Windows.UI.Xaml;
using Windows.UI.Xaml.Controls;
using Windows.UI.Xaml.Input;
using Windows.UI.Xaml.Media;

namespace WpWinNl.Controls
{
  public sealed partial class HintBar : UserControl
  {
    public HintBar()
    {
      InitializeComponent();
    }

    private void HintBarGridTapped(object sender, 
	                           TappedRoutedEventArgs e)
    {
      var commandBar = GetAssociatedCommandBar(this);
      if (commandBar != null)
      {
        commandBar.IsOpen = true;
      }
    }
  }
}

Not exactly rocket science, right? You tap the grid, the command bar opens. :-)

Using it is pretty simple too. You have a page with a command bar:

<Page
    xmlns="http://schemas.microsoft.com/winfx/2006/xaml/presentation"
    xmlns:x="http://schemas.microsoft.com/winfx/2006/xaml"
    xmlns:d="http://schemas.microsoft.com/expression/blend/2008"
    xmlns:mc="http://schemas.openxmlformats.org/markup-compatibility/2006"
    xmlns:controls="using:WpWinNl.Controls"
    x:Class="HintBarDemo.MainPage"
    mc:Ignorable="d" VerticalAlignment="Bottom">

  <Page.BottomAppBar >
    <CommandBar x:Name="BottomBar"  Background="Blue">
    <!-- Content omitted -->
    </CommandBar>
  </Page.BottomAppBar>

  <Grid Background="{ThemeResource ApplicationPageBackgroundThemeBrush}">

    <controls:HintBar Background ="Blue" Height="14" VerticalAlignment="Bottom"
     	   AssociatedCommandBar="{Binding ElementName=BottomBar}"/>

  </Grid>
</Page>

Give the command bar a name and bind it to AssociatedCommandBar property of the control. Then it’s just a matter of setting it to the bottom of the page, setting it to the desired height, and choosing a color for your bar. That is all. Life is sometimes very easy.

As always, the demo solution can be found here.