Showing posts with label Windows Phone 8. Show all posts

26 February 2014

Drawing circles on Windows Phone Here Maps and Windows Store Bing Maps

One of the areas where the mapping systems for Windows Phone and Windows 8 are lacking, is the ability to draw circles. In particular in Windows Store apps, where you have the ability to use geofences, it would come in pretty handy to be able to draw the outline of a geofence (typically a circle, as this is the only supported type right now) on the map – if only for testing purposes.

To this end I have created a set of extension methods, both for Windows Phone 8 and for Windows Store apps. In the first case, they cannot be used to display the location of a geofence as there are no geofences in Windows Phone 8, but well – drawing circles may come in handy anyway.

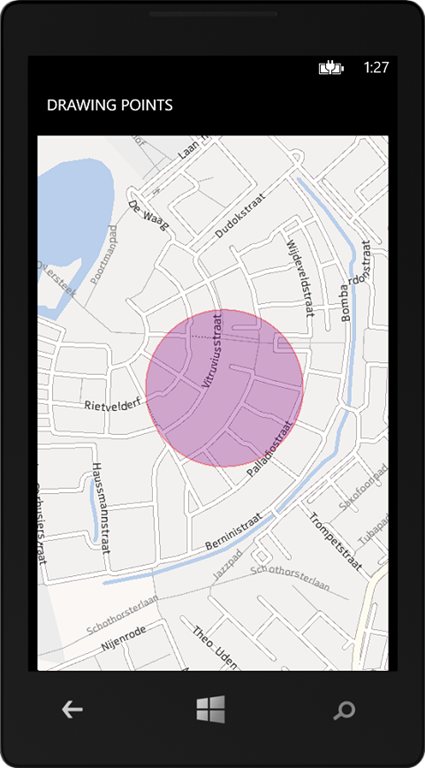
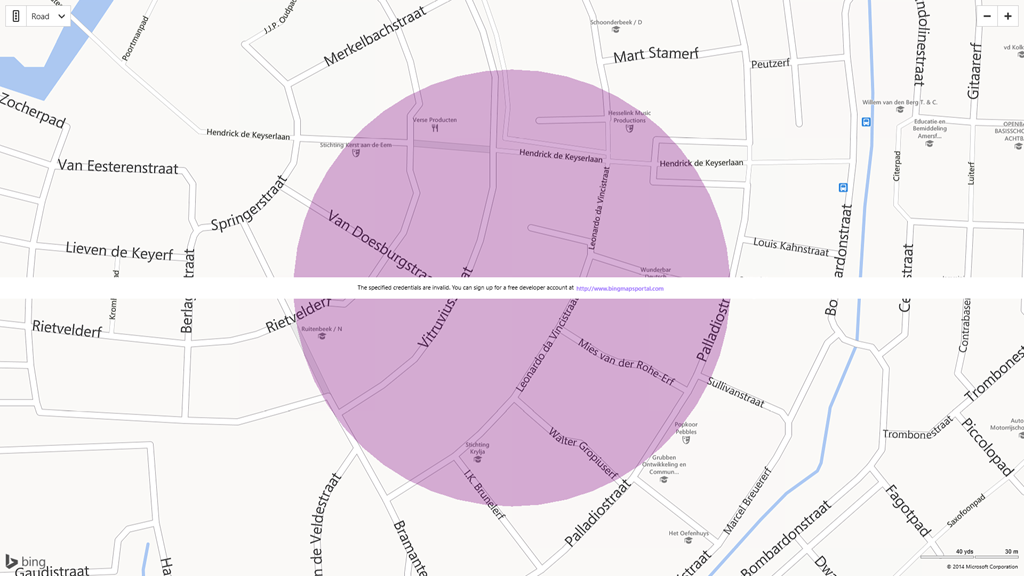
The results look something like this

imageScreenshot (16)

These are not circles – they look like circles. Basically they are just normal polygons, but their points are drawn in a form to resemble a circle. Would you zoom in very far, you would actually be able to see this. Would you calculate it’s surface area, you would actually find it  fraction smaller than a real circle area. But what the heck – it serves the purpose.

I have created a few extension methods to get this done. I will start with Windows Phone code - hey, I am not a Windows Phone MVP for nothing, right? ;-) -which starts off with this piece of math:

using System;
using System.Collections.Generic;
using System.Device.Location;

namespace WpWinNl.Utilities
{
  public static class GeoCoordinateExtensions
  {
    public static GeoCoordinate GetAtDistanceBearing(this GeoCoordinate point, 
                                                     double distance, double bearing)
    {
      const double degreesToRadian = Math.PI / 180.0;
      const double radianToDegrees = 180.0 / Math.PI;
      const double earthRadius = 6378137.0;

      var latA = point.Latitude * degreesToRadian;
      var lonA = point.Longitude * degreesToRadian;
      var angularDistance = distance / earthRadius;
      var trueCourse = bearing * degreesToRadian;

      var lat = Math.Asin(
          Math.Sin(latA) * Math.Cos(angularDistance) +
          Math.Cos(latA) * Math.Sin(angularDistance) * Math.Cos(trueCourse));

      var dlon = Math.Atan2(
          Math.Sin(trueCourse) * Math.Sin(angularDistance) * Math.Cos(latA),
          Math.Cos(angularDistance) - Math.Sin(latA) * Math.Sin(lat));

      var lon = ((lonA + dlon + Math.PI) % (Math.PI * 2)) - Math.PI;

      var result = new GeoCoordinate(lat * radianToDegrees, lon * radianToDegrees);

      return result;
    }
  }
}

This is a method that, given a coordinate, a distance in meters, and a bearing (in degrees) gives you another point. So a entering 50 for distance and 180 for bearing would give you a point 50 meters south of your original point. An impressive piece of math, if I may say so. Which I totally stole from here - as I am into maps, not so much into math. Having this, it’s pretty easy to add a second extension method:

public static IList<GeoCoordinate> GetCirclePoints(this GeoCoordinate center, 
                                   double radius, int nrOfPoints = 50)
{
  var angle = 360.0 / nrOfPoints;
  var locations = new List<GeoCoordinate>();
  for (var i = 0; i <= nrOfPoints; i++)
  {
    locations.Add(center.GetAtDistanceBearing(radius, angle * i));
  }
  return locations;
}

It divides the circle of 360 degrees in the number of points you want, and then simply adds points to the shape at the same distance but at every 360/points degrees. The higher the number of points, the more the shape will look like a real circle. Drawing the circle on a Windows Phone map is child’s play now:

void MainPageLoaded(object sender, RoutedEventArgs e)
{
  var location = new GeoCoordinate(52.181427, 5.399780);
  MyMap.Center = location;
  MyMap.ZoomLevel = 16;

  var fill = Colors.Purple;
  var stroke = Colors.Red;
  fill.A = 80;
  stroke.A = 80;
  var circle = new MapPolygon
  {
    StrokeThickness = 2,
    FillColor = fill,
    StrokeColor = stroke,
    StrokeDashed = false,
  };

  foreach( var p in location.GetCirclePoints(150))
  {
    circle.Path.Add(p);
  }

  MyMap.MapElements.Add(circle);
}

This draws a circle of 150 meters around my house. 

For Windows Store, the story is nearly the same. The differences are:

  1. You will need to install the Bing Maps SDK for Windows 8.1 Store apps
  2. The Bing Maps SDK does not understand System.Device.Location.GeoCoordinate you will need to make the extension method on Bing.Maps.Location

It’s very unfortunate that the mapping APIs for Windows Phone and Windows Store lack convergence even at the point of something as basic the naming of location types. I hope this will get more attention in the future, as mapping is something that I really care about - in case you had not noticed that from this blog ;-).

However, clever use of C# aliasing brings this convergence a bit closer. I changed the top of this file to

using System;
using System.Collections.Generic;
#if WINDOWS_PHONE
using GeoCoordinate = System.Device.Location.GeoCoordinate;
#else
using GeoCoordinate=Bing.Maps.Location;
#endif

et voilá, this file compiles under both Windows Phone and Windows Store (provided you have the Map SDK installed). You can forget about PCLs, but sharing code is definitely a possibility now as far as this little method goes.

Drawing a shape in the Windows Store app is now nearly the same:

void MainPageLoaded(object sender, RoutedEventArgs e)
{
  var location = new Location(52.181427, 5.399780);
  MyMap.Center = location;
  MyMap.ZoomLevel = 18;
  var fill = Colors.Purple;
  fill.A = 80;
  var circle = new MapPolygon
  {
   FillColor = fill,
  };

  foreach (var p in location.GetCirclePoints(150))
  {
    circle.Locations.Add(p);
  }

  var layer = new MapShapeLayer();
  layer.Shapes.Add(circle);

  MyMap.ShapeLayers.Add(layer);
}

Although attentive readers might notice there is no stroke color defined (as MapPolygon in Windows Store does not feature a separate outer shape border) and adding shapes to a map regrettably also works a bit differently. The API of both mapping systems definitely could benefit from some attention here. But anyway – it get’s the job done now at this point.

Full demo solution is downloadable here. One more time – to be able to compile this you will need to install the Bing Maps SDK for Windows 8.1 Store apps first!

23 February 2014

A behavior to replace LayoutAwarePage in Windows Store and Windows Phone apps

Sometimes I think up things all by myself, sometimes I have to read something first to let the ole’ light bulb in my brain go ‘ping’. This post is of the 2nd category, and was inspired by this brilliant piece by C# MVP Iris Classon who is – apart from a very smart and respected coder – also a living and shining (not to mention colorful) axe at the root of the unfortunate gender bigotry that is still widespread in the IT world – a lot of people still think seem convinced “women can’t code, if they do they do it badly, and those who do are socially inept, boring and ugly”. Which is demonstrably untrue – coding requires just a brain and determination - but I am convinced it still shies a lot of brain power out of IT.

Anyway – what I basically did was take Iris’ idea an turn it into – you guessed it – a behavior, to make it more reusable.

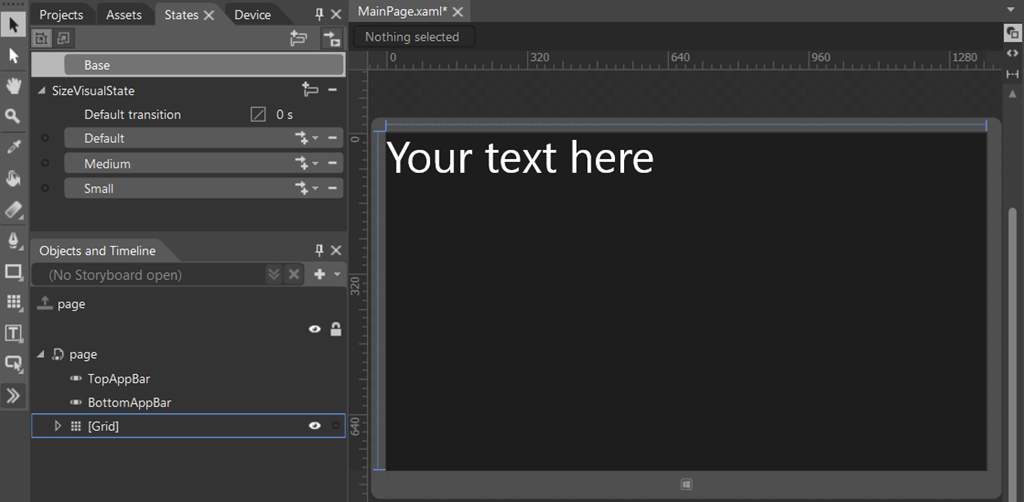
To demonstrate how it works, I created the following Store app with a very compelling UI:

image

There is only one text of 75pt there. And then I created three Visual States:

  • Default, which does basically nothing
  • Medium, which changes the font size to 50pt
  • Small, which changes the font size to 25pt

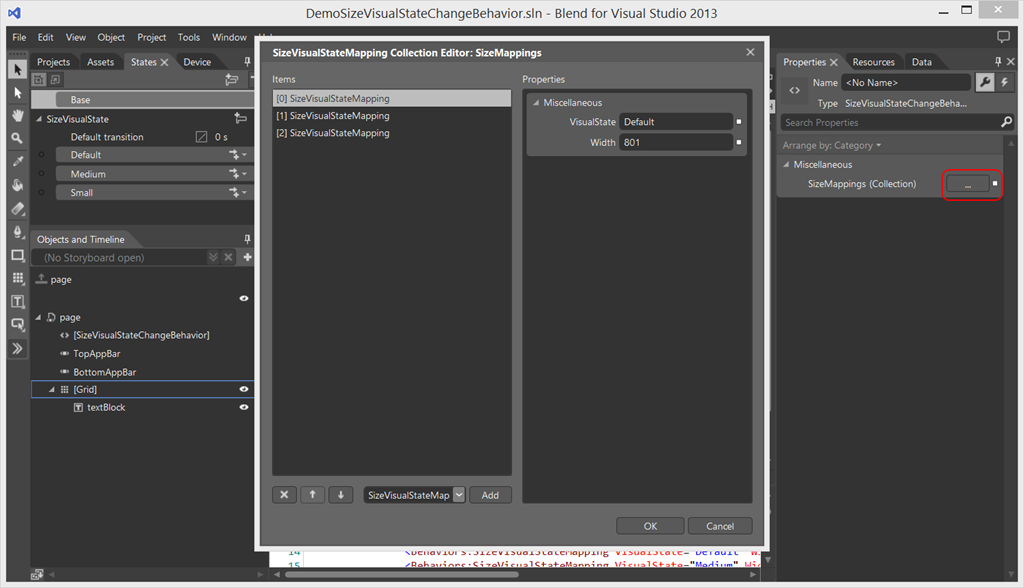
How this is done is amply explained by Iris’ post so I don’t feel very compelled to repeat that here. After creating the states I brought in my WpWinNl nuget package, and added my new SizeVisualStateChangeBehavior to the page. Then I added three entries to “SizeMappings” to the behavior by clicking on the indicated ellipses on the right:

image

  • “Default” with width 801
  • “Medium” with width 800
  • “Small” with width 500

From 801 up to infinity the the Default state will be used (showing the text in it’s default size), between 800 and 501 the Medium state will be used (50pt), and from 500 and lower, the Small state (25pt). And voilá, automatic sizing of items done by filling in some boxes in Blend – or typing in some XAML in Visual Studio if that’s more of your thing. Notice you can add any number of Visual States for any range of widths, just as long as there is one “Default” state that has a width that’s one higher than the largest none-default width. Notice SizeVisualStateMappings can have any name you like as well, as long as they correspond with names of Visual States.

For extra credit, by the way, I made this behavior attachable to Control objects rather than Page, so it can be used inside (user) controls as well. And with some #ifdef directives it also works for Windows Phone, which might come in handy with more and more of resolutions entering the Windows Phone arena.

As to how this behavior works, it’s not quite rocket science. First, we have this hugely complex class :-P that holds one SizeVisualStateMapping:

namespace WpWinNl.Behaviors
{
  public class SizeVisualStateMapping
  {
    public string VisualState { get; set; }
    public int Width { get; set; }
  }
}

The actual behavior’s setup almost immediately shows what I am doing – I simply latch on to the SizeChanged event of the object that the behavior is attached to:

using System.Collections.Generic;
using System.Diagnostics;
using System.Linq;
#if WINDOWS_PHONE
using System.Windows;
using System.Windows.Controls;
#else
using Windows.UI.Xaml;
using Windows.UI.Xaml.Controls;
#endif

namespace WpWinNl.Behaviors
{
  public class SizeVisualStateChangeBehavior : SafeBehavior<Control>
  {
    protected override void OnSetup()
    {
      AssociatedObject.SizeChanged += AssociatedObjectSizeChanged;
      base.OnSetup();
      UpdateVisualState();
    }
    
    private void AssociatedObjectSizeChanged(object sender, SizeChangedEventArgs e)
    {
      UpdateVisualState();
    }
  }
}
The core of the behavior’s functionality is the UpdateVisualState method:
private void UpdateVisualState()
{
  if (SizeMappings != null)
  {
    SizeVisualStateMapping wantedMapping = null;
    var wantedMappings = 
SizeMappings.Where(p => p.Width >= AssociatedObject.ActualWidth); if (wantedMappings.Any()) { wantedMapping = wantedMappings.OrderBy(p => p.Width).First(); } else { var orderedMappings = SizeMappings.OrderBy(p => p.Width); if (AssociatedObject.ActualWidth < orderedMappings.First().Width) { wantedMapping = orderedMappings.First(); } else if (AssociatedObject.ActualWidth > orderedMappings.Last().Width) { wantedMapping = orderedMappings.Last(); } } if (wantedMapping != null) { VisualStateManager.GoToState(AssociatedObject, wantedMapping.VisualState,
false); } } }

Which simply tries to find a SizeVisualStateMapping that’s fit for the current width of the associated object. If it finds that, it tells the VisualStateManager to go to that state, which proceeds to do the actual work. And that’s basically all. All that's left are an Dependency Property SizeMapping of type List<SizeVisualStateMapping> SizeMappings that holds the actual mapings, and a Cleanup method that detaches the behavior from the SizeChanged event again.

Full details, and a working solution including this behavior, can be found here. If you run this app in split screen and slowly makes it’s window width smaller, you will notice the text getting smaller. Be aware that the change only fires when you actually let the window divider control go – as long as you keep it active (by touching or dragging it) nothing will happen.

18 February 2014

Commercial break 2 – introducing 2 Tablet Pong aka Play On Both

310x310Regular readers might remember the launch of 2 Phone Pong in August 2013, one of the first – if not the very first – action game that could be played on two Windows Phones, first only over NFC, later over Bluetooth. It’s been a moderate success, particularly popular in Brazil and Turkey.

Today I launch 2 Tablet Pong, essentially the same game, for Windows 8.1.

But this release has a little twist – not only can you play against any Windows 8.1 device (provided it supports Wi-FI direct) but also against a Windows Phone running the newest version of 2 Phone Pong, making it possible the first cross-platform action game in town.

The gameplay on two Windows 8.1 devices is exactly the same as on Windows Phone. Here you see my Surface Pro 1 (right) and my Surface 2 (left) being used in the game

Surface versus Surface Pro

This is actually the instruction movie inside the game. As is the next one, that shows how my Lumia 1020 (right) connects to the Surface Pro – which is called “Blue”* on my network

You will need to pair a phone to a Windows 8.1 over Bluetooth first, and then they will be able to find each other. That is to say, the phone finds the PC (after some time), never the other way around. With a PC-to-PC connection it’s a matter of who starts first – the last one always finds the connection.

There were some interesting challenges to the port, but thanks to the extensive use of MVVMLight and my WpWinNl library I was able to use 90% of my code and I think 75% of XAML. I mostly used shared code, sometimes partial classes. There are also some extra rules in the Windows version – the ball speed adapts to the size of the screen, so if you play the game on half a screen, it will only go half as fast, or else it will become unplayable.

The game is free, but will be ad-supported in a soon-to-be-released update. I hope it will enjoy a just as enthusiastic reception as it’s phone predecessor.

I will soon update WpWinNl with everything I learned from porting this game, and I have a lot to blog about – I hope the community can benefit from that. Enjoy!


* disclaimer: those who think the name “Blue” has any significance or hints at something – I have a total lack of fantasy as far as device names are concerned, so I have a long standing tradition of naming my PCs after my wife’s pet hamsters. “Blue” is a 26 month old Russian dwarf hamster – she is called that way because that’s the name of the color variety. Go Bing it if you don’t believe me. My next PC will be called Smokey ;)

Build for both–an instruction video pivot page for Windows Phone apps

For Windows Phone apps, the same goes a for Windows 8 store apps – a picture tells more than a thousand words and a video even more. So as promised earlier, I am going to show you how to make a video instruction pivot for Windows Phone, that works as showed here below.

Windows Phone video instruction demo

The Pivot part is easy, as this is already built-in – controlling the MediaElements proved to be substantially harder.

A recap of the objectives:

  • Start the video on the current visible pivot item automatically – and start the first video on the first pivot as soon as the user access the page.
  • Repeat that movie automatically when it ends
  • Stop it as soon as the user selects a different pivot item

Setting the stage

  • Create a blank Windows Phone app
  • Bring in my WpWinNl library from Nuget
  • Add an empty page “Help.xaml”
  • Open WMAppManifest.xml, look for the box “Navigation Page” and change this from “MainPage.xaml” to “Help.xaml”. This will make your app start the Help page on startup. That’s not a smart move for production code but it will make a demo app a lot easier.

The XAML basics

Basically the page (expect for the header) is filled by a StackPanel containing a PivotItem and some styling for (mostly) the MediaElementand the PivotItem. That gives every MediaElement a specific alignment and size that will make it fit just in a portrait-oriented page.

<StackPanel x:Name="TitlePanel" Grid.Row="0" Margin="12,30,0,0">
  <TextBlock x:Name="ApplicationTitle" Text="MY APP" 
             Style="{StaticResource PhoneTextNormalStyle}" Margin="0,0,30,0"/>
  <phone:Pivot x:Name="VideoPivot" Title="How to do stuff" 
               HeaderTemplate="{StaticResource HeaderTemplate}" Margin="-25,0,0,0">
    <phone:Pivot.Resources>
      <Style TargetType="MediaElement">
        <Setter Property="Margin" Value="12,0,0,0"></Setter>
        <Setter Property="VerticalAlignment" Value="Top"></Setter>
        <Setter Property="HorizontalAlignment" Value="Left"></Setter>
        <Setter Property="Width" Value="478"></Setter>
        <Setter Property="Height" Value="268"></Setter>
      </Style>
      <Style TargetType="phone:PivotItem">
        <Setter Property="CacheMode" Value="{x:Null}"></Setter>
      </Style>
    </phone:Pivot.Resources>
    <phone:PivotItem Header="connect via tap+send">
      <MediaElement Source="Video/2PhonePongConnect.mp4" />
    </phone:PivotItem>
  <!-- More PivotItems with video -->
  </phone:Pivot>
</StackPanel>

Also note that the styling turns off CacheMode for the Pivot items. That seems to be necessary. The MediaElements themselves contain, apart from the url to the video, nothing else. The rest is set from code behind.

You might also notice that the Pivot used a HeaderTemplate: that’s fairly simple and just exists to limit the header text size a little:

<DataTemplate x:Key="HeaderTemplate">
   <TextBlock Text="{Binding}" FontSize="35"/>
</DataTemplate>

And again some code to make it work

There is an important difference between the FlipView and the Pivot – in what I think is an effort to conserve memory, not all the pivot panes are loaded into memory at startup: only the selected one (i.e. the first), and the ones left en right of that. So we have no way of retrieving all the MediaElements up front. So we have to gather and attach to those elements as we go along.

There is also an important issue with MediaElement on Windows Phone – it does not like to have multiple initialized MediaElements on one page. So I designed all kind of trickery to make this work. For starters, in order to make this work, we need a dictionary of all the video elements and their sources:

using System.Windows;
using System.Windows.Controls;
using System.Windows.Navigation;
using Microsoft.Phone.Controls;
using WpWinNl;
using WpWinNl.Utilities;

namespace TwoPhonePong
{
  public partial class Help
  {
    private readonly Dictionary<MediaElement, Uri> sources = 
new Dictionary<MediaElement, Uri>(); } }
The constructor, of course, kicks off the whole process
public Help()
{
  InitializeComponent();
  VideoPivot.Loaded += VideoPivotLoaded;
  VideoPivot.LoadedPivotItem += VideoPivotLoadedPivotItem;
}
Then comes the funky stuff:
private void VideoPivotLoaded(object sender, RoutedEventArgs e)
{
  VideoPivot.GetVisualDescendents().OfType<MediaElement>().
ForEach(StoreMediaElementReference); PlayMovieOnPivotItem((PivotItem)VideoPivot.SelectedItem); } private void StoreMediaElementReference(MediaElement mediaElement) { sources.Add(mediaElement, mediaElement.Source); mediaElement.Source = null; mediaElement.AutoPlay = false;

mediaElement.MediaEnded += MovieMediaElementMediaEnded; mediaElement.MediaOpened += MovieMediaElementMediaEnded; }

I case you are wondering about your sanity (or mine) – don’t worry, what you seems to be reading is correct: VideoPivotLoaded finds all the active MediaElements on the Pivot, an the calls StoreMediaElementReference – which stores the URL of their source in the sources directory and then clears the MediaElement’s Source (basically un-initializing it) and sets AutoPlay to false. And then it add the MovieMediaElementMediaEnded method to both the MediaEnded and MediaOpened events of the MediaElement. It does this – of course – only for the PivotItems that are actually loaded.

In case you think thinks can’t get any weirder than this, wait till you see the PlayMovieOnPivotItem method

private void PlayMovieOnPivotItem(PivotItem e)
{
  var mediaElement = e.GetVisualDescendents().
OfType<MediaElement>().FirstOrDefault(); VideoPivot.GetVisualDescendents().OfType<MediaElement>(). Where(p => p != mediaElement).ForEach( p => { p.Stop(); p.Source = null; }); if (mediaElement != null) { mediaElement.Position = new TimeSpan(0); if (!sources.ContainsKey(mediaElement)) { StoreMediaElementReference(mediaElement); } mediaElement.Source = sources[mediaElement]; }

So, first it tries to find the MediaElement on the current PivotItem. Then it stops all the MediaElements that are not on this Pivot, and clears their source – effectively as I said, uninitializing them. For the MediaElement on the current PivotItem – if it’s not in the sources dictionary (so it was on the fourth or higher PivotItem) it is added to the sources using StoreMediaElementReference. However – the source of the MediaElement – that at this point is null, whether it was in the sources dictionary or not – is now set from that sources dictionary.

If the movie has finished loading the MediaOpened event is fired, and calls the MovieMediaElementMediaEnded method – remember that is was wired up in StoreMediaElementReference?

private void MovieMediaElementMediaEnded(object sender, RoutedEventArgs e)
{
  var mediaElement = sender as MediaElement;
  if (mediaElement != null)
  {
    mediaElement.Position = new TimeSpan(0);
    mediaElement.Play();
  }
}

This method starts video playback it – so as soon as the video loaded, it starts playing. And since this same method is wired up to the MediaEnded event too – this will enable the repeated playback of this video as well. Until it is not by code.

Of course – when a user changes the selected PivotItem by swiping left or right – a new video needs to be started and the other ones stopped. This is pretty easily done now:

private void VideoPivotLoadedPivotItem(object sender, PivotItemEventArgs e)
{
  PlayMovieOnPivotItem(e.Item);
}

This method was wired up to the Pivot’s LoadedPivotItem way up in the constructor of this page.

Your video instruction page now works. Now to prevent memory leaks and especially prevent blocking other MediaElements elsewhere in the application, this method clears all even wiring and the MediaElement’s Source properties

protected override void OnNavigatedFrom(NavigationEventArgs e)
{
  sources.Keys.ForEach(p =>
                       {
                         p.Source = null;
                         p.MediaEnded -= MovieMediaElementMediaEnded;
                         p.MediaOpened -= MovieMediaElementMediaEnded;
                       });
  VideoPivot.Loaded -= VideoPivotLoaded;
  VideoPivot.LoadedPivotItem -= VideoPivotLoadedPivotItem;
  base.OnNavigatedFrom(e);
}

And thus you have created a video instruction page that works on Windows Phone under all circumstances (at least under all circumstances I have encountered).

Enjoy – and find the demo solution here

11 February 2014

Drawing translucent shapes and lines on a Windows Phone 8 Map

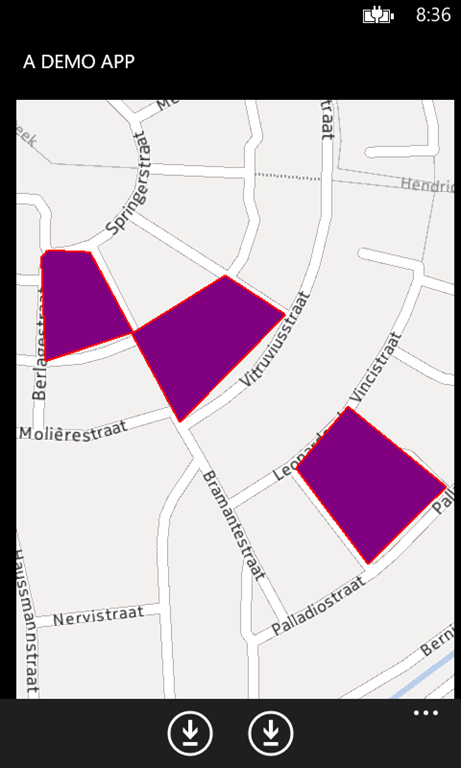
Shapes1For those who think the MVP title comes with divine wisdom, I have a disappointing announcement to make: it does not. Recently I discovered (or actually was told) something pretty elementary that I missed all that time: how to draw more or less translucent lines or shapes on a Windows Phone 8 map.

To the right you see a few shapes that I draw on the screen during my 3rd WpDevFusion Mapping session demo. The basic piece for such a shape is very simple:

var line = new MapPolygon
{
  StrokeThickness = 2,
  FillColor=Colors.Purple,
  StrokeColor = Colors.Red,
  StrokeDashed = false
};

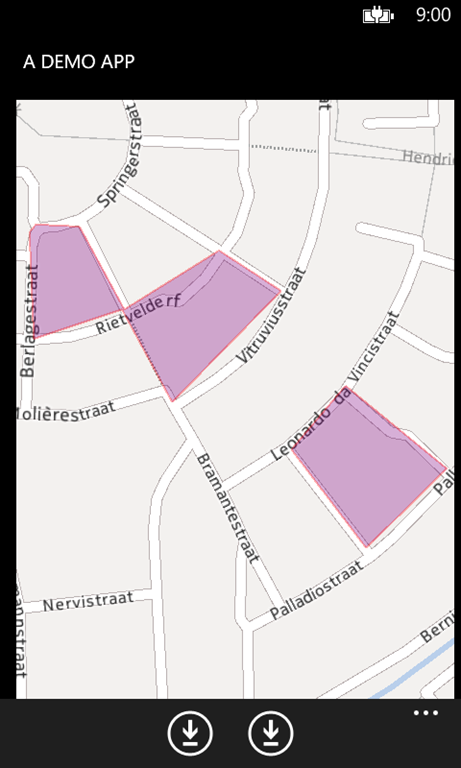
Shapes2But what we want is more or less translucent shapes. That turns out to be insanely easy:

var fill = Colors.Purple;
var stroke = Colors.Red;
fill.A = 80;
stroke.A = 80;
var line = new MapPolygon
{
  StrokeThickness = 2,
  FillColor = fill,
  StrokeColor = stroke,
  StrokeDashed = false
};

A Color has four elements : R(ed), G(reen), B(lue) and A(lpha). The last ones determines the opacity of XAML elements, but apparently also that of map shapes. Both fill and stroke are now about 80/255th (or 31%) opaque – or 69% translucent.

And that’s all there is to it. If you don’t mind, I will leave the demo solution for as exercise for the reader this time ;)

11 December 2013

Build for both–introducing WpWinNl

Intro

As I alluded to in a few previous posts, I have been working on a merged version of both my Windows Phone and Windows 8 libraries on Codeplex: wp7nl and win8nl. I have now come to the point that I think it is ready for use and/or some community feedback, so I just released WpWinNl to CodePlex and NuGet. The first ‘good’ version is 1.0.1, immediately superseded by 1.0.3 containing the new cross platform DevicePairConnectHelper.

I’ve cut some old stuff that merely introduced dependencies and that no-one used anyway, and I ported stuff that was missing in Win8nl from Windows Phone and back. Provided it makea sense – since there is no FlipView in Windows Phone, I did not port the FlipViewPanoramaBehavior

People may be shocked to see that it is mainly a Windows 8.1 project, and that the Windows Phone project contains mainly links. No, I am not trying leave Windows Phone – I just found out that most Windows 8 code compiles unchanged on Windows Phone, but not the other way around. See the things that I ran into when I was porting reflection-riddle code – it’s better to bite the bullet on Windows 8, then Windows Phone usually follows suit. The investment the Phone team made moving to a common kernel really pays off that way

It is still a work in progress, as any good library should be.

FAQ

  • What? Are you abandoning Windows Phone 7?
    • Yup. Sorry. Gotta move forward. I push you forward into the new era whether you want it or not ;-) . Seriously, I have enough #ifdef code as it is now. And for those that don’t want to go along – the old library wp7nl still exists, and most of the code will still compile under Windows Phone 7.
  • What? Only support for Windows 8.1, no Windows 8 anymore?
    • Yup. See previous question.
  • Is this fully and thoroughly tested?
    • Nope. This is the tool I needed to make to make cross-platform apps myself. I will probably run into errors. So will you. Contributions and fixes are accepted
  • You are now the only dev registered on the project. Are you taking sole control of the project again?
    • Don’t be silly – if you want to contribute as a developer, just let me know. I just did not get around to adding the people that contributed to the ‘parent projects’.
  • Why only platform specific libraries? Why not PCL?
    • Most of the code I write makes at some point use of the System.Windows or the Windows.UI.Xaml namespace. That does not fit into PCL anyway, so at this point I think the benefits of having PCL do not outweigh the extra hassle of having source code in three potential spots.

Enjoy!

04 December 2013

Building for both: a tap+send/Bluetooth connection helper for Windows Phone 8 AND Windows 8.1

On my way to the November 2013 MVP Summit, at Matthijs Hoekstra’s house in Sammamish, and back again in the Netherlands I spent considerable time trying to get my tap+send and Bluetooth connection helper to not only work on Windows 8.1 as well, but also to make it provide cross-platform communication between Windows Phone 8 and Windows 8.1. Unfortunately the MSDN PixPresenter sample suggest you can connect between Windows Phone and Windows 8 by sharing app ids in the PeerFinder.AlternateIdentities property, and so does the MSDN documentation on said property. That way, my friends, lay only mud pies and frustration. I don’t doubt that it will work for tap+send, but as the majority of the current Windows 8.x devices (including Microsoft’s own excellent Surface devices) do not include NFC capabilities, the chances of making a successful connection between a Windows Phone and a random Windows 8 computer using tap+send are very small.

I seem to have a thing with Italians these days – I had a lot of fun with a bunch of them at the Summit, and it was not until this Italian developer called Andrea Boschin pointed me to a recent blog post by him that I found a way out of this. Using this knowledge I adapted DevicePairConnectionHelper once again, so now it’s not only cross platform, but it can also connect between Windows Phone 8 and Windows 8.1. If you are completely new to this subject, I suggest you read the previous two articles about this subject as well.

What it can do

In the demo solution, that sports both a Windows 8.1 Store application and a Windows Phone 8 application, you will find a shared file DevicePairConnectionHelper2.cs containing the updated DevicePairConnectionHelper – now supporting  the following communication paths:

  • Windows Phone 8 to Windows Phone 8 – tap+send
  • Windows Phone 8 to Windows Phone 8 – Bluetooth browsing
  • Windows 8.1 to Windows 8.1 – WifiDirect browsing
  • Windows 8.1 to Windows Phone 8 – Bluetooth.

In theory it should support Windows 8.1 to Windows 8.1 over tap+send as well, but lacking even a single NFC enabled Windows 8.1 device, this is hard to test for me.

How to set it up and use it

A very important precondition– the devices can only find each other when the phone is paired to the Windows 8.1 computer. Now the odd thing is – as you have paired the phone to the computer, you will see that is “connected” on both the computer and the phone, for a very short time. And then it flashes off again, so they are not connected. This is a bit confusing, but it is normal. They now ‘know’ each other, and that is what’s important.

As far as the the updated DevicePairConnectionHelper goes, it works nearly the same as the previous one, but it has two extras, as far as using it is concerned.

  • In the constructor, you can now optionally provide a GUID that describes a Bluetooth Service
  • There is a new boolean property ConnectCrossPlatform that you can set to true – then the Window 8 phone will try to connect to a Windows 8 machine using Bluetooth.

To set it up, you have to take the following things into account:

  • In you Windows Phone 8 app manifest, you have to select the ID_CAP_PROXIMITY capability
  • In you Windows 8 app manifest, you will have to the following capabilities
    • Private Networks (Client & Server)
    • Proximity
  • After you have saved you manifest, you have to open the Package.appmanifest manually (right click, hit View Code) and add a Bluetooth rfcomm service. Andrea explains how this is done, and I repeat it here for completeness:
<Capabilities>
  <Capability Name="internetClient" />
  <Capability Name="privateNetworkClientServer" />
  <DeviceCapability Name="proximity" />
  <m2:DeviceCapability Name="bluetooth.rfcomm">
    <m2:Device Id="any">
      <m2:Function Type="serviceId:A7EA96BB-4F95-4A91-9FDD-3CE3CFF1D8BC" />
    </m2:Device>
  </m2:DeviceCapability>
</Capabilities>

The stuff in Italics is what you add – verbatim. Except for the serviceId. Make and id up yourself, generate a guid, but don’t copy this one. Don’t re-use it over applications. But keep it ready, for you will need it in your code.

So, in your Windows 8 app, you now create a DevicePairConnectionHelper and fire it off like this:

var d = new DevicePairConnectionHelper("A7EA96BB-4F95-4A91-9FDD-3CE3CFF1D8BC");
d.ConnectCrossPlatform = true;
d.Start(ConnectMethod.Browse);

And you do exactly the same on Windows Phone 8. Usually the best way to connect is:

  • Start both the Windows 8.1 and the Windows Phone 8 app.
  • First start connect on the Windows 8.1 computer. That usually pretty quickly returns with zero peers found, but it keeps advertising it’s service. Then hit connect on the Windows Phone 8
  • After some time – sometimes half a minute – the Windows Phone 8 gets the peers

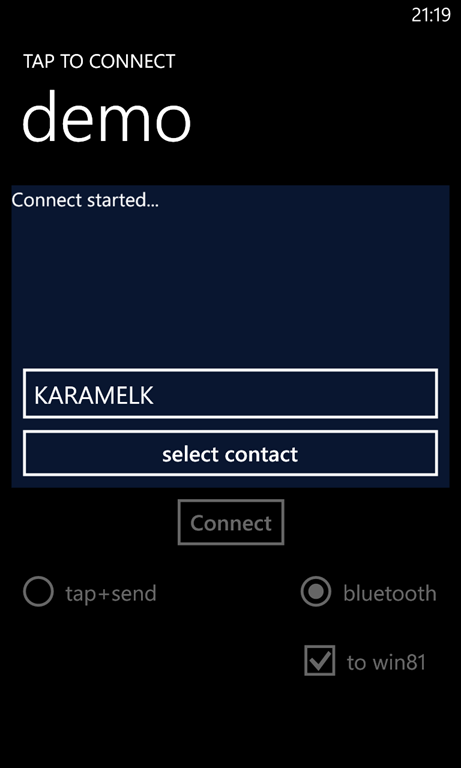
Below is the Windows 8 demo app as it has found my main desktop computer “Karamelk”) (that sports a Bluetooth dongle), and next to it the screen of the Windows 8.1 computer, still searching for contacts

wp_ss_20131204_0001     image

Then I hit “Select contact”. The first time, the Windows 8.1 you get a popup asking if the phone can use the connection. And if you give it permission, the apps connect, and it then it looks like this:

wp_ss_20131205_0001      imagewp_ss_20131205_0003

Now you can send messages back and forth.

You can still use this component to connect two Windows Phones to each other like you used to, and you now can also can connect two computers to each other and exchange messages.

A final piece of warning as far as usage is concerned – if you set ConnectCrossPlatform to true, the Windows Phone 8 will do cross-platform connect – but that’s the only thing it will do. Apparently it can’t find other Windows Phone 8 devices in that mode – just Windows 8.1 computers. For a Windows 8.1 computer, it does not matter – whether ConnectCrossPlatform is on or off, it will find other computers as well as phones. The text “Bluetooth” next to the right radio button is actually wrong on Windows 8.1, since the connection between computer actually uses WiFi Direct.


How it works

Just like last time – when I added Bluetooth – there was surprisingly little to change. The actual difficult stuff was already found out by Andrea ;-). It turns out that on the Windows Phone side you don’t have to do much, but on the Windows 8.1 side you have to resort to some trickery and use the Bluetooth Rfcomm API.

First of all we need a property to instruct the component to connect cross-platform (or not) and some stuff to hold the service GUID that we need:

public bool ConnectCrossPlatform { get; set; }

private Guid rfcommServiceUuid;

public string RfcommServiceUuid
{
  get
  {
    return rfcommServiceUuid == Guid.Empty ? null : rfcommServiceUuid.ToString();
  }
  set
  {
    Guid tmpGuid;
    if (Guid.TryParse(value, out tmpGuid))
    {
      rfcommServiceUuid = tmpGuid;
    }
  }
}

The RfcommServiceUuid property looks a bit complex, but it’s only to ensure there’s an actual GUID in it. Then comes the actual cross-platform connecting stuff. Most is just simply taken from Andrea, and for an explanation of what he is actually doing I kindly refer to his post (because I understand about half of it).

#if WINDOWS_PHONE
    private async Task InitBrowseWpToWin()
    {
      var t = new Task(() =>
      {
        PeerFinder.AlternateIdentities["Bluetooth:SDP"] = 
          rfcommServiceUuid.ToString();
      });
      t.Start();
      await t;
    }

    private void StopInitBrowseWpToWin()
    {
      if (PeerFinder.AlternateIdentities.ContainsKey("Bluetooth:SDP"))
      {
        PeerFinder.AlternateIdentities.Remove("Bluetooth:SDP");
      }
    }
#endif

#if NETFX_CORE
    // Code in this part largely based on 
    // http://www.silverlightshow.net/items/Windows-8.1-Play-with-Bluetooth-Rfcomm.aspx

    private const uint ServiceVersionAttributeId = 0x0300;
    private const byte ServiceVersionAttributeType = 0x0A;
    private const uint ServiceVersion = 200;

    private RfcommServiceProvider provider;

    private async Task InitBrowseWpToWin()
    {
      provider = await RfcommServiceProvider.CreateAsync(
                       RfcommServiceId.FromUuid(rfcommServiceUuid));

      var listener = new StreamSocketListener();
      listener.ConnectionReceived += HandleConnectionReceived;

      await listener.BindServiceNameAsync(
        provider.ServiceId.AsString(),
        SocketProtectionLevel.BluetoothEncryptionAllowNullAuthentication);

      using (var writer = new DataWriter())
      {
        writer.WriteByte(ServiceVersionAttributeType);
        writer.WriteUInt32(ServiceVersion);

        var data = writer.DetachBuffer();
        provider.SdpRawAttributes.Add(ServiceVersionAttributeId, data);
        provider.StartAdvertising(listener);
      }
    }

    private void HandleConnectionReceived(StreamSocketListener listener,
      StreamSocketListenerConnectionReceivedEventArgs args)
    {
      provider.StopAdvertising();
      listener.Dispose();
      DoConnect(args.Socket);
    }
    
    // Borrowed code ends
    
    private void StopInitBrowseWpToWin()
    {
      if (provider != null)
      {
        provider.StopAdvertising();
        provider = null;
      }
    }
#endif

Important to notice is that I use Bluetooth:SDP in stead of Bluetooth:Paired like Andrea does. If I use the paired option, I get a list of all devices paired to my phone, including my Jabra headset, my Surface Pro, a Beewi Mini Cooper Coupé Red I got on the last MVP Summit and the desktop computer that I try to connect to. I use SDP (Service Discovery Protocol) to find the device that actually provides the one service I am looking for – not so much a Bluetooth connection from a device that happens to be in the list of paired devices. Notice the Windows Store portion actually makes a “RfcommServiceProvider” with the Guid as identifier, and the Windows Phone portion sets that same Guid as a string to the AlternateIdentities.

Oh – the Windows Phone version of InitBrowseWpToWin method is a bit convoluted – it’s just a way to make whatever is inside async as well, so it’s compatible with the signature of the Windows 8.1 version.

Another important thing to notice is that the Window 8.1 part needs an extra using:

#if NETFX_CORE
using Windows.Devices.Bluetooth.Rfcomm;
#endif

Anyway, where it all starts is here: at the constructor. Not much has changed – there’s only the extra optional parameter that’s being recorded for future use:

public DevicePairConnectionHelper2(string crossPlatformServiceUid = null)
{
  RfcommServiceUuid = crossPlatformServiceUid;
  Messenger.Default.Register<NavigationMessage>(this, ProcessNavigationMessage);
  PeerFinder.TriggeredConnectionStateChanged += PeerFinderTriggeredConnectionStateChanged;
  PeerFinder.ConnectionRequested += PeerFinderConnectionRequested;
}

The Start method has been slightly adapted- it’s now async, to accommodate the async InitBrowseWpToWin method

public async Task Start(ConnectMethod connectMethod = ConnectMethod.Tap, 
   string displayAdvertiseName = null)
{
  Reset();
  connectMode = connectMethod;
  if (!string.IsNullOrEmpty(displayAdvertiseName))
  {
    PeerFinder.DisplayName = displayAdvertiseName;
  }

  try
  {
    PeerFinder.Start();
  }
  catch (Exception)
  {
    Debug.WriteLine("Peerfinder error");
  }

  // Enable browse
  if (connectMode == ConnectMethod.Browse)
  {
    if (ConnectCrossPlatform)
    {
      await InitBrowseWpToWin();
    }

    await PeerFinder.FindAllPeersAsync().AsTask().ContinueWith(p =>
    {
      if (!p.IsFaulted)
      {
        FirePeersFound(p.Result);
      }
    });
  }
}}

A couple of things have changed here – first of all, the whole component is reset in stead of just the PeerFinder, because there's now potentially much more set up now than just the PeerFinder. The start of the PeerFinder is now in a try-catch because on Windows 8.1 some combinations of parameters cause an exception – while still the connection is set up. This is a typical ‘yeah whatever works’ solution. Then the cross platform stuff is set up – if that is required, and I also check first if the result of the task that returns from the PeerFinder is not faulted, which I did not do in earlier versions either.

The most important piece of refactoring is the DoConnect method. In the old version there was one – now there are three overloads:

private void DoConnect(PeerInformation peerInformation)
{
#if WINDOWS_PHONE
  if (peerInformation.HostName != null)
  {
    DoConnect(peerInformation.HostName, peerInformation.ServiceName);
    return;
  }
#endif

  PeerFinder.ConnectAsync(peerInformation).AsTask().ContinueWith(p =>
  {
    if (!p.IsFaulted)
    {
      DoConnect(p.Result);
    }
    else
    {
      Debug.WriteLine("connection fault");
      FireConnectionStatusChanged(TriggeredConnectState.Failed);
    }
  });
}

private void DoConnect(HostName hostname, string serviceName)
{
  var streamSocket = new StreamSocket();
  streamSocket.ConnectAsync(hostname, serviceName).AsTask().ContinueWith((p) => 
                            DoConnect(streamSocket));
}

private void DoConnect(StreamSocket receivedSocket)
{
  socket = receivedSocket;
  StartListeningForMessages();
  PeerFinder.Stop();
  FireConnectionStatusChanged(TriggeredConnectState.Completed);
}

It is a bit complicated, but these three methods cover all scenario’s

  1. If a Windows Phone connects to a Windows Phone, it calls the first method. Since this is not a cross-platform call, the HostName will be null, so it will do PeerFinder.ConnectAsync, receive a StreamSocket and proceed to call the 3rd DoConnect method.
  2. If a Windows 8.1 computer connects a Windows 8.1 computer – ditto
  3. If a Windows Phone connects a Windows 8.1 computer – the Phone will fine find that the HostName (and ServiceId) will be set, so it calls the 2nd DoConnect method. This will proceed to connect to the service, as pass on the result StreamSocket again to the 3rd method
  4. The Window 8.1 computer, upon being connected by a Windows Phone, will get a callback in HandleConnectionReceived (see above, in Andrea’s code) which will immediately result in a StreamSocket, so it call the 3rd DoConnect immediately.

For good measure – the 2nd DoConnect method is actually never used in a Windows 8.1 application.

And that’s about what I needed to do. The changes to the sample app are very limited – I added a checkbox on both of them, and a wrapping ConnectCrossPlatform property that is set by said checkbox. Also a minor detail – the Reset method in the NfcConnectViewModel no longer stops the PeerFinder first. This is especially important for the Windows 8.1 app – it never finds the phone, but the phone is still trying to make a connection. If the PeerFinder on Windows 8.1 is already stopped, you get all kind of funky errors when you select the computer on the phone.

For those who find the discussion a bit arcane – there is, as always, a working demo solution for this article. It is built on top of my new not-yet-published WpWinNl library – that’s basically a cross-platform (no, not PCL, just a NuGet Package) version of the wp7nl library. Well as cross platform as it can be. Stay tuned, it will be available soon. But tackling this problem took a bit longer than I hoped, so I am a bit behind schedule

09 November 2013

Build for both-Reflection bits & pieces for Windows Phone 8 and Windows 8

This is a bit of an odd post – it’s the things I learned while porting SilverlightSerializer 2 from Windows Phone to Windows 8 Store apps code. For those who don’t know what that is – it’s a very fast serializer, created by the brilliant Mike Talbot that’s able to store complex objects graphs in a very compact binary format. I use it to store an app’s state by simply serializing the view model graph to storage. For my (now) only Windows Store app I made a half-*ssed attempt to convert the much simpler SilverlightSerializer  v1 last year – but that’s slower and much less capable – especially my port. I was very much in a hurry then, so I cut out everything I did not need.

Anyway – SilverlightSerializer is a big chunk of reflection code. To get it to work in Windows Store apps, I had to change quite a lot of things – but then again a lot less than I thought. Even more shocking was the fact it worked without any problems when I linked the adapted code back to my Windows Phone project. That’s the power of the common Windows Runtime – no #if WINDOWS_PHONE preprocessor statements here!

So anyway, here’s what I learned. I wrote it in a kind of boring old-new style, but I found very little on this subject on the web, so I hope this is useful for people digging into reflection on Windows Store apps and hitting the wall when trying to do it ‘the new way’.

Properties and Fields

Get an object’s properties:

  • Old code: Type.GetProperties()
  • New code: Type.GetRuntimeProperties()

Get a single property:

  • Old code: Type.GetProperty("MyProperty")
  • New code: Type.GetRuntimeProperty("MyProperty")

Get a property’s get method

  • Old code: PropertyInfo.GetGetMethod();
  • New code: PropertyInfo.GetMethod;

Get a property’s set method

  • Old code: PropertyInfo.GetSetMethod();
  • New code: PropertyInfo.SetMethod;

Get public non-static properties that can be get and set

  • Old code:Type.GetProperties(BindingFlags.Instance | BindingFlags.Public).
                          Where(p => p.GetSetMethod() != null));
  • New code:Type.GetRuntimeProperties().
                             Where(p=> p.GetMethod != null && p.SetMethod != null &&
                                         !p.SetMethod.IsStatic && !p.GetMethod.IsStatic &&
                                         p.GetMethod.IsPublic && p.SetMethod.IsPublic);

Get an object’s Fields:

  • Old code: Type.GetFields()
  • New code: Type.GetRuntimeFields()

Get a single Field:

  • Old code: Type.GetField("MyProperty")
  • New code: Type.GetRuntimeField("MyProperty")

You can already see two patterns here – in stead of GetXYZ you do GetRuntimeXYZ. This “Runtime” indicates all an objects has available on runtime – that is, both it’s own properties, methods etc. and those of it’s parents. The other pattern is that in the Windows Runtime there is a tendency to use properties in stead of zero-parameter get methods.

Attributes

Determine whether a property has a custom attribute or not

  • Old code: PropertyInfo.GetCustomAttributes(typeof(DoNotSerialize), true).Any()
  • New code: PropertyInfo.GetCustomAttribute<DoNotSerialize>(true) != null

Type info

Determine if a type is an enum

  • Old code: Type.IsEnum
  • New code: Type.GetTypeInfo().IsEnum

Determine if a type is a generic type

  • Old code: Type.IsGenericType
  • New code: Type.GetTypeInfo().IsGenericType

Determine a type’s generic arguments

  • Old code: Type.GetGenericArguments()
  • New code: Type.GetTypeInfo().GenericTypeArguments

Find a type’s default constructor

  • Old code:Type.GetConstructor(new Type[] { });
  • New code: Type.GetTypeInfo().DeclaredConstructors.
                            FirstOrDefault(p => !p.GetParameters().Any());

Determine if a type implements an interface

  • Old code: Type.GetInterface("IEnumerable", true) != null;
  • New code: GetTypeInfo().ImplementedInterfaces.FirstOrDefault(
                         p => string.Compare(p.Name, name, ignoreCase?
                         StringComparison.OrdinalIgnoreCase : StringComparison.Ordinal)==0);

I must admit being a bit lazy on this one – this was used quite a number of times in SilverlightSerializer, so I made the following extension method

using System;
using System.Linq;
using System.Reflection;

namespace WpWinNl.Utilities
{
  public static class TypeExtensions
  {
    public static Type GetInterface(this Type type, string name, bool ignoreCase)
    {
      return type.GetTypeInfo().ImplementedInterfaces.FirstOrDefault(
        p => string.Compare(p.Name, name, ignoreCase? 
            StringComparison.OrdinalIgnoreCase : StringComparison.Ordinal)==0) ;
    }
  }
}

and was done with it ;-). Beware – this is not something I recommend – making the new API compatible with the old. Rather, make it the other way around. But for porting existing code – especially code you did not write yourself – this can be a helpful way to save time.

Miscellaneous

Creating delegates

  • Old code: Delegate.CreateDelegate(typeof(DelegateType), MethodInfo);
  • New code: MethodInfo.CreateDelegate(typeof(DelegateType));

A MethodInfo is something you would get out of for instance PropertyInfo.GetMethod. I must admit to code in SilverlightSerializer is quite complex at this point, and I don’t understand the whole detail. But this seems to work, and I suggest people more interested in the details to have a look at the code. I will post the whole shebang soon.

Sorry, no sample this time ;-)

07 November 2013

Build for both-Converters for Windows Phone 8 and Windows 8.1 Store apps

Our Dutch DPE Rajen Kishna has been quite heavily banging the ‘build for both’ drum for some time now, and after having spent quite some time on exclusive Windows Phone development I decided to see if I could rewrite the code for my wp7nl library on codeplex so that it would easily work for Windows Phone 8 and Windows 8.1 store apps – of course in order to be able to port my apps for Windows 8.1 as well.

At the moment of this writing I am still very much in the process of converting and rewriting code, but here is already the first part one of my yet-to-be-decided-number-of-parts of a build-for-both series – about how to write a ValueConverter that runs on both platforms. Since this handles about UI stuff, I could not go PCL, so I chose the shared code route.

ValueConverters need to implement IValueConverter, a simple two-method interface. In Windows Phone (and Silverlight and WPF) this interface is

Convert(object value, Type targetType, object parameter, CultureInfo culture);
ConvertBack(object value, Type targetType, object parameter, 
CultureInfo culture);
So far so good, but for some reason I not have fathomed yet Microsoft have decided to change the IValueconverter signature to
Convert(object value, Type targetType, object parameter, string culture);
ConvertBack(object value, Type targetType, object parameter, string culture);

This is something you can moan about, or something you can solve. I choose the latter part. First of all, I implemented an abstract  base class BaseValueConverter

using System;
using System.Globalization;
#if WINDOWS_PHONE
using System.Windows.Data;
#else
using Windows.UI.Xaml.Data;
#endif

namespace WpWinNl.Converters
{
  public abstract class BaseValueConverter : IValueConverter
  {
    public abstract object Convert(object value, Type targetType, 
object parameter, CultureInfo culture); public abstract object ConvertBack(object value, Type targetType,
object parameter, CultureInfo culture); public object Convert(object value, Type targetType, object parameter,
string language) { return Convert(value, targetType, parameter, new CultureInfo(language)); }
public object ConvertBack(object value, Type targetType, object parameter,
string language) { return ConvertBack(value, targetType, parameter,
new CultureInfo(language)); } } }

Important to know is that the IValueConverter interface is defined in namespace System.Windows.Data in Windows Phone, and in Windows.UI.Xaml.Data in Windows Store apps. Fortunately, every Windows Phone project automatically defines the WINDOWS_PHONE conditional compilation symbol, so we can put these #if-#else-#endif preprocessor directives in code.

Then I took this little converter, that translates bound text to uppercase (written by my felllow MVP Timmy Kokke and added to wp7nl by him some months ago), and rewrote it using BaseValueConverter:

using System;
using System.Globalization;
using System.Windows;
#if !WINDOWS_PHONE
using Windows.UI.Xaml;
#endif

namespace WpWinNl.Converters
{
  /// <summary>
  /// Converts a string to all uppercase letters
  /// </summary>
  public class ToUpperValueConverter : BaseValueConverter
  {
    public override object Convert(object value, Type targetType, 
                           object parameter, CultureInfo culture)
    {
      if (value == null) return string.Empty;

      return value.ToString().ToUpperInvariant();
    }

    public override object ConvertBack(object value, Type targetType, 
                                       object parameter, CultureInfo culture)
    {
      return DependencyProperty.UnsetValue;
    }
  }
}

And that is all. So how does this work? In Windows Store apps, the methods with the string language parameters are called, but these make a CultureInfo from the string, and then call the methods using a CultureInfo. In Windows Phone, the CultureInfo using methods are directly called, and the string language parameters are simply not used. I could have put these between preprocessor directives as well, but I am not very fond of too much directives in the code itself.

I have included a sample Windows Phone and Windows Store app, that both show a button with the text HELLO in capitals, using this converter. The shared source code comes from a separate directory and is added as link to both solutions. When my library is finished you will of course simply make a reference to the right library, but in the mean time you know how you can write cross platform converters yourself.

Update: irony has it that Rajen itself, in the article I link to, refers to his October starter template which incorporates a BaseConverter class. His approach is a little bit different from mine, but the general idea - using shared code for a base class - is the same. As I apparently downloaded the wrong zip file from his SkyDrive, I did not see it before I wrote this. I don't know if this is prior art, but I like to be thorough in this. Great minds apparently think alike, and I sure was inspired by his (older) template to use shared code.

27 October 2013

An MVVM friendly tap+send and Bluetooth connection helper for Windows Phone 8

Why?
Early this year I blogged about TtcSocketHelper, an MVVM friendly helper object that allowed you connect two Windows Phone 8 devices to each other using a socket.I made two games with it– Pull the Rope and 2 Phone Pong, head-to-head style games that are played over two phones, exchanging JSON data to keep things in sync. A lot of things happened the last 10 months: super cheap devices entered the market – most notably the Nokia Lumia 520. It is a full fledged Windows Phone 8, but it’s super cheap and as a consequence it does not support NFC (and thus no tap+send). That apparently is of no concern to buyers, as according to AdDuplex stats, it took off like a bat out of hell. In just six months it grabbed what is now almost 33% of the Windows Phone 8 market. In other words, by limiting my app to NFC enabled phones I cut myself off from a significant – and growing – part of the market.

PhonePairConnectionHelper – supporting Bluetooth browsing
So I rewrote TtcSocketHelper into PhonePairConnectionHelper – basically the same class, but it now supports connecting phones using tap+send as well as by using the tried and tested way of Bluetooth pairing. Since October 21st 2 Phone Pong  1.3.0 is in the store, proudly powered by this component, now enabling my game to be played by 50% more people!
In this article I am going to concentrate on connecting via Bluetooth, as connecting via tap+send is already described in my article from January 2013.
The start of the object is simple enough again, and actually looks a lot like the previous incarnation:
using System;
using System.Collections.Generic;
using System.Diagnostics;
using System.Threading.Tasks;
using GalaSoft.MvvmLight.Messaging;
using Windows.Foundation;
using Windows.Networking.Proximity;
using Windows.Networking.Sockets;
using Windows.Storage.Streams;

namespace Wp7nl.Devices
{
  public class PhonePairConnectionHelper
  {
    private ConnectMethod connectMode;

    public PhonePairConnectionHelper()
    {
      Messenger.Default.Register<NavigationMessage>(this, ProcessNavigationMessage);
      PeerFinder.TriggeredConnectionStateChanged +=
        PeerFinderTriggeredConnectionStateChanged;
      PeerFinder.ConnectionRequested += PeerFinderConnectionRequested;
    }
  
    private void ProcessNavigationMessage(NavigationMessage message)
    {
      Debug.WriteLine("PhonePairConnectionHelper.ProcessNavigationMessage " + 
                       message.NavigationEvent.Uri);

      if (message.IsStartedByNfcRequest)
      {
        Start();
      }
    }
  }
}
The most notable is now that the setup is being done in the constructor. The class still listens to the NavigationMessage and if so, it still calls the start method (this is for the tap+send route, that still works). The PeerFinder is set up to listen to TriggeredConnecState events (i.e. events that happen after a tap+send) but also -  and this is important – to plain ole Bluetooth requests (ConnectionRequested event). The start method now, is pretty much changed:
public void Start(ConnectMethod connectMethod = ConnectMethod.Tap, 
  string displayAdvertiseName = null)
{
  PeerFinder.Stop();
  connectMode = connectMethod;
  if (!string.IsNullOrEmpty(displayAdvertiseName))
  {
    PeerFinder.DisplayName = displayAdvertiseName;
  }
  PeerFinder.AllowBluetooth = true;
  PeerFinder.Start();

  // Enable browse
  if (connectMode == ConnectMethod.Browse)
  {
    PeerFinder.FindAllPeersAsync().AsTask().
      ContinueWith(p => FirePeersFound(p.Result));
  }
}
The ConnectMethod enumeration, as you can already see from the code, enables you to indicate which method you want to use:
namespace Wp7nl.Devices
{
  public enum ConnectMethod
  {
    Tap,
    Browse
  }
}
The Start method has an optional parameter that gives you the ability to choose a connection method, and if necessary add a display name. The display name only applicable for the Bluetooth method. The interesting thing is – if you don’t provide a name, like I did in the sample, it will just use the phone’s name as you have provided it (by giving it a name via Explorer if you connect if via a USB cable to your computer)  - abbreviated to 15 characters. Why this is only 15 characters – your guess is as good as mine.
If you call this method without any parameters, it uses default values and will try to connect using tap+send, just like before.
Before selecting a method, you might want to check what connection methods the device support by using the two helper properties in the object:
public bool SupportsTap
{
  get
  {
    return (PeerFinder.SupportedDiscoveryTypes &
       PeerDiscoveryTypes.Triggered) == PeerDiscoveryTypes.Triggered;
  }
}

public bool SupportsBrowse
{
  get
  {
    return (PeerFinder.SupportedDiscoveryTypes &
      PeerDiscoveryTypes.Browse) == PeerDiscoveryTypes.Browse;
  }
}
Mind you – the helper is not so intelligent that it refuses to connect in a non-supported mode. And I don’t check for it in the sample app either. That is up to your app. But anyway – back up a little. If you try to connect via Bluetooth, the component tries to find all peers – that is, other phones running the same app, using FindAllPeersAsync, and fires the PeersFound event when it is done:
private void FirePeersFound(IEnumerable<PeerInformation> args)
{
  if (PeersFound != null)
  {
    PeersFound(this, args);
  }
}

public event TypedEventHandler<object, IEnumerable<PeerInformation>> PeersFound;
Your app has to subscribe to this event, and it then gets a list of “PeerInformation” objects. And PeerEvent has a number of properties, but the only one you will need to concern yourself is the “DisplayName” property. You display that in a list, a dropdown or whatever in your app, and after the user has made a selection, you call the Connect method:
public void Connect(PeerInformation peerInformation)
{
  DoConnect(peerInformation);
}

private void DoConnect(PeerInformation peerInformation)
{
  PeerFinder.ConnectAsync(peerInformation).AsTask().ContinueWith(p =>
  {
    socket = p.Result;
    StartListeningForMessages();
    PeerFinder.Stop();
    FireConnectionStatusChanged(TriggeredConnectState.Completed);
  });
}
And boom. You have a connection to the phone you have selected. The only thing that’s now missing is that the phone you have connected to, does not have a connection to you yet. But as you made the connection, the PeerFinder fired the ConnectionRequested event. Remember we set up a listener “PeerFinderConnectionRequested” to that in the constructor? Well guess what, part of the payload of the arguments of that event method gets is a PeerInformation object as well, containing the information to connect back to the phone that just connected to you :-). Which makes connecting back pretty easy:
private void PeerFinderConnectionRequested(object sender, 
                                           ConnectionRequestedEventArgs args)
{
  if (connectMode == ConnectMethod.Browse)
  {
    DoConnect(args.PeerInformation);
  }
}
And done. We know have a two-way socket connection using Bluetooth and we can call the SendMessage method just like before, and listen to result by subscribing to MessageReceived event. The only thing I did break in this helpers’ interface with regard to it predecessor is the ConnectionStatusChanged event type. This used to be

public event TypedEventHandler<object, 
             TriggeredConnectionStateChangedEventArgs>
             ConnectionStatusChanged; 
and now is
public event TypedEventHandler<object, TriggeredConnectState>
             ConnectionStatusChanged;
So if you subscribe to this event, you don’t have to check for args.State, but just for args itself. This was necessary to be able to fire connect events from DoConnect.
The rest of the class is nearly identical to the old TtcSocketHelper, and I won’t repeat myself here.

To use this class

First, decide if you are going to for for the tap+send route or the Bluetooth route. My apps check the SupportsTap and SupportsBrowse properties. If NFC (thus tap+send) is supported, I offer both options and give the users a choice to select a connect method. If is not supported, I offer only Bluetooth.
For the NFC route, the way to go still is:
  • Make sure you app does fire a NavigationMessage as described here
  • Make a new PhonePairConnectionHelper .
  • Subscribe to its ConnectionStatusChanged event
  • Subscribe to its MessageReceived event
  • Call Start
  • Wait until a TriggeredConnectState.Completed comes by
  • Call SendMessage – and see them appear in the method subscribed to MessageReceived on the other phone.
The way to go for Bluetooth is:
  • Make a new PhonePairConnectionHelper .
  • Subscribe to its ConnectionStatusChanged event
  • Subscribe to its MessageReceived event
  • Subscribe to its PeersFoundevent
  • Call Start with ConnectMethod.Browse and a display name
  • Wait until a PeersFound event comes by
  • Select a peer to connect to in your app
  • Call the Connect method with the selected peer
  • Wait until a TriggeredConnectState.Completed comes by
  • Call SendMessage – and see them appear in the method subscribed to MessageReceived on the other phone.

So basically, there isn’t that much difference ;-)

Changes in original sample
The fun thing is, you don’t even have to change that much to the existing demo solution. I added to the viewmodel the following code:

#region Bluetooth stuff

private bool useBlueTooth;
public bool UseBlueTooth
{
  get { return useBlueTooth; }
  set
  {
    if (useBlueTooth != value)
    {
      useBlueTooth = value;
      RaisePropertyChanged(() => UseBlueTooth);
    }
  }
}

private PeerInformation selectedPeer;

public PeerInformation SelectedPeer
{
  get { return selectedPeer; }
  set
  {
    if (selectedPeer != value)
    {
      selectedPeer = value;
      RaisePropertyChanged(() => SelectedPeer);
    }
  }
}

public ObservableCollection<PeerInformation> Peers { get; private set; }

private void PeersFound(object sender, IEnumerable<PeerInformation> args)
{
  Deployment.Current.Dispatcher.BeginInvoke(() =>
  {
    Peers.Clear();
    args.ForEach(Peers.Add);
    if (Peers.Count > 0)
    {
      SelectedPeer = Peers.First();
    }
    else
    {
      ConnectMessages.Add("No contacts found");
    }
  });
}

public ICommand ConnectBluetoothContactCommand
{
  get
  {
    return new RelayCommand(() =>
    {
      connectHelper.Connect(SelectedPeer);
      Peers.Clear();

    });
  }
}

#endregion
Basically:
  • A property to determine whether you are using Bluetooth or not (not = tap+send)
  • A property holding the selected Peer
  • A list of available peers
  • The callback for the helper’s PeersFound event. Not that everything here happens within a Dispatcher. As the PeersFound event comes back from a background thread, it has no access to the UI – but since it updates several bound properties, it needs that access – hence the Dispatcher.
  • and a command to allow the user to select a certain peer. Notice the Peers.Clear after the Peer is selected. That is because I use my HideWhenCollectionEmptyBehavior to display the UI for showing and selecting peers. This behavior is in the sample solution as code as I kind of forgot to add this to the last edition of my wp7nl library on codeplex.*ahem*
Two minor additions to the rest of the viewmodel: in the Init method, where I set up all the connectHelper, it now says:
connectHelper = new PhonePairConnectionHelper();
connectHelper.ConnectionStatusChanged += ConnectionStatusChanged;
connectHelper.MessageReceived += TtsHelperMessageReceived;
connectHelper.PeersFound += PeersFound;  // Added for Bluetooth support
And there’s also a little change in the StartCommand to accommodate the fact that if the user selects Bluetooth, the connectHelper should be called in a slightly different way.
public ICommand StartCommmand
{
  get
  {
    return new RelayCommand(
        () =>
        {
          ConnectMessages.Add("Connect started...");
          CanSend = false;
          CanInitiateConnect = false;
          // Changed for Bluetooth.
          if(UseBlueTooth)
          {
            connectHelper.Start(ConnectMethod.Browse);
          }
          else
          {
            connectHelper.Start();
          }
        });
  }
}
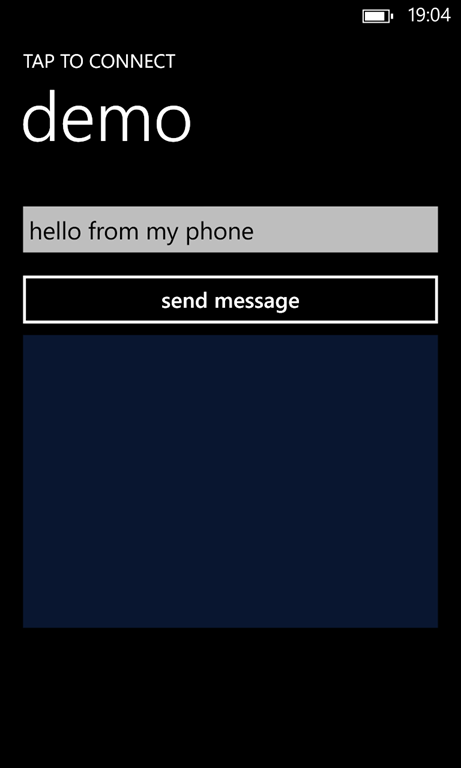
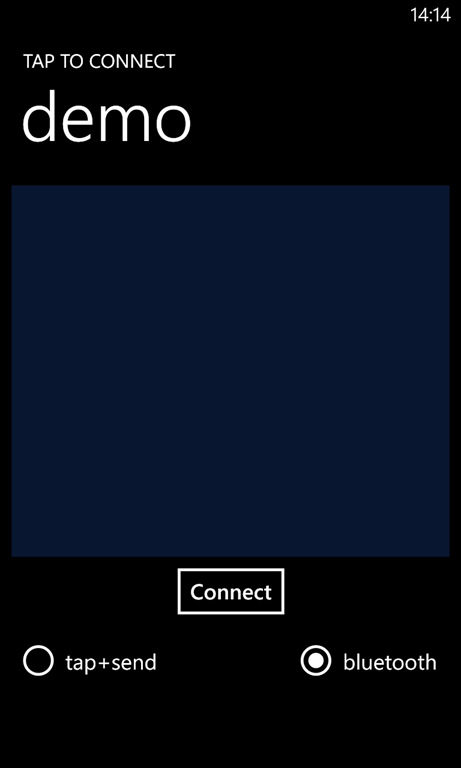
wp_ss_20131027_0001To enable the user to actually select a connection method, the start screen has changed a little and now sports two radio buttons. Bluetooth is selected by default.
<RadioButton Content="tap+send" 
IsChecked="{Binding UseBlueTooth, Converter={StaticResource BooleanInvertConvertor}, Mode=TwoWay}"  
  IsEnabled="{Binding CanInitiateConnect, Mode=OneWay}" />
<RadioButton Content="bluetooth" IsChecked="{Binding UseBlueTooth, Mode=TwoWay}" 
  HorizontalAlignment="Right" Margin="0" 
  IsEnabled="{Binding CanInitiateConnect, Mode=OneWay}" />
which is not quite rocket science, and some more code to give a user a simple UI to view and select found peers:
<Grid x:Name="bluetoothconnectgrid" VerticalAlignment="Bottom">
  <Grid.RowDefinitions>
    <RowDefinition Height="Auto"/>
    <RowDefinition Height="Auto"/>
  </Grid.RowDefinitions>
  <i:Interaction.Behaviors>
    <behaviors:HideWhenCollectionEmptyBehavior Collection="{Binding Peers}"/>
  </i:Interaction.Behaviors>
  <toolkit:ListPicker x:Name="OpponentsListPicker" Margin="12,0" VerticalAlignment="Top" 
      ExpansionMode="FullScreenOnly" 
      ItemsSource="{Binding Peers}" SelectedItem="{Binding SelectedPeer, Mode=TwoWay}" />
  <Button Content="select contact" Height="72" Grid.Row="1" 
      Command="{Binding ConnectBluetoothContactCommand, Mode=OneWay}"/>
</Grid>
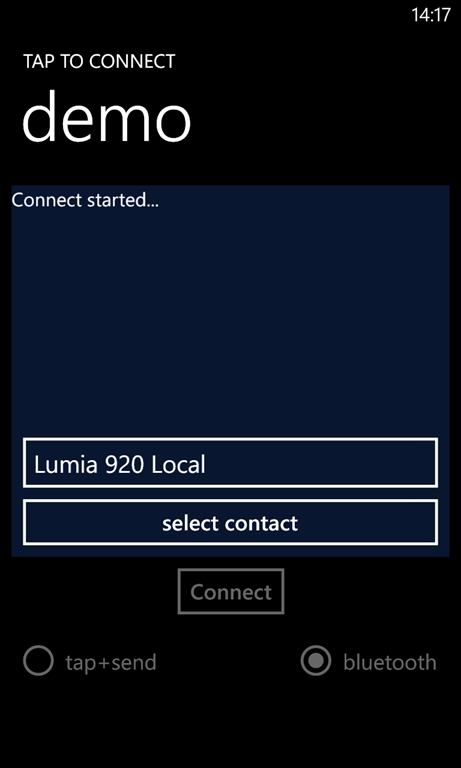
wp_ss_20131027_0002Also not very complicated – a listpicker displays the peers and selects a peer, and the button fires the command to do the actual connecting. I rather like the use of HideWhenCollectionEmptyBehavior here – this automatically shows this piece of UI as there are peers in the list, and hides it when they are not. It’s rather elegant, if I may say so myself. On the picture right you can see it shows the name of my 920 – abbreviated to 15 characters.
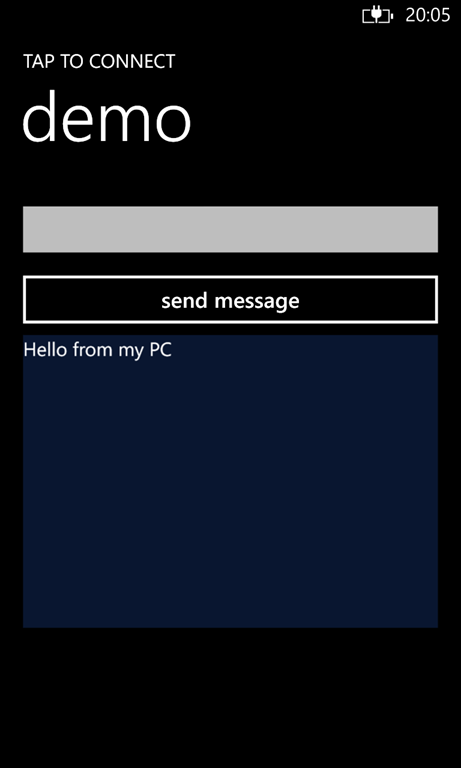
After the connection has been made – either by Bluetooth or by tap+send – you can use this app to chat just like the previous version.

Important things to know
  • If you are a developer who wants protect your customers from disappointments, you have checked the “NFC” as requirement in the WMAppManifest.xml when you built an app on top of my previous TtcSocketHelper. Remove that checkmark now. Or else your app still won’t be available for phones like the 520 that don’t have NFC. And that quite defies the point of this whole new class.
  • I have found out Bluetooth browsing on Windows Phone 8 has some peculiar things to take into account
    • You still have to be quite close together – somewhere within the meter range – to find peers. Once the connection is made, you can move further apart
    • The first phone to start searching for a peer, usually finds nothing. The second one finds one opponent, the third one two. The search process usually doesn’t last very long – in most cases just a few seconds – before the PeerFinder either gives up or comes back with a peer. It’s advisable not to call Connect automatically if you find only one peer – that might not be the one the user was looking for. Always keep the user in control.
  • If you connect via tap+send, you will only need to start the app on one of the phones and press the connect button – the other phone will automatically fire up the app (or even download it if it is not there) when the devices are tapped together.
  • For the Bluetooth route, the app needs to be started on both phones and on both phones you will need to press the connect button.

Conclusion

The app market is always in flux, that’s true for all platforms but that sure goes for Windows Phone. It’s important to stay in touch with those developments. There’s a lot of growth in the Windows Phone market – especially on the low end of the phones. Walking the extra mile for those groups is important – cater for as much users as you can. I hope I helped you a little with that, both by general example and actual code. Demo solution, as always, can be downloaded here.

15 September 2013

Zero lines of code solution for in-app checking for updates on Windows Phone

“Good artists copy; great artists steal” –Steve Jobs

Every Windows Phone developer who has non-tech friends, relatives or a wife with a Windows Phone knows the problem: a lot of users don’t check their Store regularly and simply don’t update their apps – or at least not often enough. The highly intelligent Pedro Lamas – Senior Nokia engineer, author of the Cimbalino Windows Phone toolkit, and my personal savior when I ran into some very exotic problems with Nokia Music – recently described a way to automatically check for updates inside the app.With his permission, I decided to pack the core logic into a behavior, much like I did with the ratings logic in my previous post – so you can essentially drag this on your main app page and be done with it.Pedro has used something like my SafeBehavior in Cimbalino, and now I use some of his code in the wp7nl library on codeplex. This is how community works. In that light the quote on top of this article is rather badly chosen ;-)

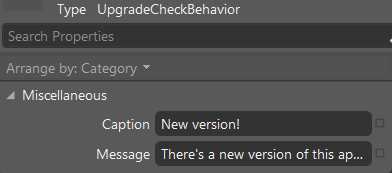
If you drop the UpgradeCheckBehavior, as I have christened this thing, onto the main page of your application, Blend will present you with only two options: a message box caption and a message box text:

image

  • Caption is the text that will appear on the message box when the behavior detects a new version. Default value is “New version!”
  • Message is the text that will appear inside the message box when the behavior detects a new version. Default value is “There's a new version of this app available, do you want to update?”

If you are fine with that, you are finished. The app will check for updates automatically on app startup.

The behavior itself is a rather simple SafeBehavior and goes like this:

using System;
using System.Globalization;
using System.Net;
using System.Threading.Tasks;
using System.Windows;
using System.Windows.Controls;
using System.Xml;
using Microsoft.Phone.Tasks;
using Wp7nl.Utilities;

namespace Wp7nl.Behaviors
{
  /// <summary>
  /// A behavior checking from in the app if there's an update available. 
  /// </summary>
  public class UpgradeCheckBehavior : SafeBehavior<Page>
  {
    private ManifestAppInfo appInfo;

    protected override void OnSetup()
    {
      appInfo = new ManifestAppInfo();
      CheckUpgrade();
    }

    private void CheckUpgrade()
    {
#if !DEBUG
      GetLatestVersion().ContinueWith(ProcessResult);
#endif
    }
  }
}

Since in debug mode the app will run on you phone or emulator using a generated temporary app id, it won’t be possible to check for new versions anyway so I’ve added an #if statement around the actual check.

Using my ManifestAppInfo helper class I retrieve all the app’s metadata which is used by the GetLatestVersion – in essence a slightly modified version of Pedro’s work:

/// <summary>
/// This method is almost 100% stolen from 
/// http://www.pedrolamas.com/2013/07/24/checking-for-updates-from-inside-a-windows-phone-app/
/// </summary>
private Task<Version> GetLatestVersion()
{
  var cultureInfoName = CultureInfo.CurrentUICulture.Name;
  var url = string.Format(
      "http://marketplaceedgeservice.windowsphone.com/v8/catalog/apps/{0}?os={1}&cc={2}&oc=&lang={3}​",
      appInfo.ProductId,
      Environment.OSVersion.Version,
      cultureInfoName.Substring(cultureInfoName.Length - 2).ToUpperInvariant(),
      cultureInfoName);

  var request = WebRequest.Create(url);

  return Task.Factory.FromAsync(request.BeginGetResponse, result =>
  {
    try
    {
      var response = (HttpWebResponse)request.EndGetResponse(result);
      if (response.StatusCode != HttpStatusCode.OK)
      {
        throw new WebException("Http Error: " + response.StatusCode);
      }

      using (var outputStream = response.GetResponseStream())
      {
        using (var reader = XmlReader.Create(outputStream))
        {
          reader.MoveToContent();
          var aNamespace = reader.LookupNamespace("a");
          reader.ReadToFollowing("entry", aNamespace);
          reader.ReadToDescendant("version");
          return new Version(reader.ReadElementContentAsString());
        }
      }
    }
    catch (Exception)
    {
      return null;
    }
  },
  null);
}

I think my only addition to this is the try-catch around the method as I tended to have some odd errors sometimes when running it inside Visual Studio. This method craftily downloads the app metadata from the store and extracts a version from it.

And then the only things left of course are comparing the retrieved version to the current version, and if the current version is greater, displaying a message box asking the user to upgrade:

private void ProcessResult(Task<Version> t)
{
  if(t.IsCompleted && t.Result != null )
  {
    var currentVersion = new Version(appInfo.Version);
    if (currentVersion < t.Result )
    {
      DoShowUpgrade();
    }
  }
}

private void DoShowUpgrade()
{
  Deployment.Current.Dispatcher.BeginInvoke(() =>
  {
    var result = MessageBox.Show(Message, Caption, MessageBoxButton.OKCancel);
    if (result == MessageBoxResult.OK)
    {
      var marketplaceReviewTask = new MarketplaceDetailTask();
      try
      {
        marketplaceReviewTask.Show();
      }
      catch (InvalidOperationException ex)
      {
      }
    }
  });
}
newversionAnd that's all there's to it. The two dependency properties holding caption and message have been omitted for the sake of brevity. The sad thing of Pedro’s brilliant idea is that it’s quite hard to check if it actually works. Well let me assure you it does, and if you run the demo solution in release mode configuration, it will show you by actually asking for an upgrade:

How is that possible? The app created by Visual Studio runs a temporary ID that should not even be in the Store! That’s correct, unless you make it have a real id. So I opened the WPAppManifest.xml file that’s over in the Properties folder and messed a little with the settings:image

I changed the app Id to that of my latest game 2 Phone Pong in the store, and changed the version number to 0.9.0.0 (while the version number in the Store of course is at least 1.0.0.0). Now the app thinks ask the store for the version number of 2 Phone Pong, gets (at the time of this writing) 1.0.0.0 back, ascertains that’s lower than it’s current version and pops up the message. I you hit the OK button it will actually take you to 2 Phone Pong in the Store . This proves Pedro’s code actually works, and you have now a zero code solution to take your users to the best possible version of your app – and no longer an excuses not to do it;-)

Warning – don’t try to deploy a debug version of your app with this id trick on a phone that has the actual app downloaded from the Store on it. That won’t work – you won’t have writing permissions. I haven’t tried the opposite – downloading an app from the store over an app deployed from Visual Studio – but I can imagine that way only lie mud pies.

I will include this soon in the upcoming version of my wp7nl library on codeplex