29 January 2019

Labeling Toy Aircraft in 3D space using an ONNX model and Windows ML on a HoloLens

Intro

Back in November I wrote about a POC I wrote to recognize and label objects in 3D space, and used a Custom Vision Object Recognition project for that. Back then, as I wrote in my previous post, you could only use this kind of projects by uploading the images you needed to the model in the cloud. In the mean time, Custom Vision Object Recognition models can be downloaded in various formats - and one of them in ONNX, which can be used in Windows ML. And thus, it can be used to run on a HoloLens to do AI-powered object recognition.

Which is exactly what I am going to show you. In essence, the app still does the same as in November, but now it does not use the cloud anymore - the model is trained and created in the cloud, but can be executed on an edge device (in this case a HoloLens).

The main actors

These are basically still the same:

  • CameraCapture watches for an air tap, and takes a picture of where you look
  • ObjectRecognizer receives the picture and feeds it to the 'AI', which is now a local process
  • ObjectLabeler shoots for the spatial map and places labels.

As I said - the app is basically still the same as the previous version, only now it uses a local ONNX file.

Setting up the project

Basically you create a standard empty HoloLens project with the MRTK and configure it as you always do. Be sure to enable Camera capabilities, of course.

Then you simply download the ONNX file from you model. The procedure is described in my previous post. Then you need to place the model file (model.onnx) into a folder "StreamingResources" in the Unity project. This procedure is described in more detail in this post by Sebastian Bovo of the AppConsult team. He uses a different kind of model, but the workflow is exactly the same.

Be sure to adapt the ObjectDetection.cs file as I described in my in my previous post.

Functional changes to the original project

Like I said, the difference between this project and the online version are for the most part inconsequential. Functionally only one thing changed: in stead the app showing the picture that it took prior to starting the (online) model, it now sounds a click sound when you air tap to start the recognition process, and sounds either a pringg sound or a buzz sound, indicating the recognition process respectively succeeded (i.e. found at least toy aircraft) or failed (i.e. did not find an toy aircraft).

Technical changes to the original project

  • The ObjectDetection file, downloaded from CustomVision.ai and adapted for use in Unity, has been added to the project
  • CustomVisonResult, containing all the JSON serialization code to deal with the online model, is deleted. The ObjectDetection file contains all classes we need
  • In all classes I have adapted the namespace from "CustomVison" *cough* to "CustomVision" (sorry, typo ;) ).
  • The ObjectDetection uses root class PredictionModel in stead of Predition, so that has been adapted in all files that use it. The affected classes are:
    • ObjectRecognitionResultMessage
    • ObjectLabeler
    • ObjectRecognizer
    • PredictionExtensions
  • Both CameraCapture and ObjectLabeler have sound properties and play sound on appropriate events
  • ObjectRecognizer has been extensively changed to use the local model. This I will describe in detail

Object recognition - the Windows ML way

The first part of the ObjectRecognizer initializes the model

using UnityEngine;
#if UNITY_WSA && !UNITY_EDITOR
using System.Threading.Tasks;
using Windows.Graphics.Imaging;
using Windows.Media;
#endif

public class ObjectRecognizer : MonoBehaviour
{
#if UNITY_WSA && !UNITY_EDITOR
    private ObjectDetection _objectDetection;
#endif

    private bool _isInitialized;

    private void Start()
    {
        Messenger.Instance.AddListener<PhotoCaptureMessage>(
          p=> RecognizeObjects(p.Image, p.CameraResolution, p.CameraTransform));
#if UNITY_WSA && !UNITY_EDITOR _objectDetection = new ObjectDetection(new[]{"aircraft"}, 20, 0.5f,0.3f ); Debug.Log("Initializing..."); _objectDetection.Init("ms-appx:///Data/StreamingAssets/model.onnx").ContinueWith
(p => { Debug.Log("Intializing ready"); _isInitialized = true; }); #endif }

Notice, here, too the liberal use of preprocessor directives, just like in my previous post. In the start of it's method we create a model from the ONNX file that's in StreamingAssets, using the method I added to ObjectDetection. Since we can't make the start method awaitable, the ContinueWith needs to finish the initalization.

As you can see, the arrival of a PhotoCapture message from the CameraCapture behavior fires off RecognizeObjects, just like in the previous app.

public virtual void RecognizeObjects(IList<byte> image, 
                                     Resolution cameraResolution, 
                                     Transform cameraTransform)
{
    if (_isInitialized)
    {
#if UNITY_WSA && !UNITY_EDITOR
        RecognizeObjectsAsync(image, cameraResolution, cameraTransform);
#endif

    }
}

But unlike the previous app, it does not fire off a Unity coroutine, but a private async method

#if UNITY_WSA && !UNITY_EDITOR
private async Task RecognizeObjectsAsync(IList<byte> image, Resolution cameraResolution, Transform cameraTransform)
{
    using (var stream = new MemoryStream(image.ToArray()))
    {
        var decoder = await BitmapDecoder.CreateAsync(stream.AsRandomAccessStream());
        var sfbmp = await decoder.GetSoftwareBitmapAsync();
        sfbmp = SoftwareBitmap.Convert(sfbmp, BitmapPixelFormat.Bgra8, 
BitmapAlphaMode.Premultiplied); var picture = VideoFrame.CreateWithSoftwareBitmap(sfbmp);
var prediction = await _objectDetection.PredictImageAsync(picture); ProcessPredictions(prediction, cameraResolution, cameraTransform); } } #endif

This method basically is 70% converting the raw bits of the image to something the ObjectDetection class's PredictImageAsync can handle. I have very much to thank this post in the Unity forums and this post on the MSDN blog site by my friend Matteo Pagani to piece this together. This is because I am a stubborn idiot - I want to take a picture in stead of using a frame of the video recorder, but then you have to convert the photo to a video frame.

The 2nd to last code actually calls the PredictImageAsync - essentially a black box for the app, and then the predictions are processed more or less like before:

#if UNITY_WSA && !UNITY_EDITOR
private void ProcessPredictions(IList<PredictionModel>predictions, 
                                Resolution cameraResolution, Transform cameraTransform)
{
    var acceptablePredications = predictions.Where(p => p.Probability >= 0.7).ToList();
    Messenger.Instance.Broadcast(
       new ObjectRecognitionResultMessage(acceptablePredications, cameraResolution, 
                                          cameraTransform));
}
#endif

Everything with a probability lower than 70% is culled, and the rest is being send along to the messenger, where the ObjectLabeler picks it up again and starts shooting for the Spatial Map in the center of all rectangles in the predications to find out where the actual object may be in space.

Conclusion

I have had some fun experimenting with this, and the conclusions are clear:

  • For a simple model as this, even with a fast internet connection, using a local model in stead of a cloud based model is way faster
  • Yet - the hit rate is notably lower - the cloud model is definitely more 'intelligent'. I suppose improvements to Windows ML will fix that in the near future. Also, the AI coprocessor the next release of HoloLens will undoubtedly contribute to both speed and accuracy.
  • With 74 pictures of a few model airplanes, almost all on the same background, my model is not nearly enough equipped to recognize random planes in random environments. This highlights a bit the crux of machine learning - you will need data, data more data and even more than that.
  • This method of training models in the cloud and executing them locally provides exiting new - an very usable - features for Mixed Reality devices.

Using Windows ML in edge devices is not hard, and on a HoloLens is only marginally harder because you have to circumvent an few differences between full UWP and Unity, and be aware of differences between C# 4.0 and C# 7.0. This can easily be addressed, as I showed before.

The complete project can be found here (branch WinML) - since in now operates without a cloud model it is actually runnable by everyone. I wonder if you can actually get it to recognize model planes you may have around. I've got it to recognize model planes up to about 1.5 meters.

27 January 2019

Adapting Custom Vision Object Recognition Windows ML code for use in Mixed Reality applications

Intro

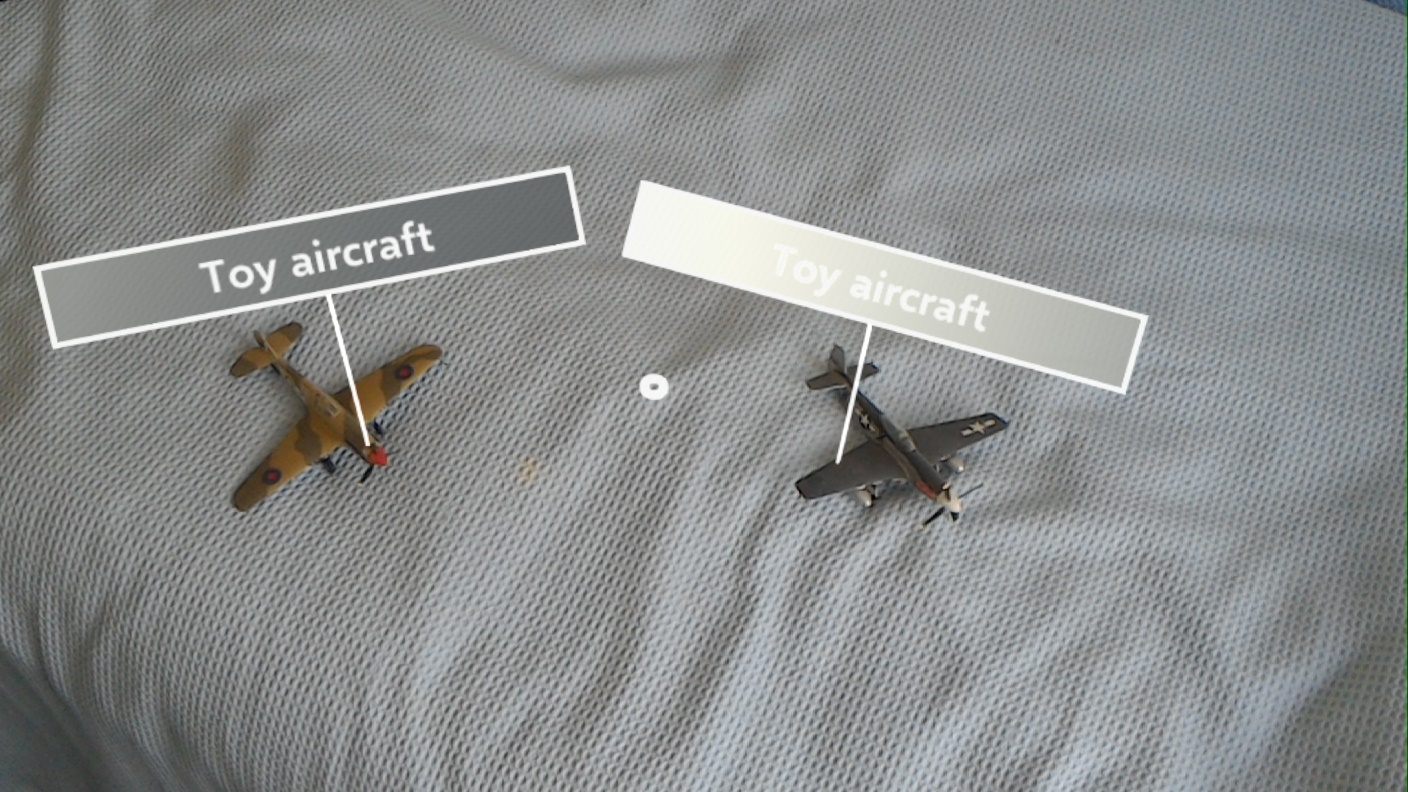
In November I wrote about a Custom Vision Object Detection experiment that I did, which allowed the HoloLens I was wearing to recognize not only what objects where in view, but also where they approximately were in space. You might remember this picture:

You might also remember this one:

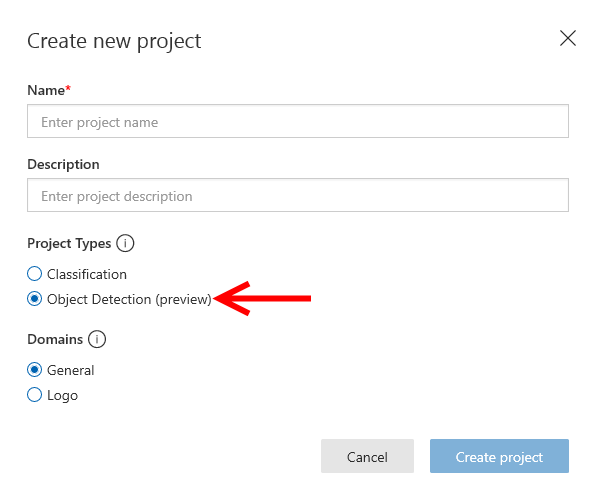
Apart from being a very cool new project type, it also showed a great limitation. You could only use an online model. You could not download it in the form of, for instance, an ONNX model to use with Windows ML. It worked pretty well, don't get me wrong, but maybe you are out and about and your device can't always reach the online model. Well guess what recently changed:

Yay! Custom Vision Object Detection now support downloadable models that can be use in Windows ML.

Download model and code

After you have changed the type from 'General" to "General (compact)" and saved that change, hit the "Performance" tab, then you will see the "Export" option appear (no idea why this is at "Performance", but what the heck:

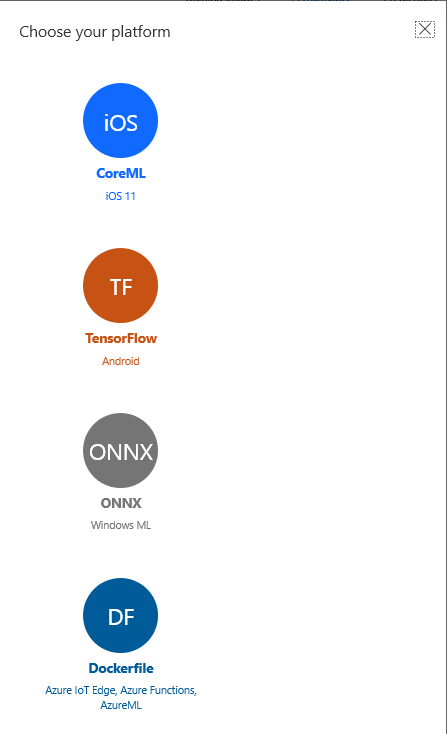
So if you click that, you get a bit of an unwieldy screen that looks like this:

We are going to select the ONNX standard because that is what we can in Windows Machine Learning - inside an UWP app running on the HoloLens. Please select version 1.2:
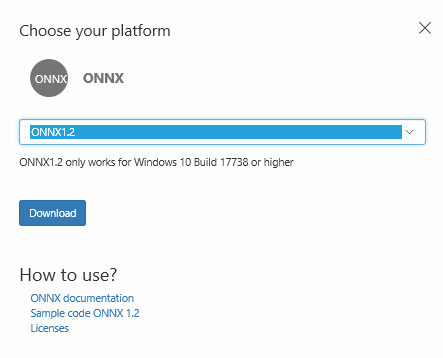


The result is a ZIP file containing the following folders and files:
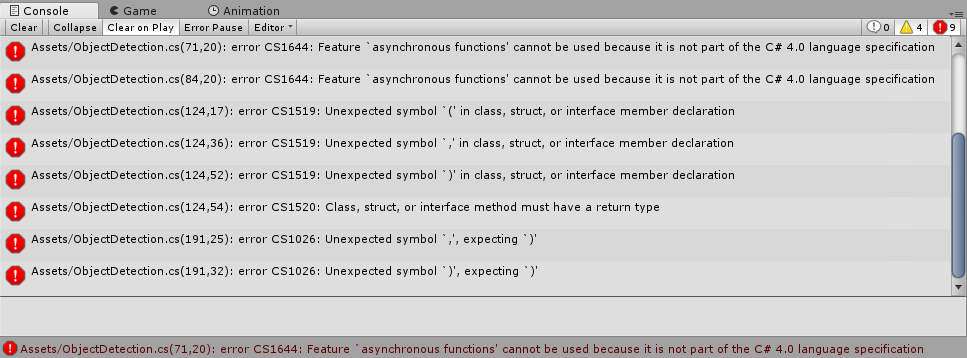


We are only going to need the model.onnx file (in the next blog post). For now I want to concentrate on the file that is inside the CSharp folder - ObjectDetection.cs. That file is very fine for using in a regular UWP app. However, although they are running on top of UWP, HoloLens apps are all but regular UWP apps.

Challenges in incorporating the C# code in an Unity project

Some interesting challenges lay ahead:

  • Unity for HoloLens knows this unusual concept of having two Visual studio solutions: one for use in the Unity editor, and a second one that is generated from the first. But the first one, the Unity solution needs to be able to swallow all the code, even if it's UWP and will never run in the editor. To make that possible, we will have to put some stuff into preprocessor directives to be able to generate the deployment project at all
  • The code uses C# 7.0 concepts - tuples - that are not supported by the C# version (4.0) supported in all but the newest versions of Unity, that I am not using here for various reasons
  • I also found a pretty subtle bug in the code that only happens in a Unity runtime

I will address all three things.

Testing in a bare bones project - here come the errors

So, I created an empty HoloLens project basically doing nothing: just imported the Mixed Reality Toolkit and hit all three configuration options in the Mixed Reality Toolkit/config menu. Then I added the ObjectDetection.cs to the project and immediately Unity started to balk:

Round 1 - preprocessor directives

The first round of fixing is pretty simple - just put everything he editor balks about between preprocessor directives:

#if !UNITY_EDITOR 
#endif

You can do this the rough way - by basically putting the whole file in these directives - or only put the minimum stuff in directives. I usually opt for the second way. So we need to put the following parts between these preprocessor directives.

First, this part in the using section of the start of the file:

    using System;
    using System.Collections.Generic;
    using System.Diagnostics;
    using System.Linq;
#if !UNITY_EDITOR
    using System.Threading.Tasks;
    using Windows.AI.MachineLearning;
    using Windows.Media;
    using Windows.Storage;
#endif

Then this part, at the start of the ObjectDetection class:

    public class ObjectDetection
    {
        private static readonly float[] Anchors = ....

        private readonly IList<string> labels;
        private readonly int maxDetections;
        private readonly float probabilityThreshold;
        private readonly float iouThreshold;
#if !UNITY_EDITOR
        private LearningModel model;
        private LearningModelSession session;
#endif

Then the following methods need to be put into entirely between these preprocessor directives:

  • Init
  • ExtractBoxes
  • Postprocess

And then both Unity and Visual Studio stop complaining about errors. So let's build the UWP solution...

Oops. Well I already warned you about this.

Round 2 - Tuples are a no-no

Although the very newest versions of Unity support C# 7.0 the majority of the versions that are used today for various reasons (mainly hologram stability) do not. But the code generated by CustomVision has some tuples in it. The culprit is ExtractBoxes:

private (IList<BoundingBox>, IList<float[]>) ExtractBoxes(TensorFloat predictionOutput,
float[] anchors)

So we need to refactor this to C# 4 style code. Fortunately, this is not quite rocket science.

First of all, we define a class with the same properties as the tuple:

internal class ExtractedBoxes
{
    public IList<BoundingBox> Boxes { get; private set; }
    public IList<float[]> Probabilities { get; private set; }

    public ExtractedBoxes(IList<BoundingBox> boxes, IList<float[]> probs)
    {
        Boxes = boxes;
        Probabilities = probs;
    }
}

I have added this to the ObjectDetection.cs file, just behind the end of the ObjectDetection class definition. Then, we only need to change the return value of the method ExtractBoxes from

private (IList<BoundingBox>, IList<float[]>)

to

 return new ExtractedBoxes(boxes, probs);

We also have to change the mode PostProcess, the place where ExtractBoxes is used:

private IList<PredictionModel> Postprocess(TensorFloat predictionOutputs)
{
    var (boxes, probs) = this.ExtractBoxes(predictionOutputs, ObjectDetection.Anchors);
    return this.SuppressNonMaximum(boxes, probs);
}

needs to become

private IList<PredictionModel> Postprocess(TensorFloat predictionOutputs)
{
    var extractedBoxes = this.ExtractBoxes(predictionOutputs, ObjectDetection.Anchors);
    return this.SuppressNonMaximum(extractedBoxes.Boxes, extractedBoxes.Probabilities);
}

and then, dear reader, Unity will finally build the deployment UWP solution. But there is still more to do.

Round 3 - fix a weird crashing bug

When I tried this in my app - and you will have to take my word for it - my app randomly crashed. The culprit, after long debugging, turned out to be this line:

private IList<PredictionModel> SuppressNonMaximum(IList<BoundingBox> boxes, 
IList<float[]> probs) { var predictions = new List<PredictionModel>(); var maxProbs = probs.Select(x => x.Max()).ToArray(); while (predictions.Count < this.maxDetections) { var max = maxProbs.Max();

I know, it doesn't make sense. I have not checked this in plain UWP, but apparently the implementation of Max() in the Unity player on top of UWP doesn't like to calculate the Max of and empty list. My app worked fine as long as there were recognizable object in view. If there were none, it crashed. So, I changed that piece to check for probs not being empty first:

private IList<PredictionModel> SuppressNonMaximum(IList<BoundingBox> boxes, IList<float[]> probs)
{
    var predictions = new List<PredictionModel>();
    // Added JvS
    if (probs.Any())
    {
        var maxProbs = probs.Select(x => x.Max()).ToArray();

        while (predictions.Count < this.maxDetections)
        {
            var max = maxProbs.Max();

And then your app will still be running when there's no predictions.

Round 4 - some minor fit & finish

Because I am lazy and it makes life easier when using this from a Unity app, I added this little overload of the Init method:

public async Task Init(string fileName)
{
    var file = await StorageFile.GetFileFromApplicationUriAsync(new Uri(fileName));
    await Init(file);
}

This will need to be in and #if !UNITY_EDITOR preprocessor directive as well. This method allows me to call the method like this without first getting a StorageFile:

_objectDetection.Init("ms-appx:///Data/StreamingAssets/model.onnx");

Conclusion

With these adaptions you have a C# file that will allow you to use Windows ML from both Unity and regular UWP apps. In a following blog post I will actually show a refactored version of the Toy Aircraft Finder to show how things work IRL.

There is no real demo project this time (yet) but if you want to download the finished file already, you can do so here.

17 January 2019

Making lines selectable in your HoloLens or Windows Mixed Reality application

Intro

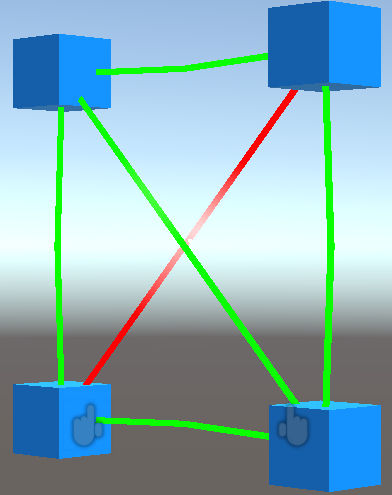
Using the Mixed Reality Toolkit, it's so easy to make an object selectable. You just add a behavior to your object that implements IInputClickHandler, fill in some code in the OnInputClicked method, and you are done. Consider for instance this rather naïve implementation of a behavior that toggles the color from the original to red and back when clicked:

using HoloToolkit.Unity.InputModule;
using UnityEngine;

public class ColorToggler : MonoBehaviour, IInputClickHandler
{
    [SerializeField]
    private Color _toggleColor = Color.red;

    private Color _originalColor;

    private Material _material;
	void Start ()
	{
	    _material = GetComponent<Renderer>().material;
        _originalColor = _material.color;
	}
	
    public void OnInputClicked(InputClickedEventData eventData)
    {
        _material.color = _material.color == _originalColor ? _toggleColor : _originalColor;
    }
}

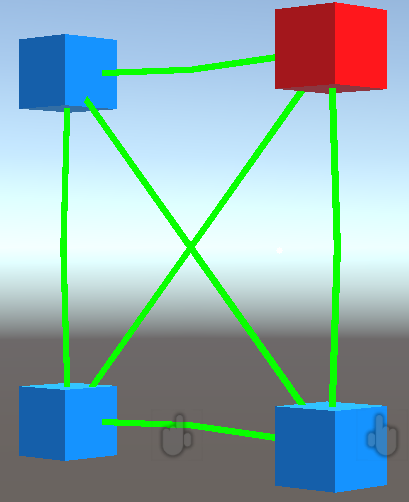
If you add this behavior on for instance a simple Cube, the color will flick from whatever the original color was (in my case blue) to red and back when you tap it. But add this behavior to a line and and attempt to tap it - and nothing will happen.

So what's a line, then?

In Unity, a Line is basically an empty game object containing a LineRender component. You can access the LineRender using the standard GetComponent, then using it's SetPosition method to actually set the points. You can see how it's done in the demo project, in which I created a class LineController to make drawing the line a bit easier:

public class LineController : MonoBehaviour
{
    public void SetPoints(Vector3[] points)
    {
        var lineRenderer = GetComponent<LineRenderer>();
        lineRenderer.positionCount = points.Length;
        for (var i = 0; i < points.Length; i++)
        {
            lineRenderer.SetPosition(i, points[i]);
        }
        //Stuff omitted
    }
}

This is embedded in a prefab "Line". Here you might see the root cause of the problem. The difference between a line and, for instance a cube is simple: there is no mesh, but more importantly - there is no collider. Compare this with the cube next to it:


So... how do we add a collider, then?

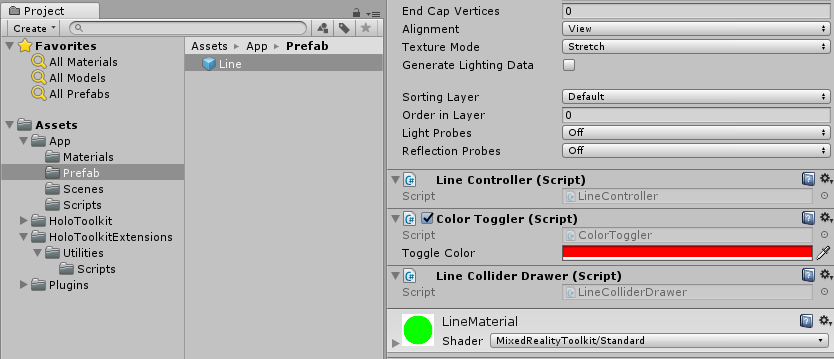
That is not very hard. Find the prefab "Line", and add a "Line Collider Drawer" component. This is sitting in "HoloToolkitExtensions/Utilities/Scripts.

Once you have done that, try to click the line again

And hey presto - the line is not only selectable, but even the MRKT Standard Shader Hover Light option, that I selected in creating the line material, actually works.

And in code, it works like this

First of all, in the LineController, I wrote "//Stuff omitted". That stuff actually calls the LineColliderDrawer (or at least, it tries to):

public class LineController : MonoBehaviour
{
    public void SetPoints(Vector3[] points)
    {
        var lineRenderer = GetComponent<LineRenderer>();
        lineRenderer.positionCount = points.Length;
        for (var i = 0; i < points.Length; i++)
        {
            lineRenderer.SetPosition(i, points[i]);
        }
        
        var colliderDrawer = GetComponent<LineColliderDrawer>();
        if (colliderDrawer != null)
        {
            colliderDrawer.AddColliderToLine(lineRenderer);
        }
    }
}

The main part of LineColliderDrawer is this method:

private  void AddColliderToLine( LineRenderer lineRenderer, 
    Vector3 startPoint, Vector3 endPoint)
{
    var lineCollider = new GameObject(LineColliderName).AddComponent<CapsuleCollider>();
    lineCollider.transform.parent = lineRenderer.transform;
    lineCollider.radius = lineRenderer.endWidth;
    var midPoint = (startPoint + endPoint) / 2f;
    lineCollider.transform.position = midPoint;

    lineCollider.transform.LookAt(endPoint);
    var rotationEulerAngles = lineCollider.transform.rotation.eulerAngles;
    lineCollider.transform.rotation =
        Quaternion.Euler(rotationEulerAngles.x + 90f, 
        rotationEulerAngles.y, rotationEulerAngles.z);

    lineCollider.height = Vector3.Distance(startPoint, endPoint);
}

This is partially inspired by this post in the Unity forums, and partially by this one. Although I think they are both not entirely correct, it certainly put me on the right track.

Basically it creates an empty game object, and add a capsule collider to that. The collider is set to the end with of the line, which is assumed to be of constant width. It's midpoint is set exactly halfway the line (segment) and then rotated to look at the end point. Oddly enough, it's then at 90 degrees with the actual line segment, so the collider is rotated 90 degrees over it's X axis. Finally, it is stretched to cover the whole line segment.

The rest of the class is basically a support act:

public class LineColliderDrawer : MonoBehaviour
{
    private const string LineColliderName = "LineCollider";

    public void AddColliderToLine(LineRenderer lineRenderer)
    {
        RemoveExistingColliders(lineRenderer);

        for (var p = 0; p < lineRenderer.positionCount; p++)
        {
            if (p < lineRenderer.positionCount - 1)
            {
                AddColliderToLine(lineRenderer, 
                    lineRenderer.GetPosition(p), 
                    lineRenderer.GetPosition(p + 1));
            }
        }
    }

    private void RemoveExistingColliders(LineRenderer lineRenderer)
    {
        for (var i = lineRenderer.gameObject.transform.childCount - 1; i >= 0; i--)
        {
            var child = lineRenderer.gameObject.transform.GetChild(i);
            if (child.name == LineColliderName)
            {
                Destroy(child.gameObject);
            }
        }
    }
  }

This basically first removes any existing colliders, then adds colliders to the line for every segment - basically a line of n points gets n-1 colliders.

Concluding words

And that's basically it. Now lines can be selected as well. Thanks to both Unity forum posters who gave me two half-way parts that allowed me to combine this into one working solution.