


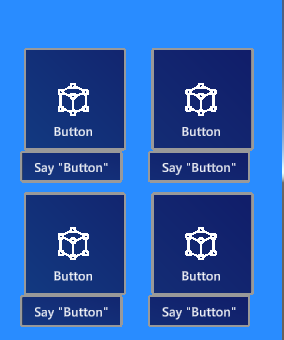
Intro
The MRTK2 allows for development for both HoloLens 1, HoloLens 2 and Windows Mixed Reality immersive headsets with nearly identical code. And a growing number of other platforms, but the focus is now understandably on HoloLens 2. Yet, if you want to make apps with a broad range, you might as well use the capabilities the toolkit offers to run one app on all platforms.
Rule-of-thumb device observations
- On HoloLens 2, you typically want interactive stuff to be close by and relatively small, so you can leverage the touch functionality
- On HoloLens 1 interactive stuff needs to be further away since the only control option you basically have is the air tap. But because it's further away, it needs to be bigger
- On Windows Mixed Reality immersive headsets you want it also further away but even bigger still, as I have observed things seems to appear smaller on an immersive headset compared to HoloLens, and lower resolution headsets makes things harder to see things like small print compared to HoloLenses.
Basically this boils down to scaling and distance. Scaling usually is pretty simple to fix, but distance behavior is a bit more difficult, especially since the MRTK2 contains so much awesome behaviours for keeping for instance a menu in view, but it does not support different behavior for different devices.
I have come up with a rather unusual solution for this, and it works pretty well.
Meet the twins
I made two behaviours that work in tandem. The first one is pretty simple enough and is called EnvironmentScaler.
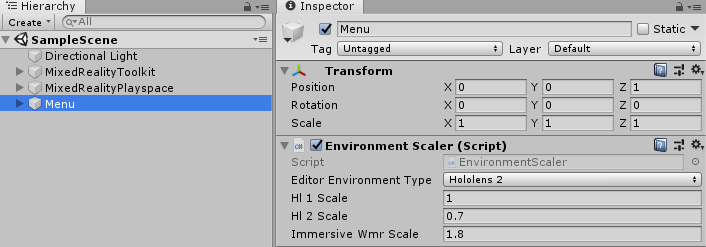
This simply scales the current game object to the value entered for the specific device type. Notice also there is a drop down that will enable you to select view how platform specific sizes will appear inside the Unity Editor.
The second one is a bit more odd. You see, for determining the right distance, I would like to use the standard Solver and RadialView combo. Of course I could have written a behaviour that changes the RadialView values based upon the detected platform. But then it would only have worked for RadialView. So I took a more radical and generic approach
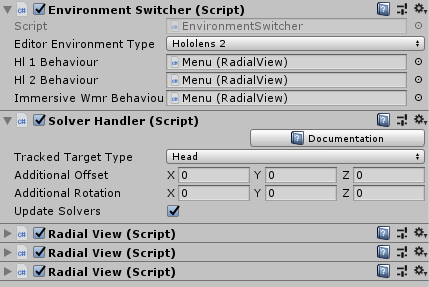
As you can see, there is one Solver but no less that three RadialViews on the menu. They all have slightly different values for things like distance and Max view degrees. An if you start Play mode:
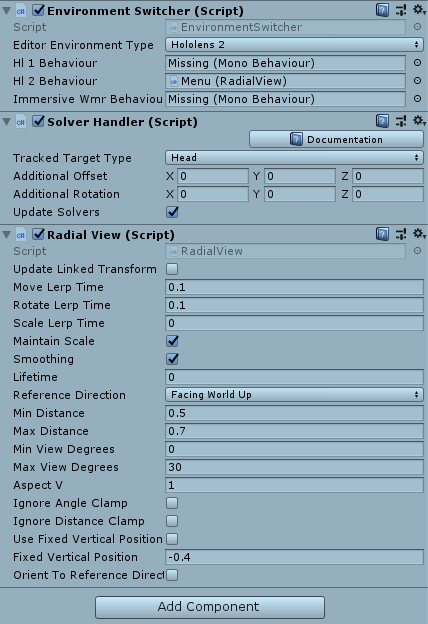
It simply destroys and removes the behaviors for the other platforms. Crude, but very effective. And no coding required. The only thing is - there is no way to distinguish those three RadialViews, so it's best to add them to your game object in the same order as they are listed in the EnvironmentSwitcher: for HoloLens 1, HoloLens 2 and WMR headsets.
The nuts and bolts
Both the switcher and the scaler have the same generic base class:
public abstract class EnvironmentHelperBase<T> : MonoBehaviour
{
    [SerializeField]
    private EditorEnvironmentType _editorEnvironmentType = EditorEnvironmentType.Hololens2;

    protected T GetPlatformValue(T hl1Value, T hl2Value, T wmrHeadsetValue)
    {
#if !UNITY_EDITOR
        if (CoreServices.CameraSystem.IsOpaque)
        {
            return wmrHeadsetValue;
        }

        var capabilityChecker = CoreServices.InputSystem as IMixedRealityCapabilityCheck;

        return capabilityChecker.CheckCapability(MixedRealityCapability.ArticulatedHand) ?
                hl2Value : hl1Value;
#else
        return GetTestPlatformValue(hl1Value, hl2Value, wmrHeadsetValue);
#endif
    }

    private T GetTestPlatformValue(T hl1Value, T hl2Value, T wmrHeadsetValue)
    {
        switch (_editorEnvironmentType)
        {
            case EditorEnvironmentType.Hololens2: return hl2Value;
            case EditorEnvironmentType.Hololens1: return hl1Value;
            default: return wmrHeadsetValue;
        }
    }
}
The GetPlatformValue method accepts three values - one for every platform supported - and returns the right one for the current platform based upon this simple rules:
- If the headset is opaque, it's a WMR headset
- If it's not opaque and it supports articulated hands, it's a HoloLens 2
- Otherwise it's a HoloLens 1
And there's also the GetTestPlatformValue that returns a platform based upon what's selected in the _editorEnvironmentType field, that can be used for testing in the editor. I have noticed that the editor returns false for opaque and true for the articulated hand support, so by default the code acts like it's in running in a HoloLens 2. Hence my 'manual switch' in editorEnvironmentType so you can see what happens for the various devices inside your editor. For runtime code, whatever you selected in editorEnvironmentType in either behaviour is of no consequence.
EnvironmentScaler implementation
This is the very simple, as all the heavy lifting has already been done in the base class:
public class EnvironmentScaler : EnvironmentHelperBase<float>
{
    [SerializeField]
    private float _hl1Scale = 1.0f;

    [SerializeField]
    private float _hl2Scale = 0.7f;

    [SerializeField]
    private float _immersiveWmrScale = 1.8f;

    void Start()
    {
        gameObject.transform.localScale *= GetPlatformValue(_hl1Scale, _hl2Scale,
                                                            _immersiveWmrScale);
    }
}
Simply scale the object to the value selected by GetPlatformValue. Easy as cake.
EnvironmentSwitcher implementation
public class EnvironmentSwitcher : EnvironmentHelperBase{ [SerializeField] private MonoBehaviour _hl1Behaviour; [SerializeField] private MonoBehaviour _hl2Behaviour; [SerializeField] private MonoBehaviour _immersiveWmrBehaviour; void Start() { var selectedBehaviour = GetPlatformValue(_hl1Behaviour, _hl2Behaviour, _immersiveWmrBehaviour); foreach (var behaviour in new[] {_hl1Behaviour, _hl2Behaviour,
_immersiveWmrBehaviour}) { if (behaviour != selectedBehaviour) { Destroy(behaviour); } } } }
Very much like the previous one, but now the values are not floats (for scale) but actual behaviors. It find the behaviour for the current device, the destroy all others.
The fun thing is - in this I used this specifically for three identical behaviours (that is, they are all RadialView behaviours) - one for every device. But it's just as easily possible to use three completely different behaviours, one for each device, and have the 'wrong' ones be rendered inoperative by this behaviour as well. This makes this approach very generically applicable.
Conclusion
Multi device strategy does not have to be complex. With these two behaviours you can make your app appear more or less the same on different devices, and still adhere to the device's unique capabilities.
Complete project, as always, here. Enjoy
No comments:
Post a Comment